


CDN之多边缘节点负载均衡--学习笔记
一.剧情
剧情是这样的,本次的多边缘节点负载均衡实验,1个LVS四层负载均衡集群和1个Nginx为反向代理的七层负载均衡集群,由Bind dns解析作为 主负载均衡服务器,调度两个集群,中间层有一台Web服务器。前端是一台客户端。如下图所示:

二.基础环境
1.硬件信息
4G内存、50G硬盘、2核
8台虚拟机系统为Centos 6.5,1台client系统为 windows server 2008。
2.网络信息:
IP地址按上图的标明。(其中每台机器的dns设置,可以在所有软件联网安装完成后,修改成环境中的192.168.40.105)
3.系统内环境配置,所有linux系统内都安装了开发工具,并关闭每台机器的防火墙。主机名已更改为图上所示:
1 1 wget -O /etc/yum.repos.d/CentOS-Base.repo http://mirrors.aliyun.com/repo/Centos-6.repo    (替换yum源为 阿里源)
2 (备用源,如果阿里源不能使用,请更换为网易源:http://mirrors.163.com/.help/CentOS6-Base-163.repo)
3 2 yum -y groupinstall "development tools"
4 3 service iptables stop
三.软件部署
此次实验,我们可以分为两部分,先做通LVS+squid+web四层负载架构。再做Nginx+Bind+Squid+web七层负载。最后将两个集群结合在一起。
LVS四层负载均衡:
1.安装LVS服务器
1 yum install ipvsadm
2.由于我们采用DR的工作方式,DR工作方式要求真实服务器的IP地址和虚拟IP地址(VIP)必须属于同一网段。具体工作原理可参考LVS三种实现技术。这一步我们修改内核参数 /etc/sysctl.conf,在文件最后追加以下三句内容,
1 vim /etc/sysctl.conf
2 net.ipv4.ip_forwarf = 0          (此句,默认是为0)
3 net.ipv4.conf.all.send_redirects = 1
4 net.ipv4.conf.default.send_redirects = 1
5 net.ipv4.conf.eth0.send_redirects = 1
修改完成后,立即生效:
1 sysctl -p
3.配置LVS服务器的VIP即虚拟IP,后续的的两台squid也要配置这个虚拟IP。并增加路由记录
1 ifconfig eth0:0 192.168.40.128 netmask 255.25.255.255 broadcast 192.168.40.128 up
2 route add -host 192.168.40.128 dev eth0:0
创建负载均衡服务器的虚拟服务及相应端口,指令rr 参数表示应用的调度算法为轮询算法(Round Robin)
1 ipvsadm -A -t 192.168.40.128:80 -s rr
建立虚拟服务与后台真实服务器squid1和squid2提供的http服务的链接,并使用DR的工作方式
1 ipvsadm -a -t 192.168.40.128:80 -r 192.168.40.122 -g
2 ipvsadm -a -t 192.168.40.128:80 -r 192.168.40.110 -g
LVS服务器的配置就到这,下一步去配置squid1和squid2缓存代理。
4.在squid1安装squid软件(squid2做同样的设置,除了visible_hostname例外。)
1 yum install squid
安装后,我们先去编辑一下squid的配置文件 /etc/squid/squid.conf
1 vim /etc/squid/squid.conf
2
3 cache_dir ufs /var/spool/squid 100 16 256
4 visible_hostname        squid
5 http_port 80 accel vhost vport
6 cache_peer 192.168.40.115 parent 80 0
7 http_access allow all
8 cache_mem 32 MB
简单的讲下各参数的意思,cache_dir 是缓存的目录,后面 100 代表的是这个目录最多能存放100MB数据,visible_hostname 必须得设置一个主机名,http_port 80 本机开放的80端口,cache_peer 是表示当我本机没有客户端请求的资源时,将去这个上一级去取,在这里即是40.115的80端口去获取。最后一个是cache_mem 表示在内存的缓存为32MB.
改完上述文件后,我们用命令检查一下squid
1 squid -z         初始化后启动
2 squid -k parse
3 squid -k reconfigure       修改配置后,重新加载
接着,我们去配置squid的内核参数,使其不再转发IP数据包和处理ARP协议包
1 vim /etc/sysctl.conf
2 net.ipv4.conf.lo.arp_ignore = 1
3 net.ipv4.conf.lo.arp_announce = 2
4 net.ipv4.conf.all.arp_ignore = 1
5 net.ipv4.conf.all.arp_announce = 2
更行内核参数,执行以下命令:
1 sysctl -p
配置虚拟IP(VIP),和LVS服务器配置同一个IP
1 ifconfig lo:0 192.168.40.128 netmask 255.255.255.255 broadcast 192.168.40.128 up
2 route add -host 192.168.40.128 dev lo:0
OK,四层负载均衡服务器将VIP(192.168.40.128)提供给用户访问,并将用户的访问请求以轮询的方式分发给后台的真实服务器,而由真实的服务器去响应客户端,此时的返回给客户这一步,将不再经过lvs。
5.web服务器的安装,使用apache来提供web服务,按照架构图所示,我们登陆40.115这台机器,安装LAMP环境,并创建两个虚拟主机。
1 yum -y install httpd mysql mysql-server mysql-devel
2 yum -y install php php-mysql
3 cd /var/www/html/
4 mkdir -pv {baidu.test.com,sougo.test.com}
5 cd baidu.test.com
6 wget www.baidu.com
7 cd ../sougo.test.com
8 wget sogou.com
软件安装完成后,我们去配置apache,编辑/etc/httpd/conf/httpd.conf 文件,修改或者追加以下内容。
1 vim /etc/httpd/conf/httpd.conf
2
3 Listen 80
4 ServerName 192.168.40.115
5 NameVirtualHost 192.168.40.115:80
6 <VirtualHost 192.168.40.115:80>
7     ServerName baidu.test.com
8     DocumentRoot /var/www/html/baidu.test.com
9 </VirtualHost>                              (其实单做这个实验时,无须使用虚拟主机,因为整体环境需要,所以这里提前修改好了。)
修改完成,检查配置有无错误后,重新启动httpd
1 apachectl -t
2 service httpd restart
验证,客户端40.114去访问192.168.40.128(四层负载的VIP地址。)打开浏览器,输入http://192.168.40.128
1 [root@squid2 ~]# tail -f /var/log/squid/access.log
2 1443079520.674     94 192.168.40.141 TCP_MISS/404 579 GET http://192.168.40.128/content-search.xml - FIRST_UP_PARENT/192.168.40.115 text/html
3 1443079520.776     99 192.168.40.141 TCP_MISS/404 572 GET http://192.168.40.128/favicon.ico - FIRST_UP_PARENT/192.168.40.115 text/html
通过squid1的日志,我们可以看到,客户端的请求,被分配到squid2这台代理服务器上。说明我们的四层负载均衡已经配置成功。如果实验中出现打不开网址现象,或者其它异常的问题,首先去检查一下各个防火墙有无关闭。(对防火墙熟悉的人可以单独打开各服务端口)
Nginx七层负载均衡:
1.七层负载均衡中的环境搭建,利用之前已经安装好的apache的网站服务器,再有两台Squid代理缓存服务器(主机名为squid3和squid4),一台windows 2008 的主机,一台Nginx服务器(猪脚),还有一台Bind域名服务器用于网站的解析指向nginx(sougo.test.com,对应为nginx的ip:192.168.40.107)。
2.安装Bind dns 软件
1 yum -y install bind*
关于bind软件安装完成后的配置,这里说一下,默认安装后,各配置文件都存放在 /var/named/chroot/目录下的子目录中。该目录下的etc/named.conf 是主配置文件,etc/named.rfc1912.zones 文件是添加域的。var/named/目录下 存放的是域名正向解析文件和反向解析文件存放的位置。
先cp一些文件到/var/named/chroot/var/named/目录下,(后续会用的到,不然启动会报错。)
1 cp /var/named/named.*
编辑named.rfc1912.zones文件,添加test.com.域(只添加标红的)
 1 [root@bind ~]# vim /var/named/chroot/etc/named.rfc1912.zones
 2 // named.rfc1912.zones:
 3 //
 4 // Provided by Red Hat caching-nameserver package
 5 //
 6 // ISC BIND named zone configuration for zones recommended by
 7 // RFC 1912 section 4.1 : localhost TLDs and address zones
 8 // and http://www.ietf.org/internet-drafts/draft-ietf-dnsop-default-local-zones-02.txt
 9 // (c)2007 R W Franks
10 //
11 // See /usr/share/doc/bind*/sample/ for example named configuration files.
12 //
13
14 zone "localhost.localdomain" IN {
15         type master;
16         file "named.localhost";
17         allow-update { none; };
18 };
19
20 zone "localhost" IN {
21         type master;
22         file "named.localhost";
23         allow-update { none; };
24 };
25
26 zone "1.0.0.0.0.0.0.0.0.0.0.0.0.0.0.0.0.0.0.0.0.0.0.0.0.0.0.0.0.0.0.0.ip6.arpa" IN {
27         type master;
28         file "named.loopback";
29         allow-update { none; };
30 };
31
32 zone "1.0.0.127.in-addr.arpa" IN {
33         type master;
34         file "named.loopback";
35         allow-update { none; };
36 };
37
38 zone "0.in-addr.arpa" IN {
39         type master;
40         file "named.empty";
41         allow-update { none; };
42 };
43
44 zone "test.com" IN {                //正向解析
45         type master;
46         file "named.test.com";
47 };
48
49
50 zone "40.168.192.in-addr.arpa" IN {        //反向解析
51         type master;
52         file "named.192.168.40";
53 };
添加域后,我们去编辑正向解析文件 named.test.com,内容为下:
 1 [root@bind ~]# vim /var/named/chroot/var/named/named.test.com
 2 $TTL 1D
 3 @       IN SOA  @ root.test.com. (
 4                                         0       ; serial
 5                                         1D      ; refresh
 6                                         1H      ; retry
 7                                         1W      ; expire
 8                                         3H )    ; minimum
 9                 NS      @
10                 A       127.0.0.1
11                 AAAA    ::1
12 bind    IN      A       192.168.40.105
13 www     IN      A       192.168.40.115
14 sougo   IN      A       192.168.40.107
编辑反向解析文件named.192.168.40(反向解析在整个实验中,不是必须的需要。只是为了更完整一些)
 1 [root@bind ~]# vim /var/named/chroot/var/named/named.192.168.40
 2 $TTL 1D
 3 @       IN SOA  40.168.192.in-addr.arpa. root.test.com. (
 4                                         0       ; serial
 5                                         1D      ; refresh
 6                                         1H      ; retry
 7                                         1W      ; expire
 8                                         3H )    ; minimum
 9 @       IN      NS      bind.test.com.
10 107     IN      PTR     sougo.test.com.
11 115     IN      PTR     www.test.com.
编辑完成后,我们检查一下配置文件
1 [root@bind ~]# named-checkconf
2 [root@bind ~]# named-checkzone
检查无误后,重启named守护进程。
1 [root@bind ~]# service named restart
可以在客户端40.114上,修改网络配置,将dns修改成40.115

测试一下。cmd内执行nslookup 解析一下,如下图所示,BINd服务器已经提供了域名解析服务,如果无法解析,请检查bind 主机的iptables是否关闭。

3.Nginx服务器的搭建,在40.107上安装nginx软件。
1 yum install nginx
修改nginx配置文件,有的需要追加进去,有的内容可能已经存在,这点需要自己判断一下,进行修改。
 1 [root@nginx ~]# vim /etc/nginx/conf.d/default.conf
 2
 3 upstream webservers {          #此处是后台squid代理服务器集群的地址,端口是80,后面我们将对squid3 和squid4 服务器进行修改内核参数及squid服务配置
 4         server 192.168.40.112:80;   # upstream将按照默认的轮询方式
 5         server 192.168.40.113:80;
 6 }
 7
 8 server {
 9     listen       80;
10     server_name  sougo.test.com;
11
12     #charset koi8-r;
13     #access_log  /var/log/nginx/log/host.access.log  main;
14
15     location ~/ {
16         proxy_pass      http://webservers;
17         proxy_redirect  off;
18         proxy_set_header Host   $host;
19         proxy_set_header X-Real-IP      $remote_addr;
20         proxy_set_header X-Forwarded-For $proxy_add_x_forwarded_for;
21     }
22
23     #error_page  404              /404.html;
24
25     # redirect server error pages to the static page /50x.html
26     #
27     error_page   500 502 503 504  /50x.html;
28     location = /50x.html {
29         root   /usr/share/nginx/html;
30     }
31
32     # proxy the PHP scripts to Apache listening on 127.0.0.1:80
33     #
34     #location ~ \.php$ {
35     #    proxy_pass   http://127.0.0.1;
36     #}
37
38     # pass the PHP scripts to FastCGI server listening on 127.0.0.1:9000
39     #
40     #location ~ \.php$ {
41     #    root           html;
42     #    fastcgi_pass   127.0.0.1:9000;
43     #    fastcgi_index  index.php;
44     #    fastcgi_param  SCRIPT_FILENAME  /scripts$fastcgi_script_name;
45     #    include        fastcgi_params;
46     #}
47
48     # deny access to .htaccess files, if Apache's document root
49     # concurs with nginx's one
50     #
51     #location ~ /\.ht {
52     #    deny  all;
53     #}
54 }
编辑主配置文件/etc/nginx,添加或者修改以下参数:
1 [root@nginx ~]# vim /etc/nginx/nginx.conf
2
3 events {
4     worker_connections  1024;
5     use epoll;
6 }
修改以上两个文件后,测试检查并重启nginx服务器
1 [root@nginx ~]# nginx -t
2 [root@nginx ~]# /etc/init.d/nginx restart
4.后台Squid两台服务器的配置(squid3 和 squid4 配置一样。)此处,以squid3为例:
1 [root@squid3 ~]# vim /etc/squid/squid.conf
2
3 cache_dir ufs /var/spool/squid 100 16 256
4 visible_hostname squid3
5 http_port 80 accel vhost vport
6 cache_peer 192.168.40.115 parent 80 0
7 http_access allow all
8 cache_mem 32 MB
上述的配置就可以将squid3 和squid4 配置为 web站点 (sougo.test.com)代理缓存服务器。配置完成后记得重启服务器
[root@squid3 ~]# /etc/init.d/squid restart
现在dns解析 sougo.test.com 为nginx服务器ip 40.107后,我们去客户端验证一下。如下图所示。
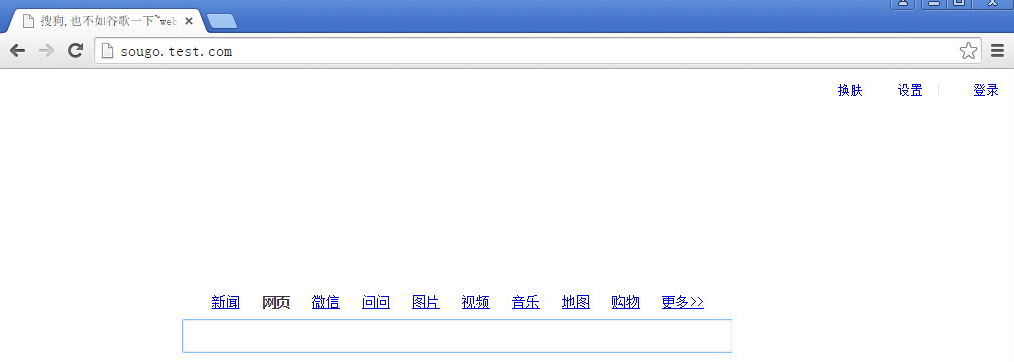
去squid3上查看一下日志,本机没有资源,去上一级即40.115上去下载资源。然后由squid响应给客户端
[root@squid3 ~]# tail -f /var/log/squid/access.log
1443020309.684      1 192.168.40.107 TCP_MISS/404 579 GET http://sougo.test.com/web/js/addbanner.min.js - FIRST_UP_PARENT/192.168.40.115 text/html
1443020309.893      1 192.168.40.107 TCP_MISS/404 578 GET http://sougo.test.com/images/index/spy_h.png - FIRST_UP_PARENT/192.168.40.115 text/html
1443020309.907      1 192.168.40.107 TCP_MISS/404 567 GET http://sougo.test.com/favicon.ico - FIRST_UP_PARENT/192.168.40.115 text/html
1443077070.478    673 192.168.40.107 TCP_MISS/404 567 GET http://sougo.test.com/favicon.ico - FIRST_UP_PARENT/192.168.40.115 text/html
1443080793.374     88 192.168.40.107 TCP_MISS/404 567 GET http://sougo.test.com/favicon.ico - FIRST_UP_PARENT/192.168.40.115 text/html
1443091064.977      6 192.168.40.107 TCP_MEM_HIT/200 12904 GET http://sougo.test.com/ - NONE/- text/html
现在,七层负载均衡的实验也得到了成功响应。那么下一步,我们就将两个负载集群融合在一块。。。
多边缘节点负载均衡:
1.这次,我们将两个集群变成多边缘。先说web,apache 有两个 虚拟主机,分别是 baidu.test.com(对应端口 192.168.40.115:80) 和 sougo.test.com(对应端口 192.168.40.115:8080),通过Bind DNS的解析,当用户访问 baidu.test.com域名时,dns解析的地址是192.168.40.128(VIP地址),跳转到四层负载集群;当用户访问sougo.test.com域名时,dns解析到192.168.40.107(nginx),跳转到七层负载集群。在此,Bind 担任的是主负载均衡服务器。下面先进行dns的配置:
2.Bind 的配置,其实只需添加一条主机记录,编辑 /var/named/chroot/var/named/named.test.com 正向解析文件
 1 [root@bind ~]# vim /var/named/chroot/var/named/named.test.com
 2
 3 $TTL 1D
 4 @       IN SOA  @ root.test.com. (
 5                                         0       ; serial
 6                                         1D      ; refresh
 7                                         1H      ; retry
 8                                         1W      ; expire
 9                                         3H )    ; minimum
10                 NS      @
11                 A       127.0.0.1
12                 AAAA    ::1
13 bind    IN      A       192.168.40.105
14 www     IN      A       192.168.40.115
15 baidu   IN      A       192.168.40.128        #(baidu.test.com 与边缘节点1的LVS服务器VIP绑定)
16 sougo   IN      A       192.168.40.107        #(sougo.test.com 与边缘节点2的nginx服务器绑定)
编辑后,重启域名named服务
1 [root@bind ~]# service named restart
3.Web服务器的配置,编辑 /etc/httpd/conf/httpd.conf,在最后添加或者修改成下面这样。
 1 [root@www ~]# vim /etc/httpd/conf/httpd.conf
 2
 3 Listen 80
 4 Listen 8080
 5 NameVirtualHost 192.168.40.115:80
 6 NameVirtualHost 192.168.40.115:8080
 7
 8 <VirtualHost 192.168.40.115:80>
 9     ServerName baidu.test.com
10     DocumentRoot /var/www/html/baidu.test.com        (虚拟主机baidu 网页存放路径)
11 </VirtualHost>
12
13 <VirtualHost 192.168.40.115:8080>
14     ServerName sougo.test.com
15     DocumentRoot /var/www/html/sougo.test.com        (虚拟主机sougo网页存放路径)
16 </VirtualHost>
开启两个端口,80提供给baidu.test.com,8080提供给sougo.test.com。 编辑完成后,测试并重启httpd服务:
1 [root@www ~]# apachectl -t
2 [root@www ~]# /etc/init.d/httpd restart
4.现在修改七层负载集群中的代理服务器,因为它们要代理访问的是sogou.test.com,所以现在修改squid3 和 squid4 服务器。(两台都要同样设置)以squid3为例:
1 [root@squid3 ~]# vim /etc/squid/squid.conf
2
3 visible_hostname squid3
4 http_port 80 accel vhost vport
5 cache_peer 192.168.40.115 parent 8080 0          (主要修改这个端口为8080即可,其它的,可按上个实验环境中的配置。)
6 http_access allow all
7 cache_mem 32 MB
修改cache_peer 字段,当squid服务器的本地缓存内容不能满足80端口上的http内容请求时,将向其的上一级节点 192.168.40.115的8080端口上去请求并接收数据。从而建立了web站点8080端口的连接,及缓存关系。
修改完成后,重新启动squid服务
[root@squid3 ~]# service squid restart
5.四层的两台squid服务器集群,由于squid.conf 文件中默认80指向的是baidu.test.com,所以我们保持默认即可。至此,8台linux服务器的配置都已ok,现在就是在客户端的测试了。下面看下访问的效果。
当访问baidu.test.com域名时:

运行ipvsadm -l 命令,可以看到,在没访问之前,运行时,连接时为0 的,但我们访问后,在运行命令,便变成了1,此时,可以多次刷新网页,查看调度情况
同样的道理,当用户访问sougo.test.com域名时,请求将被Bind全局负载解析调度到Nginx服务器上,再由七层中的集群缓存代理处理网页浏览请求。
三.总结
本次记录,主要利用了Bind作为全局负载,调度以LVS四层负载 + Nginx七层负载的集群,去访问web。在整个环节中,注意的几点:修改内核参数后,立即生效命令:sysctl -p 会打开防火墙,所以在每个环节中如果遇到问题,先排查一下iptables是否关闭。还有一点在dns配置时,也需要谨慎,因为正向或者反向,有时少一个. 可能就会造成解析失败。至于其中利用的技术原理,可以去百度补补。有的我也不是特别的完全明白。\(•ω•`)o

 浙公网安备 33010602011771号