

Nexus安装
nexus安装,可以参照:【Maven】Nexus(Maven仓库私服)下载与安装
Nexus简单说明
- 用途:指定私服的中央地址、将自己的Maven项目指定到私服地址、从私服下载中央库的项目索引、从私服仓库下载依赖组件、将第三方项目jar上传到私服供其他项目组使用
- 仓库:
hosted 类型的仓库,内部项目的发布仓库
releases 内部的模块中release模块的发布仓库
snapshots 发布内部的SNAPSHOT模块的仓库
3rd party 第三方依赖的仓库,这个数据通常是由内部人员自行下载之后发布上去
proxy 类型的仓库,从远程中央仓库中寻找数据的仓库
group 类型的仓库,组仓库用来方便我们开发人员进行设置的仓库

Nexus配置
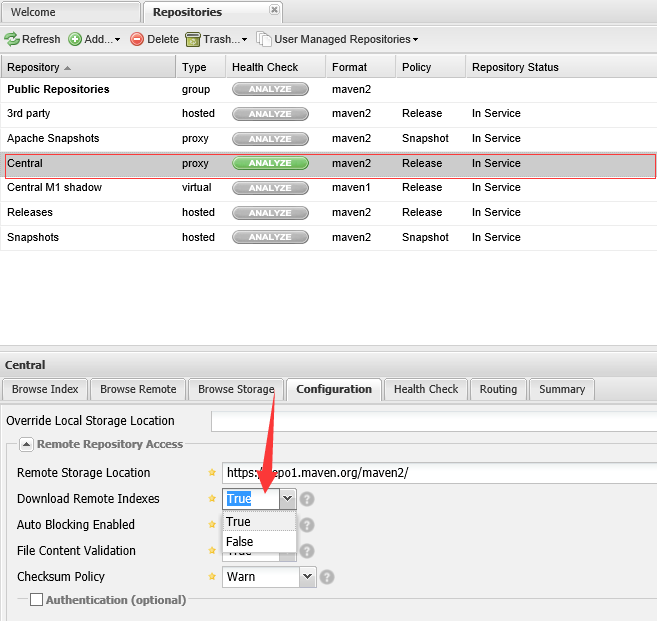
nexus配置大部分使用默认配置即可,主要是配置一个项目索引
选择Central仓库,设置Download Remote Indexes:True
Nexus使用
- 项目使用nexus私服的jar包,在项目的pom.xml文件中指定私服仓库
 1 <repositories>
 2     <repository>
 3         <id>nexus</id>
 4         <name>nexus</name>
 5         <url>http://192.168.1.103:8081/nexus/content/groups/public/</url>
 6         <releases>
 7             <enabled>true</enabled>
 8         </releases>
 9         <snapshots>
10             <enabled>true</enabled>
11         </snapshots>
12     </repository>
13 </repositories>
- 项目使用nexus私服的插件,在项目的pom.xml文件中指定插件仓库
 1 <pluginRepositories>
 2     <pluginRepository>
 3         <id>nexus</id>
 4         <name>nexus</name>
 5         <url>http://192.168.1.103:8081/nexus/content/groups/public/</url>
 6         <releases>
 7             <enabled>true</enabled>
 8         </releases>
 9         <snapshots>
10             <enabled>true</enabled>
11         </snapshots>
12     </pluginRepository>
13 </pluginRepositories>
- 如果想本机所有的maven项目都使用私服的组件,可以在maven的设置文件settings.xml中添加属性,并激活
 1 <profiles>
 2     <profile>
 3         <id>nexusProfile</id>
 4         <repositories>
 5             <repository>
 6                 <id>nexus</id>
 7                 <name>nexus</name>
 8                 <url>http://192.168.1.103:8081/nexus/content/groups/public/</url>
 9                 <releases>
10                     <enabled>true</enabled>
11                 </releases>
12                 <snapshots>
13                     <enabled>true</enabled>
14                 </snapshots>
15             </repository>
16         </repositories>
17     </profile>
18 </profiles>
19 <!-- 激活 -->
20 <activeProfiles>
21     <activeProfile>nexusProfile</activeProfile>
22 </activeProfiles>
- 项目发布到私服,maven项目使用命令:mvn clean deploy;需要在pom文件中配置一下代码;
 1 <distributionManagement>
 2         <repository>
 3             <id>user-release</id>
 4             <name>User Project Release</name>
 5             <url>http://192.168.1.103:8081/nexus/content/repositories/releases/</url>
 6         </repository>
 7
 8         <snapshotRepository>
 9             <id>user-snapshots</id>
10             <name>User Project SNAPSHOTS</name>
11             <url>http://192.168.1.103:8081/nexus/content/repositories/snapshots/</url>
12         </snapshotRepository>
13     </distributionManagement>
注意还需要配置mvn发布的权限,否则会报401错误,在settings.xml中配置权限,其中id要与pom文件中的id一致
 1 <server>
 2     <id>user-release</id>
 3     <username>admin</username>
 4     <password>admin123</password>
 5 </server>
 6 <server>
 7     <id>user-snapshots</id>
 8     <username>admin</username>
 9     <password>admin123</password>
10 </server>
发布成功后,可以在nexus中看到

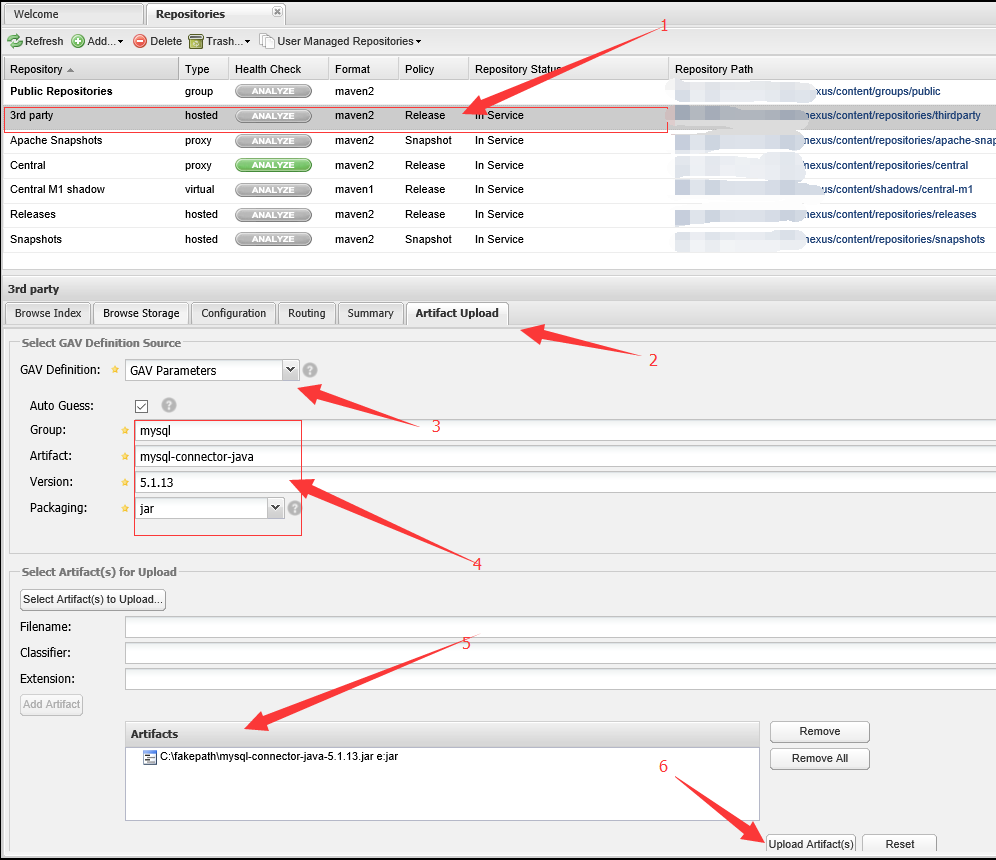
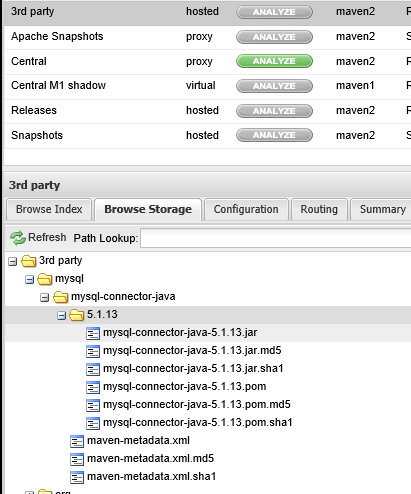
- 上传第三方的jar包,选择3rd party-->Artifact Upload--> 选择GAV方式-->填好构建参数-->增加jar包-->上传,在Browse Storeage查看


 浙公网安备 33010602011771号