交换机配置——单交换机划分VLAN配置
一、实验目的:实现单交换机划分VLAN,使PC1主机和PC2主机不能通讯
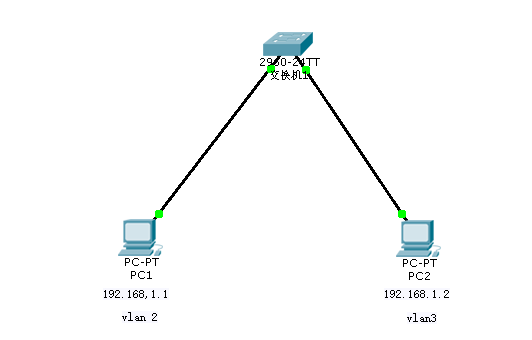
二、拓扑图
三、实验步骤
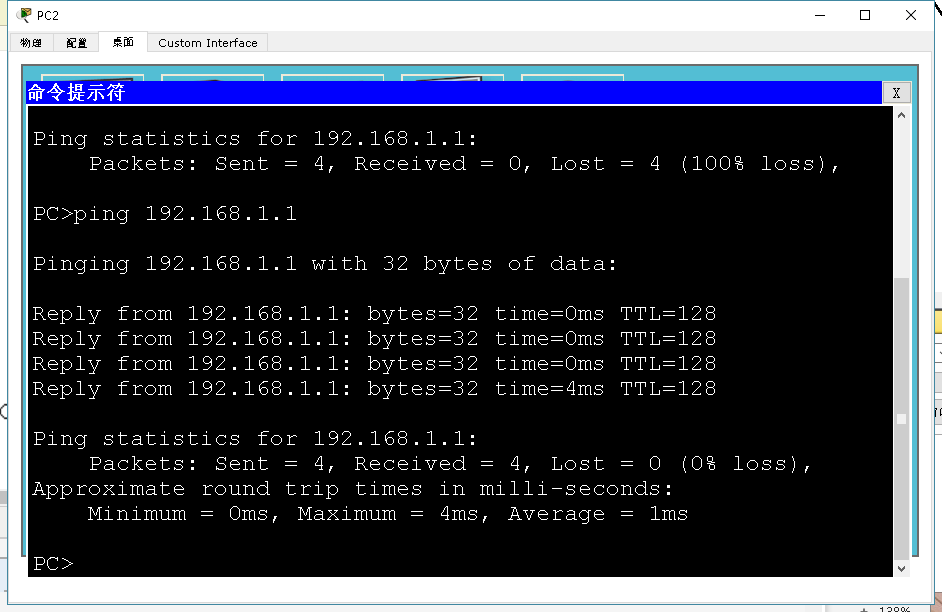
最开始两台主机都输入的端口f0/1和f0/2都属于vlan 1 可以相互通讯(如下图)
现在需要让PC1和PC2分别属于2个不同的vlan,并且不互通,具体步骤如下
Switch>enable --进入特权模式
Switch#config terminal --进入全局配置模式
Enter configuration commands, one per line. End with CNTL/Z.
Switch(config)#hostname S1 --修改交换机主机名为S1
S1(config)#vtp domain test --创建一个vtp域
Changing VTP domain name from NULL to test
S1(config)#vtp mode server --设置当前vtp身份为server
Device mode already VTP SERVER.
S1(config)#vlan 2 --创建并进入vlan 2端口
S1(config-vlan)#name V2 --命名vlan 2名字为V2
S1(config-vlan)#vlan 3 --创建并进入vlan3端口
S1(config-vlan)#name V3 --命名为V3
S1(config-vlan)#interface f0/1 --进入f0/1端口
S1(config-if)#switchport mode access --将端口模式改为access模式
S1(config-if)#switchport access vlan 2 --将端口划分到vlan 2
S1(config-if)#interface f0/2 --进入到f0/2端口
S1(config-if)#switchport mode access --将端口模式改为access模式
S1(config-if)#switchport access vlan 3 --将端口划分到 vlan 3
S1(config-if)#end --发回特权模式
S1#copy running-config startup-config --保存配置
Destination filename [startup-config]?
%SYS-5-CONFIG_I: Configured from console by console
Building configuration...
[OK] --成功保存
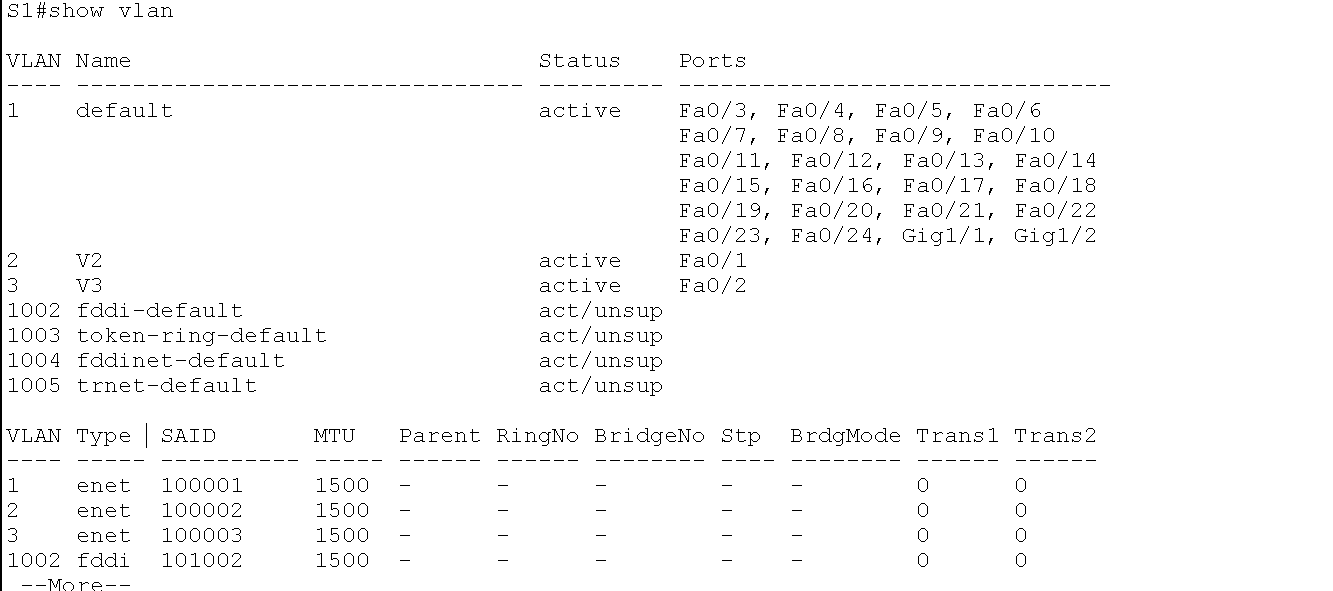
四、验证PC1和PC2是否不互通,f0/1和f0/2是否分别划分到vlan 2和vlan 3里
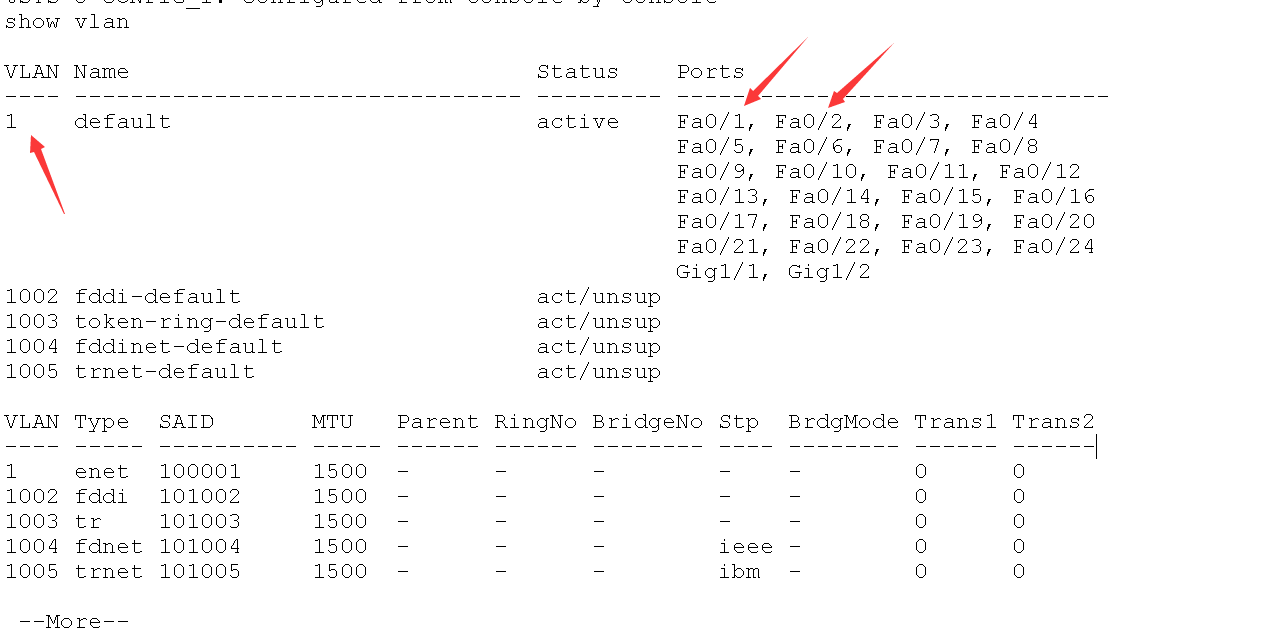
(1)验证vlan
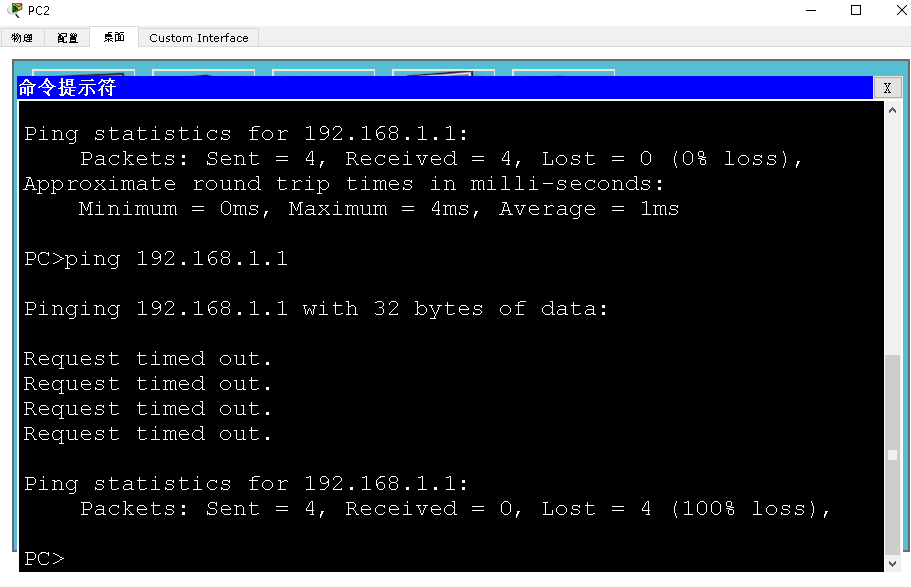
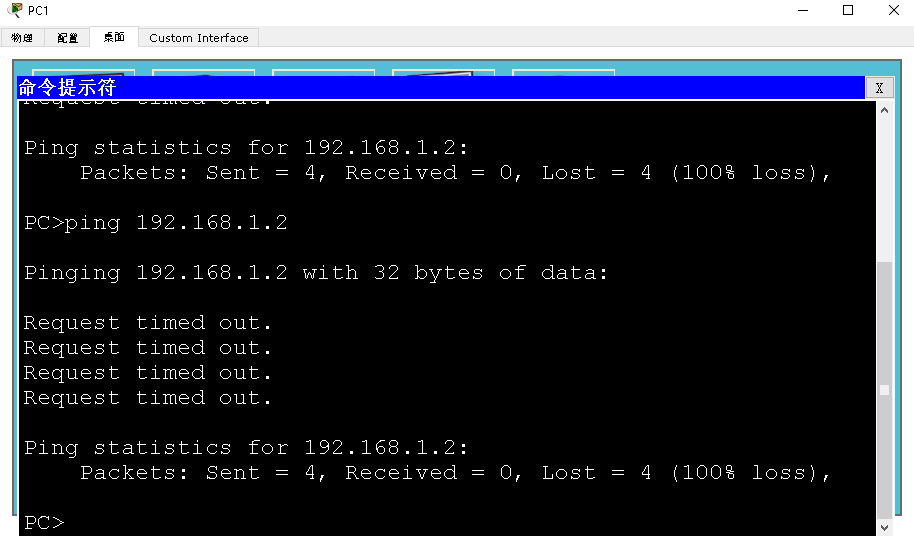
(2)验证是否相互不能ping通
PC1:
PC2