
[译] 第十六天: Goose Extractor - 有效提取文章
前言
今天的30天挑战,我决定学习怎样用Python实现文章提取,几个月前当我想写Prismatic克隆的时候就对文章提取有兴趣了。Prismatic会根据用户的兴趣创建新闻feed. 提取出文章的主要内容,图片和其他元信息在大部分像Prismatic这样的内容挖掘网站是一个很基本的需求。这篇博客里,我们来学习用goose-extractor 的Python包来完成这个任务,先学习些基础知识,再用Goose Extractor API开发个简单的Flask程序.
Goose Extractor是什么?
Goose Extractor是一个开源的文章提取库,用Python编写,可以用来提取文章的主要文字,图片,视频,数据描述和数据标签。Goose最开始由Gravity.com用Java编写,最近转换成了scala项目。
摘自Goose Extractor网站
Goose Extractor完全由python重写,软件旨在给出文章或者文章类型的网页的任何新闻,不仅仅是文章的主要内容,还包括所有的元数据和最可能的重要图片。
我为什么关注Goose Extractor?
我决定学习Goose Extractor的几点原因:
- 我想开发的程序需要用到文章提取。Goose Extractor基于强悍的NTLK和Beautiful Soup, 他们是文字处理和HTML分析中成熟前沿的库。
- 我想学习怎样用Python完成文章提取。
安装Goose Extractor
在开始用Goose Extractor前,我们需要先装Python和virtualenv, 我这里用的Python版本是2.7.
我们用pip install来开始Goose Extractor。给不熟悉pip的开发者提一下,它是Python包管理器,我们可以从官网下载pip, 在你机器上选个目录,运行一下命令。


$ mkdir myapp
$ cd myapp
$ virtualenv venv --python=python2.7
$ . venv/bin/activate

$ pip install goose-extractor
以上命令会在本地上创建myapp目录,然后用Python激活irtualenv, 再安装goose-extractor包。
Github仓库
今天的demo在github: day16-goose-extractor-demo.
程序
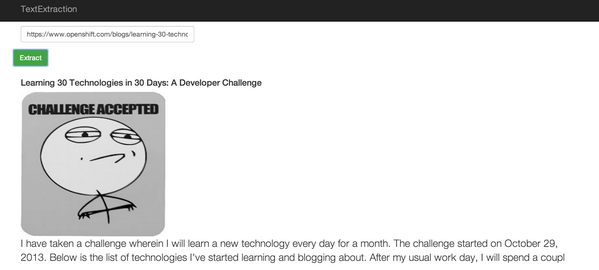
demo在OpenShift上的地址http://gooseextractor-t20.rhcloud.com/. 是用Goose Extractor API写的很简单的示例,用户可以提交链接,然后程序会现在标题,主要图像和文章主题的前200字。
我们开发个简单的Flask程序用于解析REST API, 如果你对Flask不熟悉,参考我之前的博客。
接下来要安装Flask框架,要安装Flask, 先激活virtualenv然后用pip安装Flask.
$ . venv/bin/activate
$ pip install flask
如我之前博客Flask里提到的,它对于写基于web服务的REST非常棒,在myapp文件夹下新建文件app.py.
$ touch app.py
复制以下代码粘贴到app.py文件。
from flask import Flask, request, render_template,jsonify
from goose import Goose

app = Flask(__name__)

@app.route('/')
@app.route('/index')
def index():
    return render_template('index.html')

@app.route('/api/v1/extract')
def extract():
    url = request.args.get('url')
    g = Goose()
    article = g.extract(url=url)
    response = {'title' : article.title , 'text' : article.cleaned_text[:250],'image': article.top_image.src}
    return jsonify(response)

if __name__ == "__main__":
    app.run(debug=True)
以上代码:
- 从flask包导入Flask 类,request对象,jsonify方法和render_template方法
- 从goose包导入Goose类
- 定义路径'/' 和'index' url, 所以,当用户发送GET请求到'/'或者'/index', index.html就会被加载
- 定义路径'api/v1/extract' url, 我们先从request对象获得'url'查询参数,然后创建Goose类的实例,接着,提取文章,最后,创建json对象并返回。这个json对象包含了标题,纯文本和文章的主要图片。
- 最后,我们用python app.py命令来启动服务,运行程序。通过设置Debug=True启动调试。调试模式下,如果出现未知错误,可以在浏览器里交互调试。调试模式的另外一个好处是它可以自动加载更新。我们可以在后台环境开启调试,并保持应用继续工作。这就提供了一个很好的生产环境。
Index()方法加载html文件,在myapp目录下新建templates文件夹,然后新建文件index.html.
$ mkdir templates
$ touch templates/index.html
复制内容到index.html,用Twitter Boostrap添加格式,用jQuery使REST调用keyup事件。当键是backspace, tab, enter, left, right, up, down时不使用REST.
<!DOCTYPE html>
<html>
<head>
    <title>Extract Title, Text, and Image from URL</title>
    <meta name="viewport" content="width=device-width, initial-scale=1.0">
    <link rel="stylesheet" type="text/css" href="static/css/bootstrap.css">
    <style type="text/css">
    body {
      padding-top:60px;
      padding-bottom: 60px;
    }
  </style>
</head>
<body>

<div class="navbar navbar-inverse navbar-fixed-top">
      <div class="container">
        <div class="navbar-header">
          <button type="button" class="navbar-toggle" data-toggle="collapse" data-target=".navbar-collapse">
            <span class="icon-bar"></span>
            <span class="icon-bar"></span>
            <span class="icon-bar"></span>
          </button>
          <a class="navbar-brand" href="#">TextExtraction</a>
        </div>

    </div>
  </div>

<div id="main" class="container">
    <form class="form-horizontal" role="form" id="myform">
        <div class="form-group">
            <div class="col-lg-4">
                <input type="url" id="url" name="url"  class="form-control" placeholder="Url you want to parse" required>
            </div>
        </div>
        <div class="form-group">
            <input type="submit" value="Extract" id="submitUrl" class="btn btn-success">
        </div>
    </form>
</div>

<div id="loading" style="display:none;" class="container">
    <img src="/static/images/loader.gif" alt="Please wait.." />
</div>

<div id="result" class="container">

</div>

<script type="text/javascript" src="static/js/jquery.js"></script>
<script type="text/javascript">
    $("#myform").on("submit", function(event){
        $("#result").empty();
        event.preventDefault();
        $('#loading').show();
        var url = $("#url").val()
        $.get('/api/v1/extract?url='+url,function(result){
            $('#loading').hide();
            $("#result").append("<h4>"+result.title+"</h4>");
            $("#result").append("<img src='"+result.image+"' height='300' width='300'</img>");
            $("#result").append("<p class='lead'>"+result.text+"</p>");
    })


    });

</script>
</body>
</html>
你可以从我的github仓库复制js和css文件。
以上HTML文件,我们在提交表格上使用了REST调用,接收到响应后,追加在结果div后。
发布到云
在发布之前,先准备几步。
- 在OpenShift Account上注册。 OpenShift完全免费,红帽给每个用户免费提供了3个Gears来运行程序。目前,这个资源分配合计有每人1.5GB内存,3GB磁盘空间。
- 在本机安装rhc 客户端工具,rhc是ruby gem包,所以你需要安装1.8.7或以上版本的ruby。安装rhc,输入 sudo gem install rhc. 如果已经安装了,确保是最新的,要更新rhc,输入sudo gem update rhc. 想了解rhc command-line 工具,更多帮助参考https://www.openshift.com/developers/rhc-client-tools-install.
- 用rhc 安装命令安装OpenShift. 执行命令可以帮你创建空间,上传ssh 密钥到OpenShift服务器。
安装之后,我们可以运行以下命令来创建程序。
$ rhc create-app day16demo python-2.7 --from-code https://github.com/shekhargulati/day16-goose-extractor-demo.git --timeout 180
它会执行所有从创建程序,到设置公共DNS, 到创建git私有仓库,最后用Github仓库的代码发布应用。程序运行在http://day16demo-{domain-name}.rhcloud.com. 替换你自己的域名。这个程序运行在http://gooseextractor-t20.rhcloud.com/.
这就是今天的内容,继续给反馈吧。
原文:https://www.openshift.com/blogs/day-16-goose-extractor-an-article-extractor-that-just-works

 浙公网安备 33010602011771号