
Nancy之Forms authentication的简单使用
 Nancy中Forms authentication的简单使用。这里的authentication与ASP.NET Identity有异曲同工之妙!
一、前言
想必大家或多或少都听过微软推出的ASP.NET Identity技术,可以简单的认为就是一种授权的实现
很巧的是,Nancy中也有与之相类似的技术Authentication,这两者之间都用到了一些相通的安全技术
(我没有去看ASP.NET Identity的内部实现,是从它的简单用法中判断的)
正式开始介绍之前先推荐几篇ASP.NET Identity的好文章
r01cn 的 ASP.NET Identity系列教程(目录)
腾飞(Jesse) 的 MVC5 - ASP.NET Identity登录原理 - Claims-based认证和OWIN
好了,下面还是用demo的形式来介绍怎么简单使用Forms authentication吧
二、简单使用
1)、新建一个空的asp.net项目
2)、通过NuGet安装相应的包
1       Install-Package Nancy
2      Install-Package Nancy.Hosting.Aspnet
3       Install-Package Nancy.Authentication.Forms
4       Install-Package Dapper
由于用到了数据库访问,所以还安装了Dapper
3)、建立数据表
 1 CREATE TABLE [dbo].[SystemUser](
 2     [SystemUserId] [uniqueidentifier] NOT NULL,
 3     [SystemUserName] [nvarchar](50) NOT NULL,
 4     [SystemUserPassword] [nvarchar](50) NOT NULL,
 5  CONSTRAINT [PK_SystemUser] PRIMARY KEY CLUSTERED
 6 (
 7     [SystemUserId] ASC
 8 )WITH (PAD_INDEX = OFF, STATISTICS_NORECOMPUTE = OFF, IGNORE_DUP_KEY = OFF, ALLOW_ROW_LOCKS = ON, ALLOW_PAGE_LOCKS = ON) ON [PRIMARY]
 9 ) ON [PRIMARY]
10 GO
同时像表中插入两条数据
1 INSERT INTO [dbo].[SystemUser]([SystemUserId],[SystemUserName],[SystemUserPassword])
2 VALUES(newid(),'catcher','123')
3 INSERT INTO [dbo].[SystemUser]([SystemUserId],[SystemUserName],[SystemUserPassword])
4 VALUES(newid(),'admin','123')
注:由于是演示,所以密码没有进行加密处理
4)、建立相应的文件夹
Models用于存放模型
Modules用于存放相应的操作
Views用于存放视图
5)、编写模型 SystemUser.cs
1     public class SystemUser
2     {
3         public Guid SystemUserId { get; set; }
4         public string SystemUserName { get; set; }
5         public string SystemUserPassword { get; set; }
6     }
6)、编写HomeModule.cs
 1 using Dapper;
 2 using Nancy;
 3 using Nancy.Authentication.Forms;
 4 using Nancy.ModelBinding;
 5 using NancyDemoForFormsauthentication.Models;
 6 using System.Data;
 7 using System.Data.SqlClient;
 8 using System.Linq;
 9 namespace NancyDemoForFormsauthentication.Modules
10 {
11     public class HomeModule : NancyModule
12     {
13         public HomeModule()
14         {
15             Get["/"] = _ =>
16             {
17                 return View["index"];
18             };
19             Get["/login"] = _ =>
20             {
21                 return View["login"];
22             };
23             Post["/login"] = _ =>
24             {
25                 var loginUser = this.Bind<SystemUser>();
26                 SystemUser user = GetValidUser(loginUser.SystemUserName, loginUser.SystemUserPassword);
27                 if (user == null)
28                 {
29                     return Response.AsText("出错了", "text/html;charset=UTF-8");
30                 }
31                 return this.LoginAndRedirect(user.SystemUserId, fallbackRedirectUrl: "/secure");
32             };
33         }
34         private readonly string sqlconnection =
35                "Data Source=127.0.0.1;Initial Catalog=NancyDemo;User Id=sa;Password=dream_time1314;";
36         private SqlConnection OpenConnection()
37         {
38             SqlConnection connection = new SqlConnection(sqlconnection);
39             connection.Open();
40             return connection;
41         }
42         private SystemUser GetValidUser(string name, string pwd)
43         {
44             using (IDbConnection conn = OpenConnection())
45             {
46                 const string query = "select * from SystemUser where SystemUserName=@SystemUserName and SystemUserPassword=@SystemUserPassword";
47                 return conn.Query<SystemUser>(query, new { SystemUserName = name, SystemUserPassword = pwd }).SingleOrDefault();
48             }
49         }
50     }
51 }
其中,登录的post方法中用到了 LoginAndRedirect 这个静态方法
这个方法位于ModuleExtensions.cs中,返回值是Response类型的
1         public static Response LoginAndRedirect(this INancyModule module, Guid userIdentifier, DateTime? cookieExpiry = null, string fallbackRedirectUrl = "/")
2         {
3             return FormsAuthentication.UserLoggedInRedirectResponse(module.Context, userIdentifier, cookieExpiry, fallbackRedirectUrl);
4         }
看方法名都能知道这个是用来干什么的!
还有Response.AsText后面的第二个参数可以让中文不乱码!!
7)、编写相应的视图
index.html
 1 <!DOCTYPE html>
 2 <html>
 3 <head>
 4     <title></title>
 5     <meta charset="utf-8" />
 6 </head>
 7 <body>
 8     <h2>Nancy之基于Forms authentication的简单使用</h2>
 9     <p>访问需要权限的页面</p>
10     <a href="/secure">secure</a>
11 </body>
12 </html>
login.html
 1 <!DOCTYPE html>
 2 <html>
 3 <head>
 4     <title></title>
 5     <meta charset="utf-8" />
 6 </head>
 7 <body>
 8     <form method="post" action="/login">
 9         <label>姓名:</label><input type="text" name="SystemUserName" /><br />
10         <label>密码:</label><input type="password" name="SystemUserPassword" /><br />
11         <input type="submit" />
12     </form>
13 </body>
14 </html>
8)、编写SecureModule.cs
 1 using Nancy;
 2 using Nancy.Security;
 3
 4 namespace NancyDemoForFormsauthentication.Modules
 5 {
 6     public class SecureModule : NancyModule
 7     {
 8         public SecureModule()
 9         {
10             this.RequiresAuthentication();
11             Get["/secure"] = _ =>
12             {
13                 return "Hello ," + this.Context.CurrentUser.UserName;
14             };
15         }
16     }
17 }
其中
1 this.RequiresAuthentication();
这句是关键!!表明需要验证才能通过。位于Nancy.Security这个命名空间
通过验证访问后会打印出当前的用户名称。
9)、编写Bootstraper.cs
 1 using Nancy;
 2 using Nancy.Authentication.Forms;
 3 using Nancy.TinyIoc;
 4 using Nancy.Bootstrapper;
 5 namespace NancyDemoForFormsauthentication
 6 {
 7     public class Bootstrapper : DefaultNancyBootstrapper
 8     {
 9         protected override void ConfigureRequestContainer(TinyIoCContainer container, NancyContext context)
10         {
11             base.ConfigureRequestContainer(container, context);
12             container.Register<IUserMapper, UserMapper>();
13         }
14         protected override void RequestStartup(TinyIoCContainer container, IPipelines pipelines, NancyContext context)
15         {
16             base.RequestStartup(container, pipelines, context);
17             var formsAuthConfiguration = new FormsAuthenticationConfiguration
18             {
19                 RedirectUrl = "~/login",
20                 UserMapper = container.Resolve<IUserMapper>(),
21             };
22             FormsAuthentication.Enable(pipelines, formsAuthConfiguration);
23         }
24     }
25 }
这里是至关重要的一步!!!
要在RequestStartup中启用我们的FormsAuthentication!!
同时我们还要配置FormsAuthenticationConfiguration
注册了UserMapper,所以我们接下来就是实现UserMapper
10)、编写UserMapper.cs
 1 using Dapper;
 2 using Nancy;
 3 using Nancy.Authentication.Forms;
 4 using Nancy.Security;
 5 using NancyDemoForFormsauthentication.Models;
 6 using System;
 7 using System.Data;
 8 using System.Data.SqlClient;
 9 using System.Linq;
10 namespace NancyDemoForFormsauthentication
11 {
12     public class UserMapper : IUserMapper
13     {
14         public IUserIdentity GetUserFromIdentifier(Guid identifier, NancyContext context)
15         {
16             using (IDbConnection conn = OpenConnection())
17             {
18                 const string query = "select * from SystemUser where SystemUserId=@SystemUserId";
19                 var user = conn.Query<SystemUser>(query, new { SystemUserId = identifier }).SingleOrDefault();
20                 if (user == null)
21                 {
22                     return null;
23                 }
24                 else
25                 {
26                     return new UserIdentity
27                     {
28                         UserName = user.SystemUserName,
29                         Claims = new[] { "SystemUser"}
30                     };
31                 }
32             }
33         }
34         private readonly string sqlconnection =
35                 "Data Source=127.0.0.1;Initial Catalog=NancyDemo;User Id=sa;Password=dream_time1314;";
36         private SqlConnection OpenConnection()
37         {
38             SqlConnection connection = new SqlConnection(sqlconnection);
39             connection.Open();
40             return connection;
41         }
42     }
43 }
UserMapper必须要实现IUserMapper这个接口!同时返回一个实现IUserIdentity接口的对象。
11)、编写UserIdentity.cs
 1 using Nancy.Security;
 2 using System.Collections.Generic;
 3 namespace NancyDemoForFormsauthentication
 4 {
 5     public class UserIdentity : IUserIdentity
 6     {
 7         public string UserName { get; set; }
 8         public IEnumerable<string> Claims { get; set; }
 9     }
10 }
到这里所有的工作都已经做完了,下面就是看看效果了
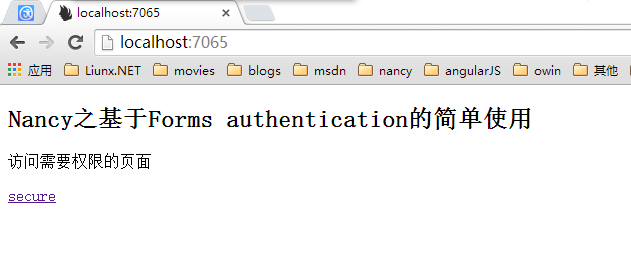
我们点击 secure链接,发现自动跳转到登录界面了!!
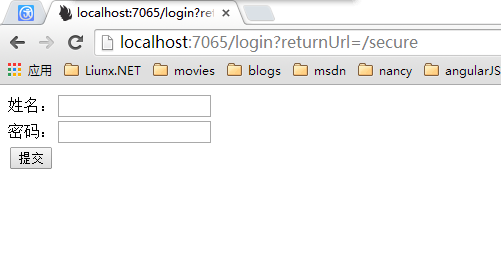
我们输入用户名和密码

登录成功,并返回到secure页面了!

当我们输入错误的用户名和密码时

最后是本次示例代码:
https://github.com/hwqdt/Demos/tree/master/src/NancyDemoForFormsauthentication


 浙公网安备 33010602011771号