


用Let's Encrypt实现Https(Windows环境+Tomcat+Java)
补充1:
已解决20的部分问题,移步这里
单域名下多子域名同时认证HTTPS
补充2:
之前忘了说了,我这个方法只对Tomcat7.0以上有用(要不然就是8.0...)
我自己用的是9.0
原因好像是因为7.0(还是8.0)才新增的对证书配置方法的支持,也就是这里:

7.0以下这一步应该是过不去的
----------------------正文----------------------------
1,下载Let's Encrypt Windows认证客户端
https://files.cnblogs.com/files/teamblog/letsencrypt-win-simple.V1.9.1.zip
2,解压缩,打开letsencrypt.exe
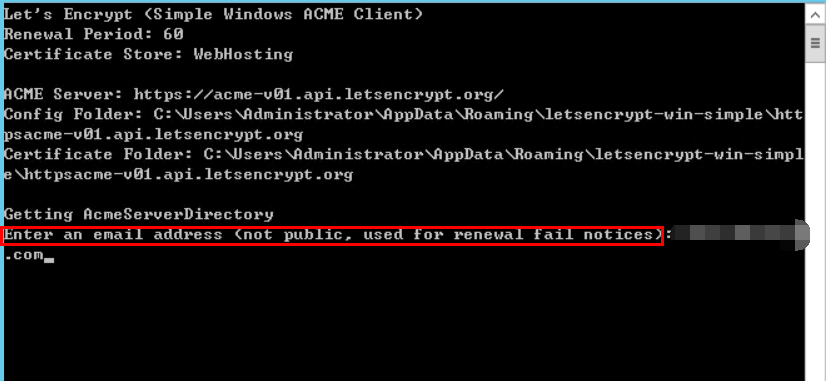
3,设置提醒邮箱
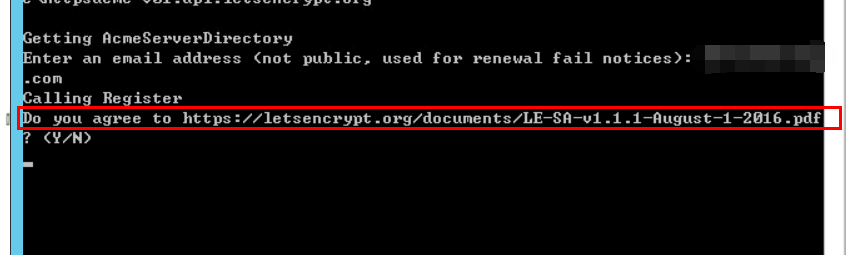
4,按Y同意条款
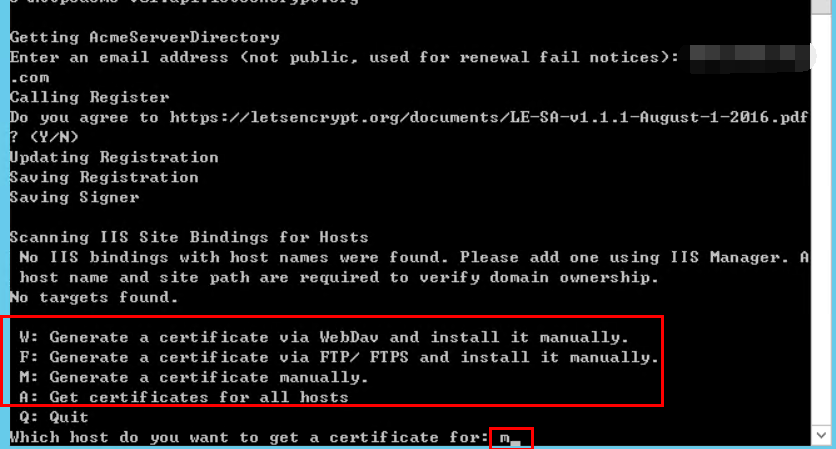
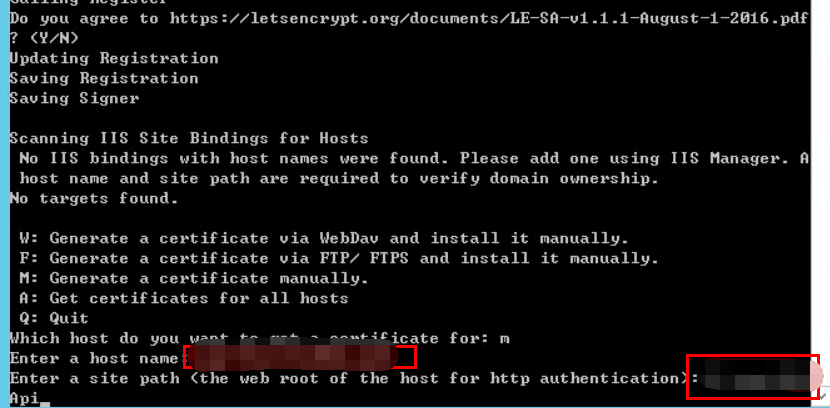
5,按M方式认证
6,在你想要上https的域名的后台文件里,加入对"/.well-known/acme-challenge/*"形式访问的处理
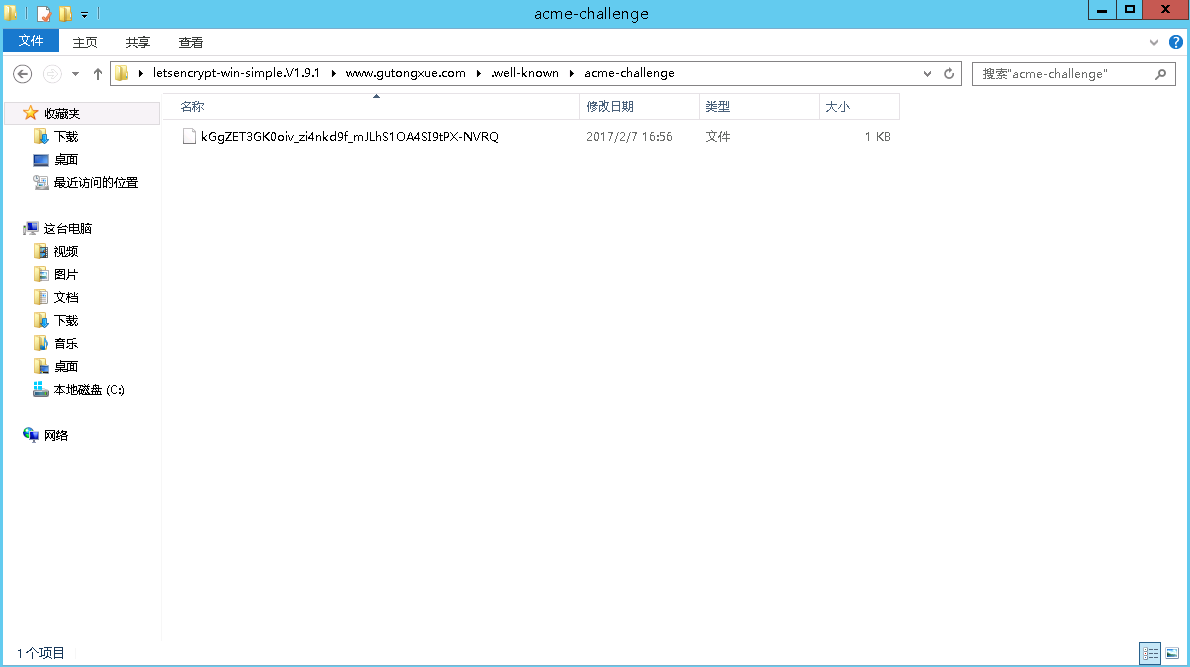
因为Let's Encrypt要验证你的域名是否属于你,会在你刚刚解压缩文件夹下生成一个验证文件,这里*是生成是随机字符
就比如:
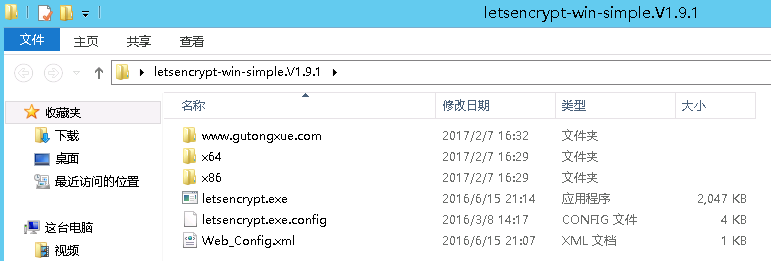
这是我服务器上解压路径(我给放到桌面了),验证时候(第七,第八步)会生成一个要验证域名的文件夹,里面存放着验证文件,如下图:
SpringMVC形式验证的代码如下,其他方式自行实现:
@RequestMapping("/.well-known/acme-challenge/*")
    public ResponseEntity<String> check(HttpServletRequest request, HttpServletResponse response){
        HttpHeaders responseHeaders = new HttpHeaders();
        responseHeaders.set("Content-Type", "application/json;charset=UTF-8");
        String result="";
        try {
            String URI=request.getRequestURI().replace("/","\\");
            //文件路径自行替换一下就行,就是上图中生成验证文件的路径,因为URI中已经包含了/.well-known/acme-challenge/,所以这里不需要
            File file=new File("C:\\Users\\Administrator\\Desktop\\letsencrypt-win-simple.V1.9.1\\www.gutongxue.com\\"+URI);
            InputStream is = new FileInputStream(file);
            // 设置response参数,可以打开下载页面
            response.reset();
            response.setContentType("application/vnd.ms-excel;charset=utf-8");
            response.setHeader("Content-Disposition", "attachment;filename="+ new String(("验证文件").getBytes(), "iso-8859-1"));
            ServletOutputStream out = response.getOutputStream();
            BufferedInputStream bis = null;
            BufferedOutputStream bos = null;
            try {
                bis = new BufferedInputStream(is);
                bos = new BufferedOutputStream(out);
                byte[] buff = new byte[2048];
                int bytesRead;
                // Simple read/write loop.
                while (-1 != (bytesRead = bis.read(buff, 0, buff.length))) {
                    bos.write(buff, 0, bytesRead);
                }
            } catch (final IOException e) {
                throw e;
            } finally {
                if (bis != null)
                    bis.close();
                if (bos != null)
                    bos.close();
            }
        }catch (Exception e){

        }
        return new ResponseEntity<String>(result, responseHeaders, HttpStatus.OK);
    }
7,输入你想转为https的域名
8,验证文件的域名(如果用我的代码,就还输入你的域名就行,验证原理是访问你输入的值+/.well-known/acme-challenge/+生成的随机码)
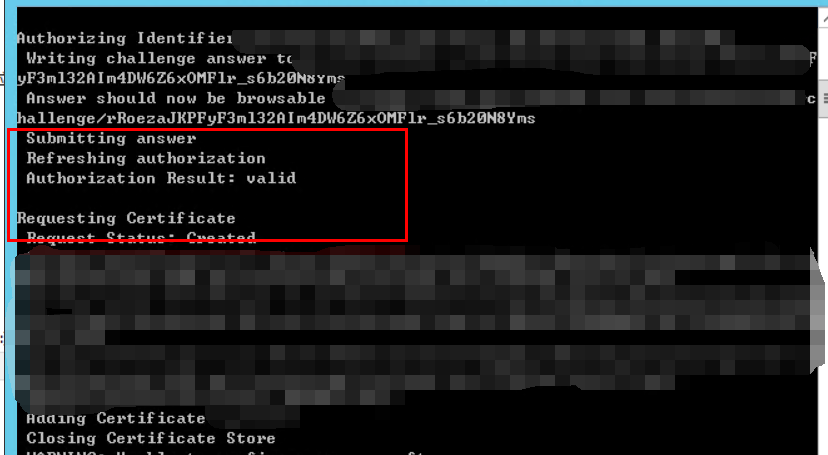
9,证书到这里就生成成功了
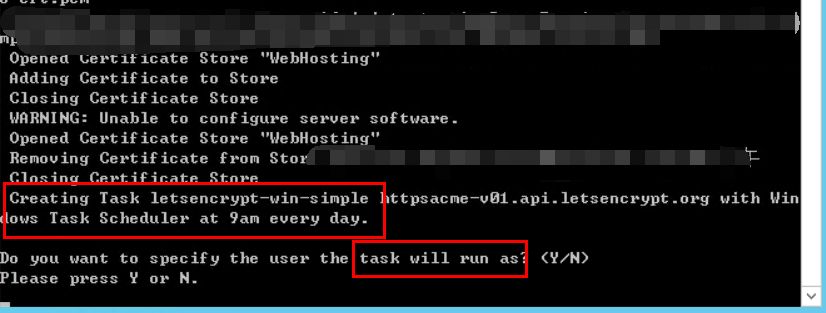
10,由于Let's Encrypt是免费的SSL证书,90天就过期了,需要再次认证,贴心的Let's Encrypt客户端程序会自动帮你生成验证脚本,不要关闭窗口,继续往下走就行
11,确认帮你创建定时任务(不确定的话90天后SSL证书过期,就不是https了)
12,输入该计算机(服务器)的管理员帐号密码

13,证书部分完成,可以关闭该窗口了

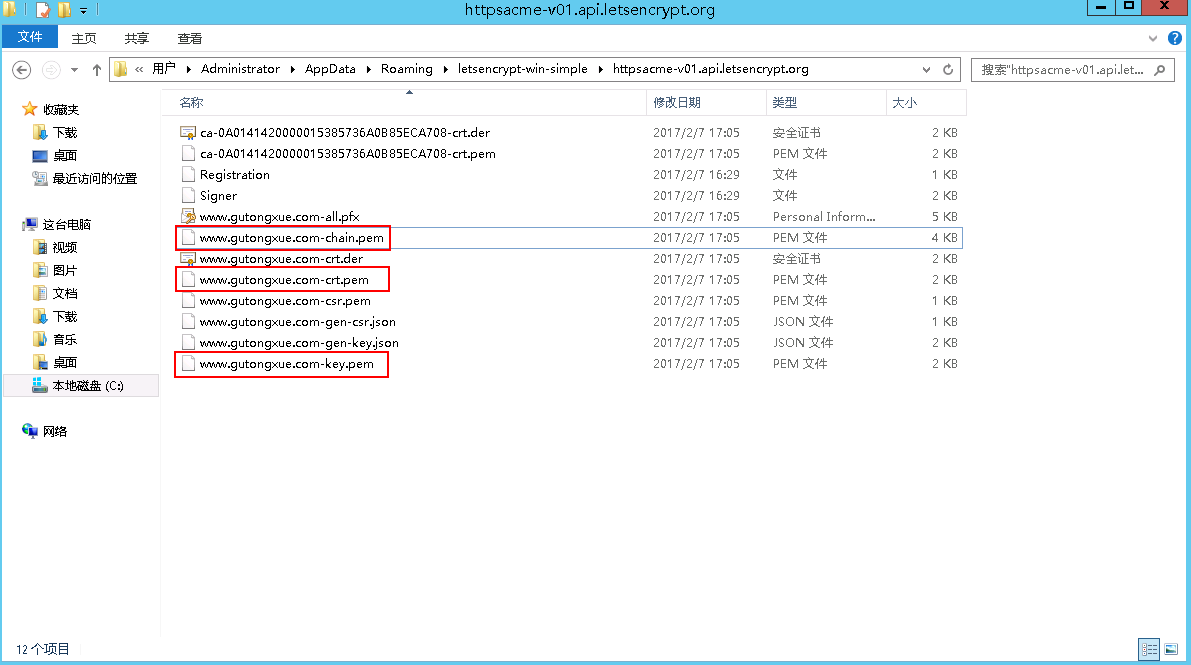
14,找到生成的证书文件,默认路径在 C:\Users\Administrator\AppData\Roaming\letsencrypt-win-simple\httpsacme-v01.api.letsencrypt.org\ ,主要使用下图三个文件:
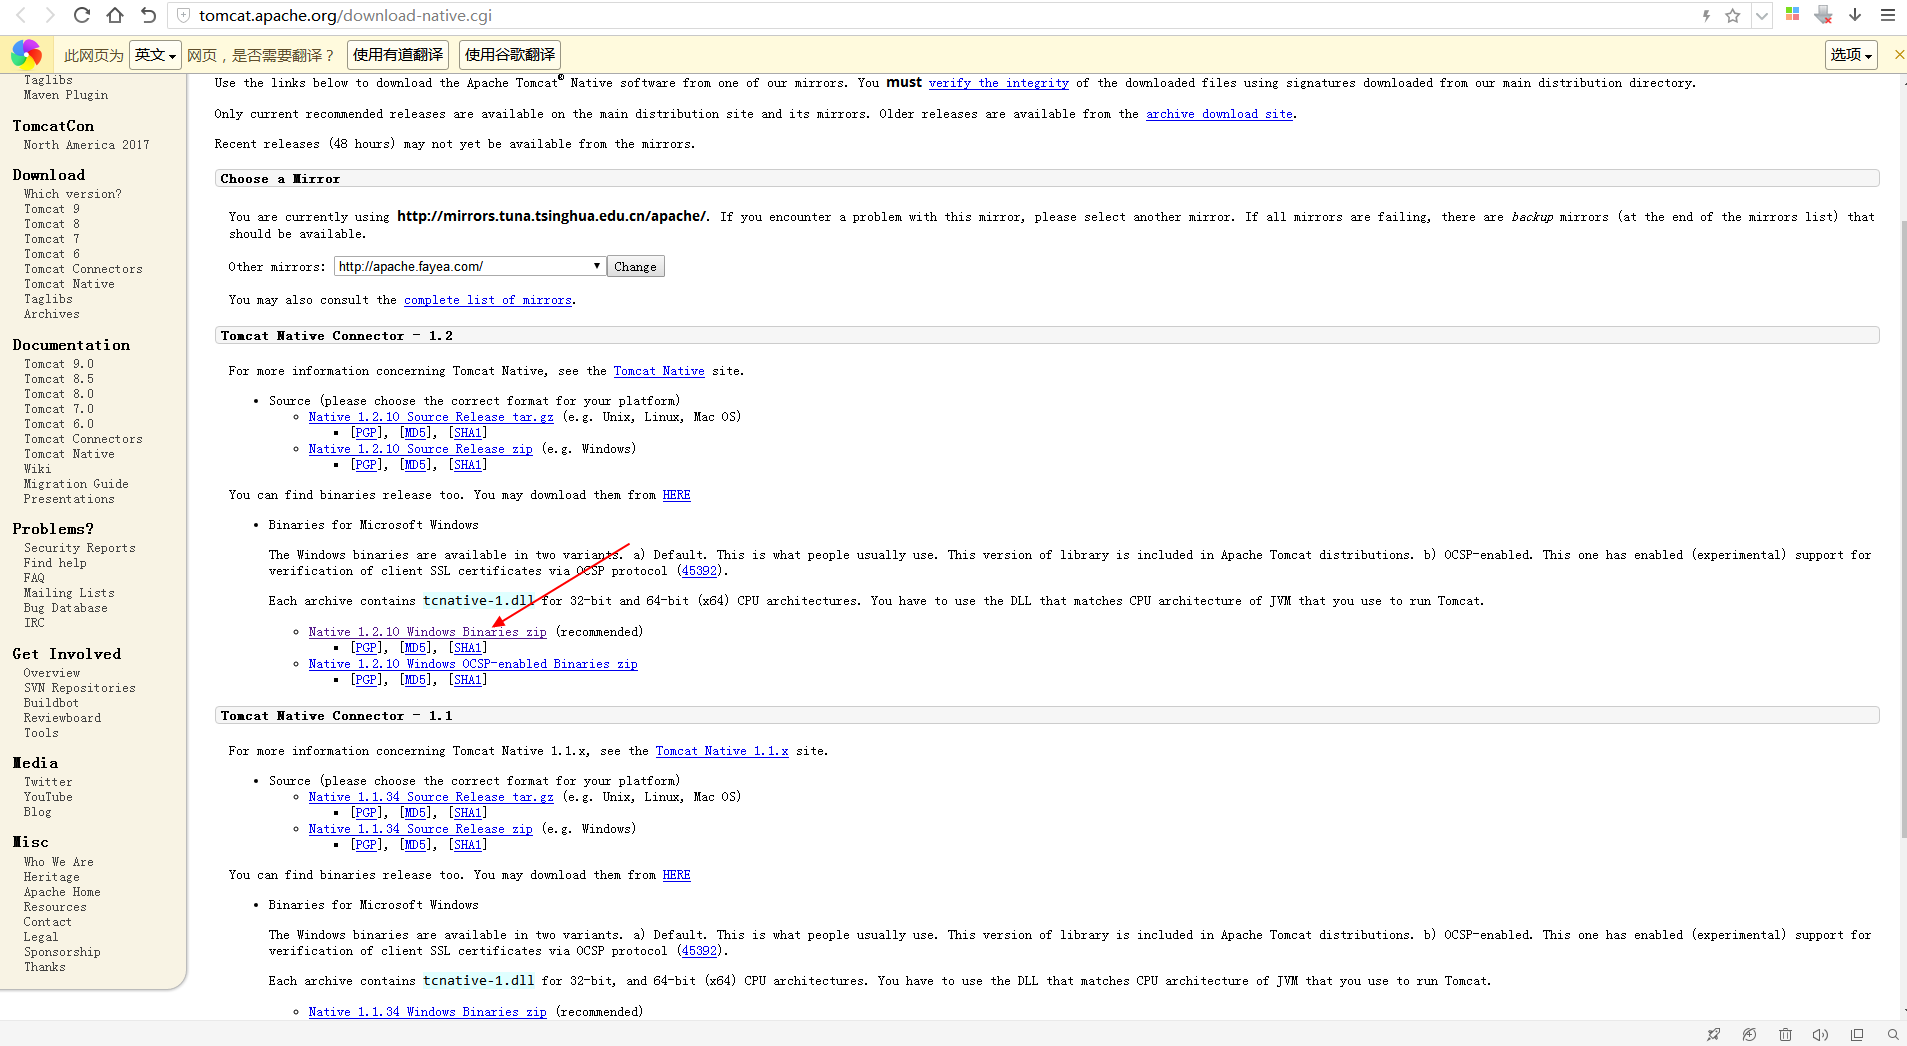
15,装ARP环境(没有这一步Tomcat启不起来(未验证))
http://tomcat.apache.org/download-native.cgi
下载这个
解压缩,把服务器对应位数(32/64位)的tcnative-1.dll粘贴至C:\Program Files\Java\jre1.8.0_112\bin路径下
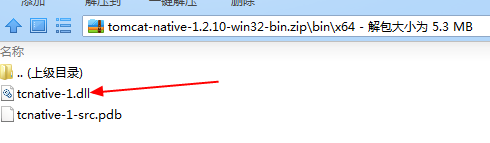
注:32位的就在压缩包的bin目录下
16,配置Tomcat(注:我也是第一次做,一头雾水不明白原理,以下配置我这里可以成功,至于说为什么这么做/你们不成功的原因,我也不知道...以后知道了再补充)
17,修改tomcat的conf目录下server.xml文件:
搜索8443端口,第二个,去掉注释,并改为这样:

<Connector port="443" protocol="org.apache.coyote.http11.Http11AprProtocol"

               maxThreads="150" SSLEnabled="true" >

        <UpgradeProtocol className="org.apache.coyote.http2.Http2Protocol" />

        <SSLHostConfig>

            <Certificate certificateKeyFile="C:\Users\Administrator\AppData\Roaming\letsencrypt-win-simple\httpsacme-v01.api.letsencrypt.org\www.gutongxue.com-key.pem"

                         certificateFile="C:\Users\Administrator\AppData\Roaming\letsencrypt-win-simple\httpsacme-v01.api.letsencrypt.org\www.gutongxue.com-crt.pem"

                         certificateChainFile="C:\Users\Administrator\AppData\Roaming\letsencrypt-win-simple\httpsacme-v01.api.letsencrypt.org\www.gutongxue.com-chain.pem"

                         type="RSA" />

        </SSLHostConfig>

    </Connector>
这里就用到了之前证书生成的文件,对应着填就行
<Connector port="8080" protocol="HTTP/1.1"
               connectionTimeout="20000"
               redirectPort="8443" />
修改为:
<Connector port="80" protocol="HTTP/1.1"
               connectionTimeout="20000"
               redirectPort="443" />
<!--
   <Connector port="8009" enableLookups="false" protocol="AJP/1.3" redirectPort="8443" />
-->
去掉注释并修改为:
<Connector port="8009" enableLookups="false" protocol="AJP/1.3" redirectPort="443" />
18,修改tomcat的conf目录下web.xml文件:
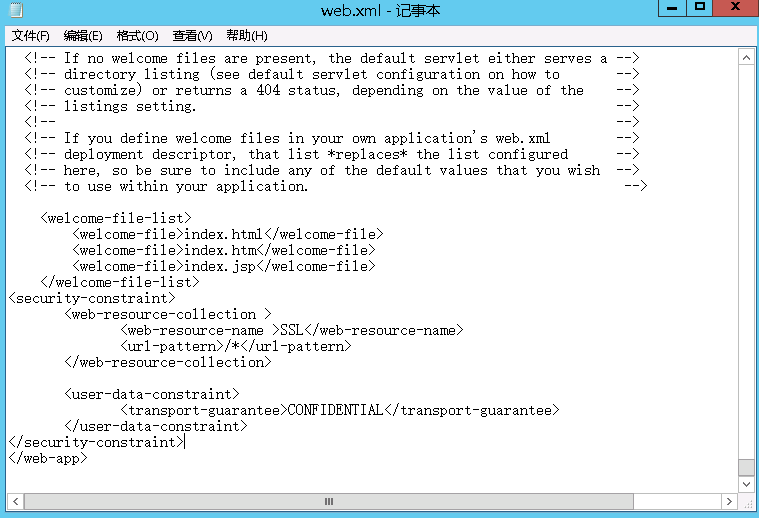
如图位置,加入以下代码:
<security-constraint>
       <web-resource-collection >
              <web-resource-name >SSL</web-resource-name>
              <url-pattern>/*</url-pattern>
       </web-resource-collection>

       <user-data-constraint>
              <transport-guarantee>CONFIDENTIAL</transport-guarantee>
       </user-data-constraint>
</security-constraint>
19,重启Tomcat,完成

20,已知问题:
多域名同一台服务器怎么弄?Tomcat那里怎么配?还需要多试试
子域名访问时变成这个样子...很尴尬啊...


 浙公网安备 33010602011771号