Android Wear开发 - 卡片通知 - 第二节 : 自定义Wear卡片样式
一.前言说明
在上一节添加Android Wear通知特性我们实现了简单的Android Wear卡片拓展,但是默认提供给我们的多张卡片只能实现简单的文字展示,如果想要自定义布局,添加图片等等,则需要本节的知识。
二. 环境配置
- 代码配置与上一节没区别
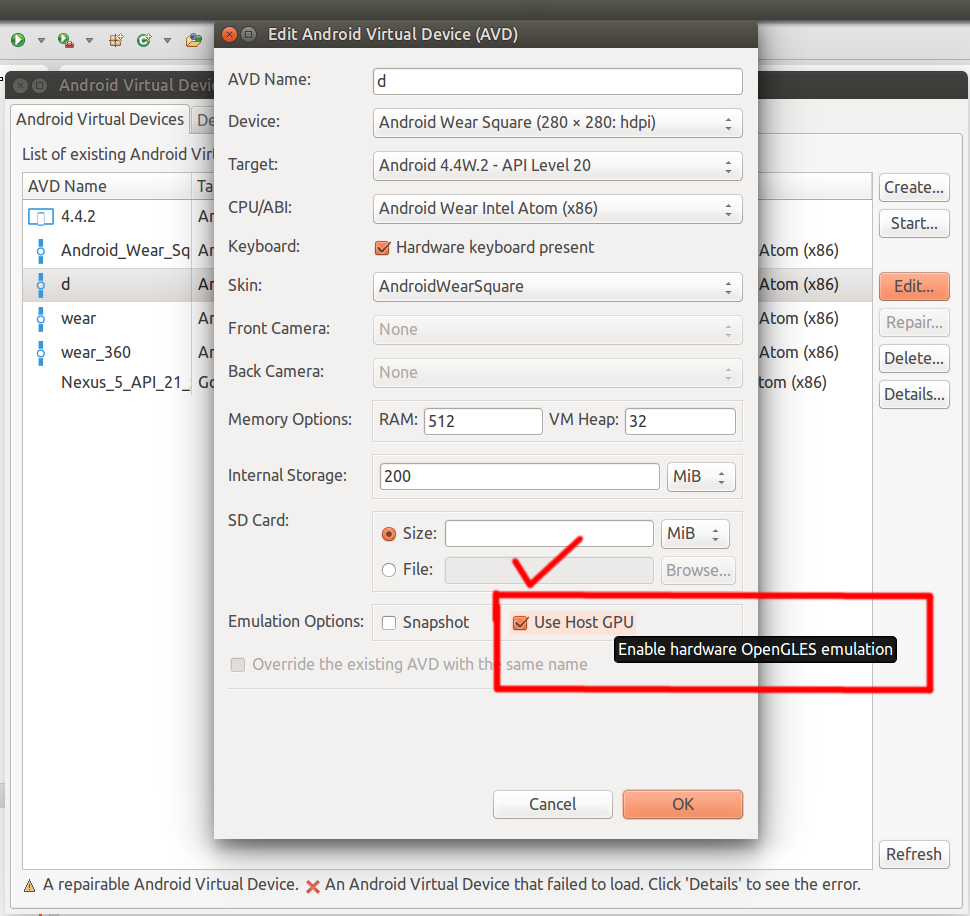
- 若用Wear模拟器进行开发,必须要注意配置,必须将Use Host GPU打钩,否则,动态自定义的卡片会显示不了,变成黑色的一块块,上图。
![]()

三. 自定义卡片
效果图

- 图1~4卡片展示:可设置卡片高度,可调整显示内容的样式
- 图5卡片展示:可实现动画效果,这里其实是一张不停在动的卡片
所以我们可以看到,自定义卡片可以做的东西是很多很多的。
代码实现
private Notification getCustomExtender() {

	// 1. 构建一个指定Activity的PendingIntent

	Intent displayIntent = new Intent(this, SecondActivity.class);

	PendingIntent displayPendingIntent = PendingIntent.getActivity(this, 0,

			displayIntent, PendingIntent.FLAG_UPDATE_CURRENT);


	// 2. 构建一个Wear拓展对象,并设置显示Activity的PendingIntent

	WearableExtender extender = new NotificationCompat.WearableExtender();

	extender.setDisplayIntent(displayPendingIntent);


	// 3. 构建一个NotificationCompat.Builder,填入相关的参数,并返回Notification对象

	NotificationCompat.Builder builder = new NotificationCompat.Builder(

			this);

	builder.setContentTitle("title");

	builder.setContentText("text");

	builder.extend(extender);


	return builder.build();

}
然后在使用添加新的一页卡片的形式加入到卡片中。
wearableExtender.addPage(getCustomExtender());
版权声明:欢迎自由转载-非商用-非衍生-保持署名。作者:Benhero,博客地址:http://www.cnblogs.com/benhero/

 浙公网安备 33010602011771号