一步一步学Silverlight 2系列(33):Silverlight 2应用Web Service两例
 我们知道,在Silverlight 2中提供了丰富的网络通信API,包括支持SOAP服务、REST服务、基于HTTP通信、Socket通信等。本文我将通过几个示例来演示如何在Silverlight 2中应用Web Service实现文件上传和电子邮件发送。
1.使用Web Service上传文件
2.使用Web Service发送电子邮件
我们知道,在Silverlight 2中提供了丰富的网络通信API,包括支持SOAP服务、REST服务、基于HTTP通信、Socket通信等。本文我将通过几个示例来演示如何在Silverlight 2中应用Web Service实现文件上传和电子邮件发送。
1.使用Web Service上传文件
2.使用Web Service发送电子邮件
概述
我们知道,在Silverlight 2中提供了丰富的网络通信API,包括支持SOAP服务、REST服务、基于HTTP通信、Socket通信等。本文我将通过几个示例来演示如何在Silverlight 2中应用Web Service实现文件上传和电子邮件发送。
使用Web Service上传文件
我将通过一个示例来展示如何使用Web Service向服务器上传文件,首先创建Silverlight项目,并在Web测试项目中添加一个ASP.NET Web Service文件。现在来实现相关的WebMethod,在此方法中,将会接收两个参数:字节数组和文件扩展名,并会在服务器上创建文件,如下代码所示:
public class FileService : WebService
{
    [WebMethod]
    public int UploadFile(byte[] FileByte, String FileExtention)
    {
        FileStream stream = new FileStream(String.Format(@"D:\example.{0}", FileExtention),FileMode.CreateNew);
        stream.Write(FileByte, 0, FileByte.Length);
        stream.Close();
        return FileByte.Length;
    }
}
添加一个简单的界面,供用户选择本地文件,我们将在按钮单击单击事件中调用Web Service,如下代码所示:
<Canvas Background="#FF333333">
    <TextBox x:Name="txtFile" Height="30" Width="300" Canvas.Top="120"
             Canvas.Left="30" Style="{StaticResource textBoxStyle}"></TextBox>
    <Button x:Name="btnUpload" Width="60" Content="上 传" Height="30"
             Canvas.Left="340" Canvas.Top="120" Style="{StaticResource buttonStyle}"
             Click="OnUploadClick"></Button>
    <TextBlock x:Name="tblStatus" Canvas.Left="30" Canvas.Top="160"
               FontSize="14" Foreground="White" Text=""></TextBlock>
</Canvas>
调用Web Service上传文件,此处使用了OpenFileDialog对象弹出择窗口以便选择文件,此对象将选择的文件作为Stream返回,我们把Stream转换为一个字节数据传递给Web Service,如下代码所示:
void OnUploadClick(object sender, RoutedEventArgs e)
{
    OpenFileDialog openFile = new OpenFileDialog();

    if (openFile.ShowDialog() == DialogResult.OK)
    {
        String fileName = openFile.SelectedFile.Name;

        FileServiceSoapClient client = new FileServiceSoapClient();
        client.UploadFileCompleted += new EventHandler<UploadFileCompletedEventArgs>(OnUploadFileCompleted);

        Stream stream = (Stream)openFile.SelectedFile.OpenRead();
        stream.Position = 0;
        byte[] buffer = new byte[stream.Length + 1];
        stream.Read(buffer, 0, buffer.Length);
        String fileExtention = fileName.Substring(fileName.IndexOf('.') + 1);

        client.UploadFileAsync(buffer, fileExtention);
    }
}

void OnUploadFileCompleted(object sender, UploadFileCompletedEventArgs e)
{
    if (e.Error == null)
    {
        tblStatus.Text = "上传文件成功!";
    }
}
运行程序后,选择一个文件并上传,如下图所示:

至此,我们就完成了一个使用Web Service上传文件的示例。
使用Web Service发送电子邮件
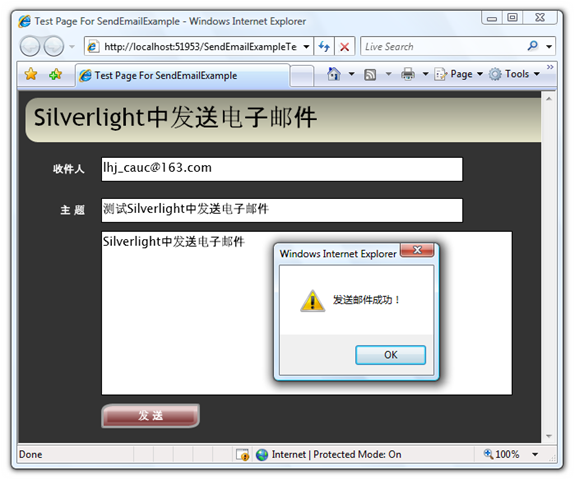
众所周知,发送电子邮件需要使用SMTP协议,Silverlight中并不支持SMTP通信,但是我们可以借助于Web Service来发送电子邮件。本节将通过一个示例讲解这一内容,最终完成的效果如下图所示:

我们首先添加一个ASP.NET Web Service,并实现WebMethod,此方法将接受四个参数:发件人、收件人、邮件主题以及邮件内容,并使用SmtpClient对象发送邮件,关于SmtpClient的使用,大家可以参考MSDN,它位于System.Net.Mail命名空间下。如下代码所示:
public class EmailService : WebService
{
    [WebMethod]
    public bool Send(String fromAddress,String toAddress,String subject,String body)
    {
        try
        {
            MailMessage msg = new MailMessage();
            msg.From = new MailAddress(fromAddress);
            msg.To.Add(new MailAddress(toAddress));
            msg.Subject = subject;
            msg.Body = body;
            msg.IsBodyHtml = false;

            SmtpClient smtp = new SmtpClient();
            smtp.EnableSsl = true;
            smtp.Send(msg);

            return true;
        }
        catch
        {
            return false;
        }
    }
}
使用SmtpClient需要在Web.config文件中配置一下邮件服务器,这里使用Google的服务器,大家可以使用自己的Gmail帐号,如下代码所示:
<system.net>
  <mailSettings>
    <smtp>
      <network host="smtp.gmail.com" port="587" userName="terrylee1218@gmail.com" password="password"/>
    </smtp>
  </mailSettings>
</system.net>
在浏览器中测试Web Service,确保它可以正确的发送邮件。编写一个简单用户界面,如下代码所示:
<Grid x:Name="LayoutRoot" Background="#333333">
    <Grid.RowDefinitions>
        <RowDefinition Height="70"></RowDefinition>
        <RowDefinition Height="50"></RowDefinition>
        <RowDefinition Height="50"></RowDefinition>
        <RowDefinition Height="200"></RowDefinition>
        <RowDefinition Height="50"></RowDefinition>
    </Grid.RowDefinitions>
    <Grid.ColumnDefinitions>
        <ColumnDefinition Width="100"></ColumnDefinition>
        <ColumnDefinition Width="*"></ColumnDefinition>
    </Grid.ColumnDefinitions>
    <local:TitleControl Grid.Row="0" Margin="8,8,8,8" Grid.ColumnSpan="2"></local:TitleControl>
    <TextBlock Text="收件人" Grid.Row="1" Style="{StaticResource textBlockStyle}"></TextBlock>
    <TextBlock Text="主 题" Grid.Row="2" Style="{StaticResource textBlockStyle}"></TextBlock>
    <TextBox x:Name="txtToEmailAddress" Grid.Row="1" Grid.Column="1" Width="440" Height="30" HorizontalAlignment="Left"></TextBox>
    <TextBox x:Name="txtSubject" Grid.Row="2" Grid.Column="1" Width="440" Height="30" HorizontalAlignment="Left"></TextBox>
    <TextBox x:Name="txtBody" Grid.Row="3" Grid.ColumnSpan="2" Width="500" HorizontalAlignment="Left" Height="200" Margin="100 0 0 0"></TextBox>
    <Button x:Name="btnSend" Grid.Row="4" Grid.Column="1" HorizontalAlignment="Left" Content="发 送"
            Style="{StaticResource buttonStyle}" Width="120" Height="30"
            Click="OnSendClick"></Button>
  </Grid>
在Silverlight项目中添加Web Service引用,并编写代码来调用Web Service,相信大家都已经熟悉了该如何调用,如下代码所示:
void OnSendClick(object sender, RoutedEventArgs e)
{
    // 发送邮件地址
    String fromAddress = "terrylee1218@gmail.com";

    EmailServiceSoapClient client = new EmailServiceSoapClient();
    client.SendCompleted += new EventHandler<SendCompletedEventArgs>(OnSendCompleted);
    client.SendAsync(fromAddress,
                     this.txtToEmailAddress.Text,
                     this.txtSubject.Text,
                     this.txtBody.Text);
}

void OnSendCompleted(object sender, SendCompletedEventArgs e)
{
    if (e.Result)
    {
        HtmlPage.Window.Alert("发送邮件成功!");
    }
    else
    {
        HtmlPage.Window.Alert("发送邮件成功!");
    }
}
运行后输入相关信息,并发送邮件,如下图所示:
至此我们就完成一个在Silverlight中发送电子邮件的示例,大家如果有兴趣,还可以为其加上更加丰富的功能,如添加抄送人、密送人以及附件等。
本文首发IT168:http://tech.it168.com/msoft/2008-05-30/200805301124268.shtml
Worktile,新一代简单好用、体验极致的团队协同、项目管理工具,让你和你的团队随时随地一起工作。完全免费,现在就去了解一下吧。
https://worktile.com

 浙公网安备 33010602011771号