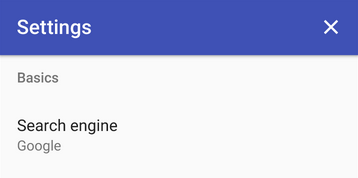
Toolbar使用
原文地址 http://www.cnblogs.com/Dentist/p/4370176.html
Android4.0出现的Actionbar提供了同意方便的导航管理。很大程度的统一了Android应用的风格,但他定制性差,使用不灵活的缺点限制了Android应用的发展。
Android5.0谷歌推出了Material Design。用ToolBar代替了Actionbar。继承了Actionbar的用法。却像布局一样任意修改。
<LinearLayout xmlns:android="http://schemas.android.com/apk/res/android"
    android:layout_width="match_parent"
    android:orientation="vertical"
    android:layout_height="match_parent" >

    <android.support.v7.widget.Toolbar
        android:id="@+id/toolbar"
        android:layout_width="match_parent"
        android:layout_height="wrap_content"
        android:background="?attr/colorPrimary">
    </android.support.v7.widget.Toolbar>

    <EditText
        android:layout_width="wrap_content"
        android:layout_height="wrap_content"
        android:text="Hello World"/>

    <TextView
        android:layout_width="wrap_content"
        android:layout_height="wrap_content"
        android:text="Hello World"/>

</LinearLayout>
然后代码里找到并设置为SupportActionBar就成为了一个真正的Actionbar。不过theme里关于ActionBar的属性对他不管用。因为他是假的,是Google的特技。
    @Override
    protected void onCreate(Bundle savedInstanceState) {
        super.onCreate(savedInstanceState);
        setContentView(R.layout.activity_main);
        Toolbar toolbar = (Toolbar) findViewById(R.id.toolbar);
        setSupportActionBar(toolbar);
    }
但 onCreateOptionsMenu 和 onOptionsItemSelected都有用。
设置导航图标 toolbar.setNavigationIcon();
但设置标题则需要用 getSupportActionBar().setTitle();
使用ToolBar时一定要把Activity的Theme设为NoActionBar。或者Theme.AppCompat并重写这俩属性
        <item name="windowActionBar">false</item>
        <item name="android:windowNoTitle">true</item>
因为Theme.AppCompat.NoActionBar仅仅就是在Theme.AppCompat的基础上多加了上面两行。看源码便知。
然后你一定会发现:
当你使用Light主题时。APP所有字的颜色都是黑色,包括Toolbar的字体颜色也是黑色。
当你使用Dark(普通)主题时。APP所有字的颜色都是白色,包括Toolbar的字体颜色也是白色。就像这样:


而google的Material Design展示的优雅界面

这TM是在逗我。。。
其实ToolBar支持单独设置一个theme
    <android.support.v7.widget.Toolbar
        android:id="@+id/toolbar"
        android:layout_width="match_parent"
        android:layout_height="wrap_content"
        android:background="?attr/colorPrimary"
        app:theme="@style/Theme.AppCompat">
    </android.support.v7.widget.Toolbar>
然后给Activity设置为Light主题。就完美解决了。
但每个页面都写这样一堆XML代码洁癖患者实在受不了。
可以使用include标签优雅的解决。
<android.support.v7.widget.Toolbar xmlns:android="http://schemas.android.com/apk/res/android"
    xmlns:app="http://schemas.android.com/apk/res-auto"
    android:id="@+id/toolbar"
    android:layout_width="match_parent"
    android:layout_height="wrap_content"
    app:theme="@style/Theme.AppCompat"
    android:background="@color/colorPrimary">


</android.support.v7.widget.Toolbar>
<LinearLayout xmlns:android="http://schemas.android.com/apk/res/android"
    android:layout_width="match_parent"
    android:orientation="vertical"
    android:layout_height="match_parent">

    <include layout="@layout/toolbar" />

    <EditText
        android:layout_width="wrap_content"
        android:layout_height="wrap_content"
        android:text="Hello World"/>

    <TextView
        android:layout_width="wrap_content"
        android:layout_height="wrap_content"
        android:text="Hello World"/>

</LinearLayout>
注意当你换了Toolbar的主题就不能再用 android:background="?attr/colorPrimary" 这种基于主题的资源,应该直接重新定义。
然后介绍下ToolBar的特技。
1.动画显示/隐藏ToolBar
    public void showToolbar(boolean show){
        if (show == toolbarShow || toolbar == null)return;
        toolbarShow = show;
        if (show) {
            toolbar.animate()
                    .translationY(0)
                    .alpha(1)
                    .setDuration(HEADER_HIDE_ANIM_DURATION)
                    .setInterpolator(new DecelerateInterpolator());
        } else {
            toolbar.animate()
                    .translationY(-toolbar.getBottom())
                    .alpha(0)
                    .setDuration(HEADER_HIDE_ANIM_DURATION)
                    .setInterpolator(new DecelerateInterpolator());
        }
    }
2.设置ToolBar的背景透明度
//设置好ToolBar过后
mActionbarDrawable = new ColorDrawable(getResources().getColor(R.color.theme_primary));
getSupportActionBar().setBackgroundDrawable(mActionbarDrawable);
    protected void setToolbarAlpha(float alpha){
        mActionbarDrawable.setAlpha((int) (alpna*255));
    }
这两个特技一般都配合RecyclerView SccollView等滑动视图(过时的ListView不考虑了)。
RecyclerView :
public abstract class HidingScrollListener extends RecyclerView.OnScrollListener {

  @Override
  public void onScrolled(RecyclerView recyclerView, int dx, int dy) {
    super.onScrolled(recyclerView, dx, dy);
      Utils.Log("percent:" + dy);
      if (dy > 1){
          onHide();
      }else if(dy < -1){
          onShow();
      }
  }

  public abstract void onHide();
  public abstract void onShow();

}
mRecyclerView.setOnScrollListener(new HidingScrollListener() {
                @Override
                public void onHide() {
                        showToolbar(false);
                }

                @Override
                public void onShow() {
                        showToolbar(true);
                }
            });
SccollView:
public class ObservableScrollView extends ScrollView {
    public interface ScrollViewListener {

        void onScrollChanged(ObservableScrollView scrollView, int x, int y, int oldx, int oldy);

    }
    private ScrollViewListener scrollViewListener = null;

    public ObservableScrollView(Context context) {
        super(context);
    }

    public ObservableScrollView(Context context, AttributeSet attrs,
            int defStyle) {
        super(context, attrs, defStyle);
    }

    public ObservableScrollView(Context context, AttributeSet attrs) {
        super(context, attrs);
    }

    public void setScrollViewListener(ScrollViewListener scrollViewListener) {
        this.scrollViewListener = scrollViewListener;
    }

    @Override
    protected void onScrollChanged(int x, int y, int oldx, int oldy) {
        super.onScrollChanged(x, y, oldx, oldy);
        if (scrollViewListener != null) {
            scrollViewListener.onScrollChanged(this, x, y, oldx, oldy);
        }
    }

}
        mScrollView.setScrollViewListener(new ObservableScrollView.ScrollViewListener() {
            @Override
            public void onScrollChanged(ObservableScrollView scrollView, int x, int y, int oldx, int oldy) {
                    if (y-oldy>3){
                        showToolbar(false);
                    }else if(y-oldy<-3){
                        showToolbar(true);
                    }
            }
        });


 浙公网安备 33010602011771号