
telnet不能用!!!
提示:-bash: telnet: command not foun
一.检查
1、[root@localhost ~]# telnet
bash: telnet: command not found
2、 查询了是否安装Telnet包,结果如下:
[root@localhost ~]# rpm -qa telnet*
telnet-server-0.17-47.el6.i686
3、又查询了xinetd的状态:
[root@localhost ~]# service xinetd status
xinetd (pid 2967) 正在运行...
4、使用ntsysv命令,开启了Telnet服务;同时,也查看 /etc/xinetd.d/telnet 文件,将将“disable = yes” 改为“disable = no”;也重启了服务 [root@CentOS5 /]#service xinetd restart
在系统服务里面,也查看过,telnet服务和xinetd也都是工作状态。
二.安装服务
解决方式,重装一下telnet客户端。
centos、ubuntu
yum list telnet* 查看telnet相关的安装包
yum install telnet-server 安装telnet服务
yum install telnet.* 安装telnet客户端
注意,安装之前要先安装#yum install xinetd (注意在root下安装)因为,telnet要依靠xinetd服务启动,所以要先安装该服务
三.配置telnet
方法一:使用ntsysv,在出现的窗口之中,将 telnet 勾选起来,然后按下 OK 即可!
方法二:使用chkconfig命令直接开启
#chkconfig telnet on
方法三:直接修改配置文件
vi /etc/xinetd.d/telnet
一般是这样子的:
# default: yes
# description: The telnet server servestelnet sessions; it uses \
# unencrypted username/password pairs for authentication.
service telnet
{
flags = REUSE
socket_type = stream
wait = no
user = root
server =/usr/sbin/in.telnetd
log_on_failure += USERID
disable = yes
}
只需要将”disable= yes”改成” disable=no”
四、激活服务
telnet 是挂在 xinetd 底下的,所以自然只要重新激活 xinetd 就能够将 xinetd 里头的设定重新读进来,所以刚刚设定的 telnet 自然
也就可以被激活。
# servicexinetd restart
或者#/etc/rc.d/init.d/xinetd restart
五.iptables防火墙会阻止telnet,所以需要在iptables允许,用如下命令
当你启动telnet服务后,你可以用netstat –tunlp命令来查看telnet服务所使用的端口,可以发现有23。使用下面命令开启这些端口:
iptables -I INPUT -p tcp --dport 23 -jACCEPT
iptables -I INPUT -p udp --dport 23 -jACCEPT
service iptables save //保存
service iptables restart //重启防火墙
或者来点狠的!!关闭防火墙!
service iptables stop
六、可能的问题:
下面我们来看一下二种错误:
第一种:
[root@linuxchao ~]# telnet 192.168.1.87
Trying 192.168.1.87...
telnet: connect to address 192.168.1.87: Noroute to host
telnet: Unable to connect to remote host:No route to host
解决方法:这种问题防火墙没有允许telnet服务,连接被阻止,默认CentOS只允许SSH,所以进入其自定义选项,在telnet前打个勾!
第二种 :
[root@test xinetd.d]# telnet 172.25.1.3
Trying 172.25.1.3...
Connected to 172.25.1.3 (172.25.1.3).
Escape character is '^]'.
getnameinfo: localhost: Success
Temporary failure in name resolution: Illegal seek
Connection closed by foreign host.
这一个就是/etc/hosts文件配置问题
解决方法:我在里面加两个IP地址,内容如下:
[linux@localhost ~]$ more /etc/hosts
# Do not remove the following line, orvarious programs
# that require network functionality willfail.
127.0.0.1localhost.localdomainlocalhost
::1localhost6.localdomain6localhost6
192.168.1.88
192.168.1.86
说明:因为客户机的名字不好记就没写进去,内容格式应为127.0.0.1 pcname
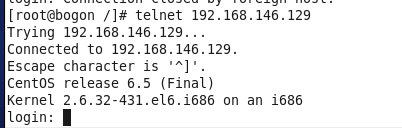
测试连接成功:
参考:https://blog.csdn.net/shijiebei2009/article/details/40047077
