Spring基础——在Spring Config 文件中配置 Bean
一、基于 XML 的 Bean 的配置——通过全类名(反射)
<bean
<!-- id: bean 的名称在IOC容器内必须是唯一的若没有指定,则自动的将全限定类名作为 改 bean 的名称-->id="hello"
<!-- 通过全类名的方式来配置 bean -->class="com.atguigu.spring.helloworld.HelloWorld">
</bean>
1.通过属性注入
即通过 setXxx() 方法注入 Bean 的属性值或依赖的对象。
使用 <property name="" value="" ref=""/> 元素,其中 name 值为对应 Bean 属性名称,value 指定对应属性值,ref 引用其他 Bean,value 属性和 ref 属性不可以同时存在。
也可以通过 <value></value> 子节点的方式指定属性值。
e:
<bean id="helloWorld" class="com.nucsoft.spring.helloworld.HelloWorld">
  <property name="hello" value="spring"/>
  <property name="world">
    <value>spring</value>
  </property>
</bean>
注意:在此种方式下,要配置的 Bean 必须存在空参构造器。
2.通过构造器注入
通过构造方法注入属性值或依赖的对象。
使用 <constructor-arg value="" index="" name="" ref="" type=""/> 元素,value 属性为对应的参数指定值,ref 引用其他 Bean。不可同时存在。
通过 name 属性、index 属性、type属性提供了三种注入方式:
(1)name:按照构造器参数名匹配入参
<bean id="car1" class="com.nucsoft.spring.helloworld.Car">
  <constructor-arg name="brand" value="奥迪"/>
  <constructor-arg name="corp" value="上海"/>
  <constructor-arg name="price" value="400000"/>
</bean>
(2)index:按照索引匹配入参
<bean id="car2" class="com.nucsoft.spring.helloworld.Car">
  <constructor-arg index="0" value="大众"/>
  <constructor-arg index="1" value="10000"/>
</bean>
(3)type:按照类型匹配入参
<bean id="car3" class="com.nucsoft.spring.helloworld.Car">
  <constructor-arg type="java.lang.String" value="宝马"/>
  <constructor-arg type="double" value="200000"/>
</bean>
注意:Spring 虽然提供了通过构造器的方式进行注入,但是并不推荐使用此种方式。
3.细节问题
(1)若注入的属性值包含特殊字符,可以使用 <![CDATA[]]> 包含该属性值。
如:
<bean id="car4" class="com.nucsoft.spring.Car">
  <property name="brand">
    <value><![CDATA[<BM>]]> </value>
  </property>
  <property name="corp" value="德国"/>
  <property name="maxSpeed" value="230"/>
  <property name="price" value="20000000"/>
</bean>
(2)可以通过 <ref> 元素或 ref 属性为 Bean 的属性或构造器指定对 Bean 的引用。
如:
e1:
<bean id="service" class="com.nucsoft.spring.Service"/>
<bean id="action" class="com.nucsoft.spring.Action">
    <property name="service" ref="service"/>
</bean>
e2:
<bean id="feather" class="com.nucsoft.spring.Feather">
  <property name="length" value="13"/>
</bean>

<bean id="bird" class="com.nucsoft.spring.Bird">
  <constructor-arg name="birdName" value="smallBird"/>
  <constructor-arg name="feather" ref="feather"/>
</bean>
(3)内部Bean:可以在属性或构造器里包含 Bean 的声明,内部 Bean 不需要指定 id,同时在别的地方也无法引用。
如:
e1:
<bean id="action" class="com.nucsoft.spring.Action">
  <property name="service">
  <bean class="com.nucsoft.spring.Service"/>
  </property>
</bean>
e2:
<bean id="bird" class="com.nucsoft.spring.Bird">
  <constructor-arg name="birdName" value="smallBird"/>
  <constructor-arg name="feather">
    <bean class="com.nucsoft.spring.Feather">
      <property name="length" value="13"/>
    </bean>
  </constructor-arg>
</bean>
4.为引用类型(字符串或对象)注入 Null 值
<bean id="bird" class="com.nucsoft.spring.Bird">
  <constructor-arg name="birdName" value="smallBird"/>
  <constructor-arg name="feather">
    <null/>
   </constructor-arg>
</bean>
5.为级联属性注入
(1)通过属性
<bean id="feather" class="com.nucsoft.spring.Feather">
  <property name="length" value="44"/>
</bean>

<bean id="bird" class="com.nucsoft.spring.Bird">
  <property name="birdName" value="smallBird"/>
  <property name="feather" ref="feather"/>
  <property name="feather.length" value="23"/>
</bean>
(2)通过构造器
<bean id="feather" class="com.nucsoft.spring.Feather">
    <property name="length" value="44"/>
</bean>
<bean id="bird2" class="com.nucsoft.spring.Bird">
    <constructor-arg name="birdName" value="bigBird"/>
    <constructor-arg name="feather" ref="feather"/>
    <property name="feather.length" value="33"/>
</bean>
注意:设置级联属性的前提是,级联属性所属对象已经被注入到容器中。同时需要为级联属性所属对象提供 getXxx() 方法。
6.集合属性
(1)集合性质的类型:List,Set,Map 和 数组
(2)使用 <list>,<set>,<map> 来配置集合属性,其中数组和 List 都使用 <list>
(3)List:通过引用外部 Bean 或 创建内部 Bean 的方式
<bean id="department" class="com.nucsoft.spring.Department">
  <property name="deptName" value="dept01"/>
</bean>

<bean id="company" class="com.nucsoft.spring.Company">
  <property name="companyName" value="ICBC"/>
  <property name="departments">
    <list>
      <ref bean="department"/>
      <bean class="com.nucsoft.spring.Department">
        <property name="deptName" value="dept02"/>
      </bean>
    </list>
  </property>
</bean>
测试:
private ApplicationContext ctx = null;

@Before
public void init() {
  ctx = new ClassPathXmlApplicationContext("spring/ApplicationContext.xml");
}

@Test
public void test01() {
  Company com = ctx.getBean(Company.class);
  System.out.println(com);
}
输出:
Company{companyName='ICBC', departments=[Department{deptName='dept01'}, Department{deptName='dept02'}]}
(4)Set:与 List 类似。不做重复说明。
(5)Map: 在<map> 标签中使用多个 <entry> 子标签:简单字面值使用属性 key 和 value 来定义,Bean 的引用通过 key-ref 和 value-ref 属性定义。
如:
<bean id="emp02" class="com.nucsoft.spring.Employee">
  <property name="employeeName" value="emp02"/>
  <property name="age" value="23"/>
</bean>

<bean id="department" class="com.nucsoft.spring.Department">
  <property name="deptName" value="dept01"/>
</bean>
<bean id="department02" class="com.nucsoft.spring.Department">
  <property name="deptName" value="dept02"/>
</bean>

<bean id="company" class="com.nucsoft.spring.Company">
  <property name="companyName" value="ICBC"/>
  <property name="departments">
    <map>
      <entry key-ref="department" value-ref="emp01"/>
      <entry key-ref="department02" value-ref="emp02"/>
    </map>
  </property>
  <property name="strs">
    <map>
      <entry key="key01" value="value01"/>
      <entry key="key02" value="value02"/>
    </map>
  </property>
</bean>
测试:
private ApplicationContext ctx = null;

@Before
public void init() {
  ctx = new ClassPathXmlApplicationContext("spring/ApplicationContext.xml");
}

@Test
public void test01() {
  Company com = ctx.getBean(Company.class);
  System.out.println(com);
}
输出:
Company{companyName='ICBC', departments={Department{deptName='dept01'}=Employee{employeeName='emp01', age=12}, Department{deptName='dept02'}=Employee{employeeName='emp02', age=23}}}
注意:不能在 <entry> 标签中定义 Bean 标签,不支持。
(6)Properties 类型的属性:和 Map 类似,在 <props> 标签中使用 <prop> 子标签, 每个 <prop> 子标签必须定义 key 属性。
<bean id="DataSourceId" class="com.nucsoft.spring.DataSourceBean">
  <property name="propertiesInfo">
    <props>
      <prop key="user">root</prop>
      <prop key="password"></prop>
      <prop key="jdbcUrl">jdbc:mysql:///test</prop>
      <prop key="driverClass">com.mysql.jdbc.Driver</prop>
    </props>
  </property>
</bean>
7.定义单独的集合 Bean
使用基本的集合标签定义集合时,不能将集合作为独立的 Bean 定义,导致其他 Bean 无法引用该集合,所以无法在不同的 Bean 之间共用。
可以使用 util schema 里的集合标签定义独立的集合 Bean。需要注意的是,定义的集合 Bean 与 <bean> 标签是同级别的。
<bean id="company" class="com.nucsoft.spring.Company">
  <property name="companyName" value="ICBC"/>
  <property name="departments" ref="departments"/>
</bean>

<util:list id="departments">
  <bean class="com.nucsoft.spring.Department">
    <property name="deptName" value="dept01"/>
  </bean>
  <ref bean="department02"/>
</util:list>
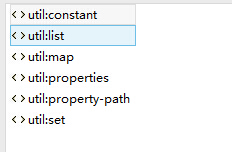
可以定义到外部的集合 Bean 有:
8.使用 p 命名空间,简化 XML 配置文件
<bean id="bird3" class="com.nucsoft.spring.Bird" p:birdName="smallBird" p:feather-ref="feather"/>
二、基于 XML 的 Bean 的配置——通过工厂方法
1.通过静态工厂方法
直接调用某一个类的静态方法,可以返回一个 Bean 的实例。通过 class 属性来指定全类名,使用 factory-method 来指定生成 bean 的静态方法。使用 constructor-arg 为静态方法传入参数。如:
<bean class="java.text.DateFormat" id="dateFormat" factory-method="getDateInstance">
  <constructor-arg value="1"/>
</bean>
@Test
public void test04() {
  DateFormat dateFormat = (DateFormat) ctx.getBean("dateFormat");
  System.out.println(dateFormat);
}
适用情况:官方或第三方提供的通过静态方法生成 bean 对象,不需要我们再创建,对应的 Bean 类一般是通过 newInstance 软编码的方式来创建。
2.通过实例工厂方法:将对象创建的过程封装到另外一个对象的方法里。
(1)首先要创建和配置一个含有工厂方法的 Bean
(2)在另一个 bean 配置中调用含有工厂方法 bean 的非 static 方法(即工厂方法)来返回一个 bean 的实例,factory-bean:指向已经创建好的工厂 bean ,factory-method:实例化工厂方法,construtor-arg:为实例工厂方法传入参数。
如:
工厂 Bean 的配置:
<bean class="java.text.SimpleDateFormat" id="simpleDateFormat">
  <constructor-arg value="yyyy-MM-dd"/>
</bean>
目标 Bean 的配置:
<bean factory-bean="simpleDateFormat" factory-method="parse" id="date">
  <constructor-arg value="2012-02-24"/>
</bean>
测试:
@Test
public void test05() {
  Date date = (Date) ctx.getBean("date");
  System.out.println(date);
}
控制台输出:
Fri Feb 24 00:00:00 CST 2012
三、基于 XML 的 Bean 的配置——通过 FactoryBean 配置 Bean
1.Spring 中有两类 Bean,一种是普通 Bean,另外一种是工厂 Bean,即 FactoryBean
2.工厂 Bean 与普通 Bean 不同,其返回的对象不是指定类的一个实例,其返回的是该工厂 Bean 的 getObject() 方法返回的对象
3.具体操作
(1)目标工厂 Bean 需要实现 FactoryBean 接口
(2)返回的对象为 getObject() 方法返回的对象。
如:
工厂 Bean:
/**
 * @author solverpeng
 * @create 2016-07-19-11:45
 */
public class DepartmentFactoryBean implements FactoryBean<Department>{
    @Override
    public Department getObject() throws Exception {
        Department department = new Department();
        department.setDeptName("dept01");
        department.setEmployee(new Employee());
        return department;
    }

    @Override
    public Class<?> getObjectType() {
        return Department.class;
    }

    @Override
    public boolean isSingleton() {
        return true;
    }
}
Spring Config 配置:
<bean class="com.nucsoft.spring.bean.DepartmentFactoryBean" id="department"/>
测试:
@Test
public void test06() {
  Department department = (Department) ctx.getBean("department");
  System.out.println(department);
}
三、基于注解的 Bean 的配置
前提:需要导入 spring-aop-4.0.0.RELEASE.jar 包
1.在 classpath 中扫描组件(component scanning):Spring 能够从 classpath 下自动扫描和实例化具有特定注解的组件。
2.特定的组件包括:
(1)@Component:基本注解,标识了一个受 Spring 管理的组件
(2)@Respository:标识持久层组件
(3)@Service:标识服务层组件
(4)@Controller :标识表现层组件
3.对于扫描到的组件,Spring 有默认的命名策略:使用简短类名,第一个字母小写。也可以通过 value 属性指定名称。
4.当在组件类上使用了特定注解后,还需要在 Spring 的配置文件中声明 <context:component-scan>。
属性:
base-package:指定要扫描的基类包,Spring会自动扫描这个基类包及其子包中的所有类。当需要扫描多个包是,可以使用逗号进行分割。
如:
<context:component-scan base-package="com.nucsoft.spring"/>
resource-pattern:若需要扫描基包下指定的类,可以使用该属性过滤特定的类。默认是:"**/*.class"。
如:
<context:component-scan base-package="com.nucsoft.spring" resource-pattern="component/*.class" />
<context:include-filter type="" expression=""/> 子节点表示要包含的目标类
<context:exclude-filter type="" expression=""/> 子节点表示要排出在外的目标类
可以同时包含多个 <context:include-filter type="" expression=""/> 和 <context:exclude-filter type="" expression=""/> 子节点
属性 type:表示支持不同类型的过滤
annotation:所有标注某注解的类。该类型采用目标类是否标注了某注解进行过滤
e:所有在基包下标注 @Controller 注解的类都不被扫描
<context:component-scan base-package="com.nucsoft.spring">
  <context:exclude-filter type="annotation" expression="org.springframework.stereotype.Controller"/>
</context:component-scan>
assinable:所有继承或扩展某个特定的类进行过滤
e:所有继承或扩展 Person 类的类都不被扫描
<context:component-scan base-package="com.nucsoft.spring" resource-pattern="component/*.class">
  <context:exclude-filter type="assignable" expression="com.nucsoft.spring.bean.Person"/>
</context:component-scan>
四、基于注解来装配 Bean 的属性
1.<context:component-scan> 还会自动注册 AutowiredAnnotationBeanPostProcessor 实例,该实例可以自动装配具有 @Autowired 和 @Resource、@Inject 注解的属性。
2.@Autowired 注解
自动装配目标 Bean 的 Bean 属性(该属性为一个 Bean 的实例,该 Bean 为在 IOC 容器中存在的 Bean)
(1)可以对属性标注该注解。如:
/**
 * @author solverpeng
 * @create 2016-07-19-16:49
 */
@Component
public class Department {
    private String deptName;

    @Autowired
    private Employee employee;
    @Autowired
    private Address address;

    public void setDeptName(String deptName) {
        this.deptName = deptName;
    }

    @Override
    public String toString() {
        return "Department{" +
                "deptName='" + deptName + '\'' +
                ", employee=" + employee +
                ", address=" + address +
                '}';
    }
}
(2)可以对方法标注该注解,方法参数为要自动装配的类型,可以是任意方法
/**
 * @author solverpeng
 * @create 2016-07-19-16:49
 */
@Component
public class Department {
    private String deptName;
    private Employee employee;
    private Address address;

    @Autowired
    public void setAddress(Address address) {
        this.address = address;
    }

    @Autowired
    public void abc(Employee employee) {
        this.employee = employee;
    }

    public void setDeptName(String deptName) {
        this.deptName = deptName;
    }

    @Override
    public String toString() {
        return "Department{" +
                "deptName='" + deptName + '\'' +
                ", employee=" + employee +
                ", address=" + address +
                '}';
    }
}
(3)可以对构造器标注该注解,方法参数为要自动装配的类型。
/**
 * @author solverpeng
 * @create 2016-07-19-16:49
 */
@Component
public class Department {
    private String deptName;
    private Employee employee;
    private Address address;

    public void setDeptName(String deptName) {
        this.deptName = deptName;
    }

    @Autowired
    public Department(Employee employee, Address address) {
        this.employee = employee;
        this.address = address;
    }

    @Override
    public String toString() {
        return "Department{" +
                "deptName='" + deptName + '\'' +
                ", employee=" + employee +
                ", address=" + address +
                '}';
    }
}
注意:
使用 @Autowired 自动匹配时,如果只匹配到一个的情况下:
按照类型进行匹配
如果匹配到多个:
标记有 primary="true" 的 bean 有限,不能同时出现多个 primary="true" 的相同类型的 bean。否则:UnsatisfiedDependencyException
若都没有 primary 属性,在按照 @Autowired 标注的构造器或方法 的参数名称进行匹配 Bean。若还没有匹配到,则报:UnsatisfiedDependencyException异常。
具体参见:
org.springframework.beans.factory.support.DefaultListableBeanFactory#findAutowireCandidates
org.springframework.beans.factory.support.DefaultListableBeanFactory#determinePrimaryCandidate
(4)若某一个属性允许不被设置,可以设置 @Autowired 注解的 required 属性为 false。
(5)@Qualifier 注解:Spring 允许对方法的入参或属性标注 @Qualifier 注解。@Qualifier 注解里提供 Bean 的名称。
如:
属性处:
@Autowired
@Qualifier("address2")
private Address address;
方法处:
@Autowired
public Department(Employee employee, @Qualifier("address2") Address address) {
  this.address = address;
  this.employee = employee;
}
(6)@Autowired 注解可以标识在数组类型的属性上,此时会把所有匹配的 Bean 进行自动装配
(7)@Autowired 注解可以标识在集合属性上,此时会将集合类型对应的 Bean 进行自动装配
(8)@Autowired 注解可以标识在 Map 上,若 key 为 String,则此时会将 value 对应的 Bean 的类型进行自动装配
3.@Resource 注解
(1)如果说 @Autowired 属性是按照类型进行自动装配的,那么 @Resource 注解可以看成是按照名称进行装配的。
@Resource 注解要求提供一个 Bean 名称的属性,若该属性为空,则自动采用标注出的变量或方法名作为 Bean 的名称。
注意:不能标注于构造器。
4.@Inject 注解
和 @Autowire的 注解一样也是按照类型匹配注入的 Bean ,但是没有 required 属性。
5.最后,对比一下@Resource和@Autowired
(1)@Resource默认是按照名称来装配注入的,只有当找不到与名称匹配的bean才会按照类型来装配注入
(2)@Autowired默认是按照类型装配注入的,如果想按照名称来转配注入,则需要结合@Qualifier一起使用
(3)@Resource注解是又J2EE提供,而@Autowired是由spring提供,故若要减少系统对spring的依赖建议使用 @Resource的方式;
6.最最后,推荐使用 @Autowired 注解。

