.NET手撸绘制TypeScript类图——下篇
.NET手撸绘制TypeScript类图——下篇
在上篇的文章中,我们介绍了如何使用.NET解析TypeScript,这篇将介绍如何使用代码将类图渲染出来。
注:以防有人错过了,上篇链接如下:https://www.cnblogs.com/sdflysha/p/20191113-ts-uml-with-dotnet-1.html
类型定义渲染
不出意外,我们继续使用FlysEngine。虽然文字排版没做过,但不试试怎么知道好不好做呢?
正常实时渲染时,画一两行文字可能很容易,但绘制大量文字时,就需要引入一些排版操作了。为了实现排板,首先需要将ClassDef类扩充一下——干脆再加个RenderingClassDef类,包含一个ClassDef:
class RenderingClassDef
{
    public ClassDef Def { get; set; }

    public Vector2 Position { get; set; }

    public Vector2 Size { get; set; }

    public Vector2 Center => Position + Size / 2;
}
它包含了一些位置和大小信息,并提供了一个中间值的变量。之所以这样定义,因为这里存在了一些挺麻烦的过程,比如想想以下操作:
- 如果我想绘制放在中间的
类名,我就必须知道所有行的宽度 - 如果我想绘制边框,我也必须知道所有行的高度
还好Direct2D/DirectWrite提供了方块的文字宽度、高度计算属性,通过.Metrics即可获取。有了这个,排板过程中,我认为最难处理的是y坐标了,它是一个状态机,需要实时去更新、计算y坐标的位置,绘制过程如下:
foreach (var classDef in AllClass.Values)
{
    ctx.FillRectangle(new RectangleF(classDef.Position.X, classDef.Position.Y, classDef.Size.X, classDef.Size.Y), XResource.GetColor(Color.AliceBlue));

    var position = classDef.Position;
    List<TextLayout> lines =
        classDef.Def.Properties.OrderByDescending(x => x.IsPublic).Select(x => x.ToString())
        .Concat(new string[] { "" })
        .Concat(classDef.Def.Methods.OrderByDescending(m => m.IsPublic).Select(x => x.ToString()))
        .Select(x => XResource.TextLayouts[x, FontSize])
        .ToList();

    TextLayout titleLayout = XResource.TextLayouts[classDef.Def.Name, FontSize + 3];
    float width = Math.Max(titleLayout.Metrics.Width, lines.Max(x => x.Metrics.Width)) + MarginLR * 2;
    ctx.DrawTextLayout(new Vector2(position.X + (width - titleLayout.DetermineMinWidth()) / 2 + MarginLR, position.Y), titleLayout, XResource.GetColor(Color.Black));
    ctx.DrawLine(new Vector2(position.X, position.Y + titleLayout.Metrics.Height), new Vector2(position.X + width, position.Y + titleLayout.Metrics.Height), XResource.GetColor(TextColor), 2.0f);

    float y = lines.Aggregate(position.Y + titleLayout.Metrics.Height, (y, pt) =>
    {
        if (pt.Metrics.Width == 0)
        {
            ctx.DrawLine(new Vector2(position.X, y), new Vector2(position.X + width, y), XResource.GetColor(TextColor), 2.0f);
            return y;
        }
        else
        {
            ctx.DrawTextLayout(new Vector2(position.X + MarginLR, y), pt, XResource.GetColor(TextColor));
            return y + pt.Metrics.Height;
        }
    });
    float height = y - position.Y;

    ctx.DrawRectangle(new RectangleF(position.X, position.Y, width, height), XResource.GetColor(TextColor), 2.0f);
    classDef.Size = new Vector2(width, height);
}
请注意变量y的使用,我使用了一个LINQ中的Aggregate,实时的绘制并统计y变量的最新值,让代码简化了不少。
这里我又取巧了,正常文章排板应该是
x和y都需要更新,但这里每个定义都固定为一行,因此我不需要关心x的位置。但如果您想搞一些更骚的操作,如所有类型着个色,这时只需要同时更新x和y即可。
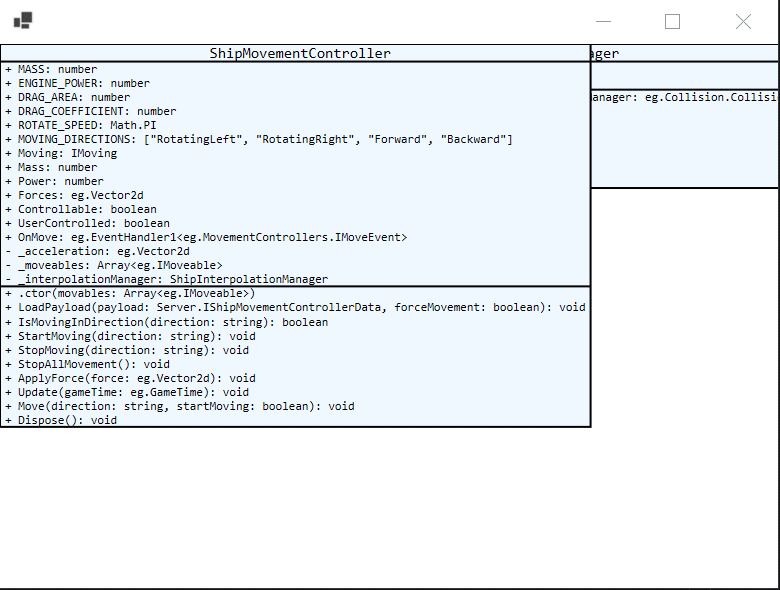
此时渲染出来效果如下:

可见类图可能太小,我们可能需要局部放大一点,然后类图之间产生了重叠,我们需要拖拽的方式来移动到正确位置。
放大和缩小
由于我们使用了Direct2D,无损的高清放大变得非常容易,首先我们需要定义一个变量,并响应鼠标滚轮事件:
Vector2 mousePos;
Matrix3x2 worldTransform = Matrix3x2.Identity;

protected override void OnMouseWheel(MouseEventArgs e)
{
    float scale = MathF.Pow(1.1f, e.Delta / 120.0f);
    worldTransform *= Matrix3x2.Scaling(scale, scale, mousePos);
}
其中魔术值1.1代表,鼠标每滚动一次,放大1.1倍。
另外mousePos变量由鼠标移动事件的X和Y坐标经worldTransform的逆变换计算而来:
protected override void OnMouseMove(MouseEventArgs e)
{
    mousePos = XResource.InvertTransformPoint(worldTransform, new Vector2(e.X, e.Y));
}
注意:
矩阵逆变换涉及一些高等数学中的线性代数知识,没必要立即掌握。只需知道矩阵变换可以变换点位置,矩阵逆变换可以恢复原点的位置。
在本文中鼠标移动的坐标是窗体提供的,换算成真实坐标,即需要进行“矩阵逆变换”——这在碰撞检测中很常见。
以防我有需要,我们还再加一个快捷键,按空格即可立即恢复缩放:
protected override void OnKeyUp(KeyEventArgs e)
{
    if (e.KeyCode == Keys.Space) worldTransform = Matrix3x2.Identity;
}
然后在OnDraw事件中,将worldTransform应用起来即可:
protected override void OnDraw(DeviceContext ctx)
{
    ctx.Clear(Color.White);
    ctx.Transform = worldTransform; // 重点
    // 其它代码...
}
运行效果如下(注意放大缩小时,会以鼠标位置为中心点进行):
碰撞检测和拖拽
拖拽而已,为什么会和碰撞检测有关呢?
这是因为拖拽时,必须知道鼠标是否处于元素的上方,这就需要碰撞检测了。
首先给RenderingClassDef方法加一个TestPoint()方法,判断是鼠标是否与绘制位置重叠,这里我使用了SharpDX提供的RectangleF.Contains(Vector2)方法,具体算法已经不用关心,调用函数即可:
class RenderingClassDef
{
    // 其它代码...
    public bool TestPoint(Vector2 point) => new RectangleF(Position.X, Position.Y, Size.X, Size.Y).Contains(point);
}
然后在OnDraw方法中,做一个判断,如果类方框与鼠标出现重叠,则画一个宽度2.0的红色的边框,代码如下:
if (classDef.TestPoint(mousePos))
{
    ctx.DrawRectangle(new RectangleF(classDef.Position.X, classDef.Position.Y, classDef.Size.X, classDef.Size.Y), XResource.GetColor(Color.Red), 2.0f);
}
测试效果如下(注意鼠标位置和红框):
碰撞检测做好,就能写代码拖拽了。要实现拖拽,首先需要在RenderingClassDef类中定义两个变量,用于保存其起始位置和鼠标起始位置,用于计算鼠标移动距离:
class RenderingClassDef
{
    // 其它定义...

    public Vector2? CapturedPosition { get; set; }

    public Vector2 OriginPosition { get; set; }
}
然后在鼠标按下、鼠标移动、鼠标松开时进行判断,如果鼠标按下时处于某个类的方框里面,则记录这两个起始值:
protected override void OnMouseDown(MouseEventArgs e)
{
    foreach (var item in this.AllClass.Values)
    {
        item.CapturedPosition = null;
    }

    foreach (var item in this.AllClass.Values)
    {
        if (item.TestPoint(mousePos))
        {
            item.CapturedPosition = mousePos;
            item.OriginPosition = item.Position;
            return;
        }
    }
}
如果鼠标移动时,且有类的方框处于有值的状态,则计算偏移量,并让该方框随着鼠标移动:
protected override void OnMouseMove(MouseEventArgs e)
{
    mousePos = XResource.InvertTransformPoint(worldTransform, new Vector2(e.X, e.Y));
    foreach (var item in this.AllClass.Values)
    {
        if (item.CapturedPosition != null)
        {
            item.Position = item.OriginPosition + mousePos - item.CapturedPosition.Value;
            return;
        }
    }
}
如果鼠标松开,则清除该记录值:
protected override void OnMouseUp(MouseEventArgs e)
{
    foreach (var item in this.AllClass.Values)
    {
        item.CapturedPosition = null;
    }
}
此时,运行效果如下:

类型间的关系
类型和类型之间是有依赖关系的,这也应该通过图形的方式体现出来。使用DeviceContext.DrawLine()方法即可画出线条,注意先画的会被后画的覆盖,因此这个foreach需要放在OnDraw方法的foreach语句之前:
foreach (var classDef in AllClass.Values)
{
    List<string> allTypes = classDef.Def.Properties.Select(x => x.Type).ToList();
    foreach (var kv in AllClass.Where(x => allTypes.Contains(x.Key)))
    {
        ctx.DrawLine(classDef.Center, kv.Value.Center, XResource.GetColor(Color.Gray), 2.0f);
    }
}
此时,运行效果如下:
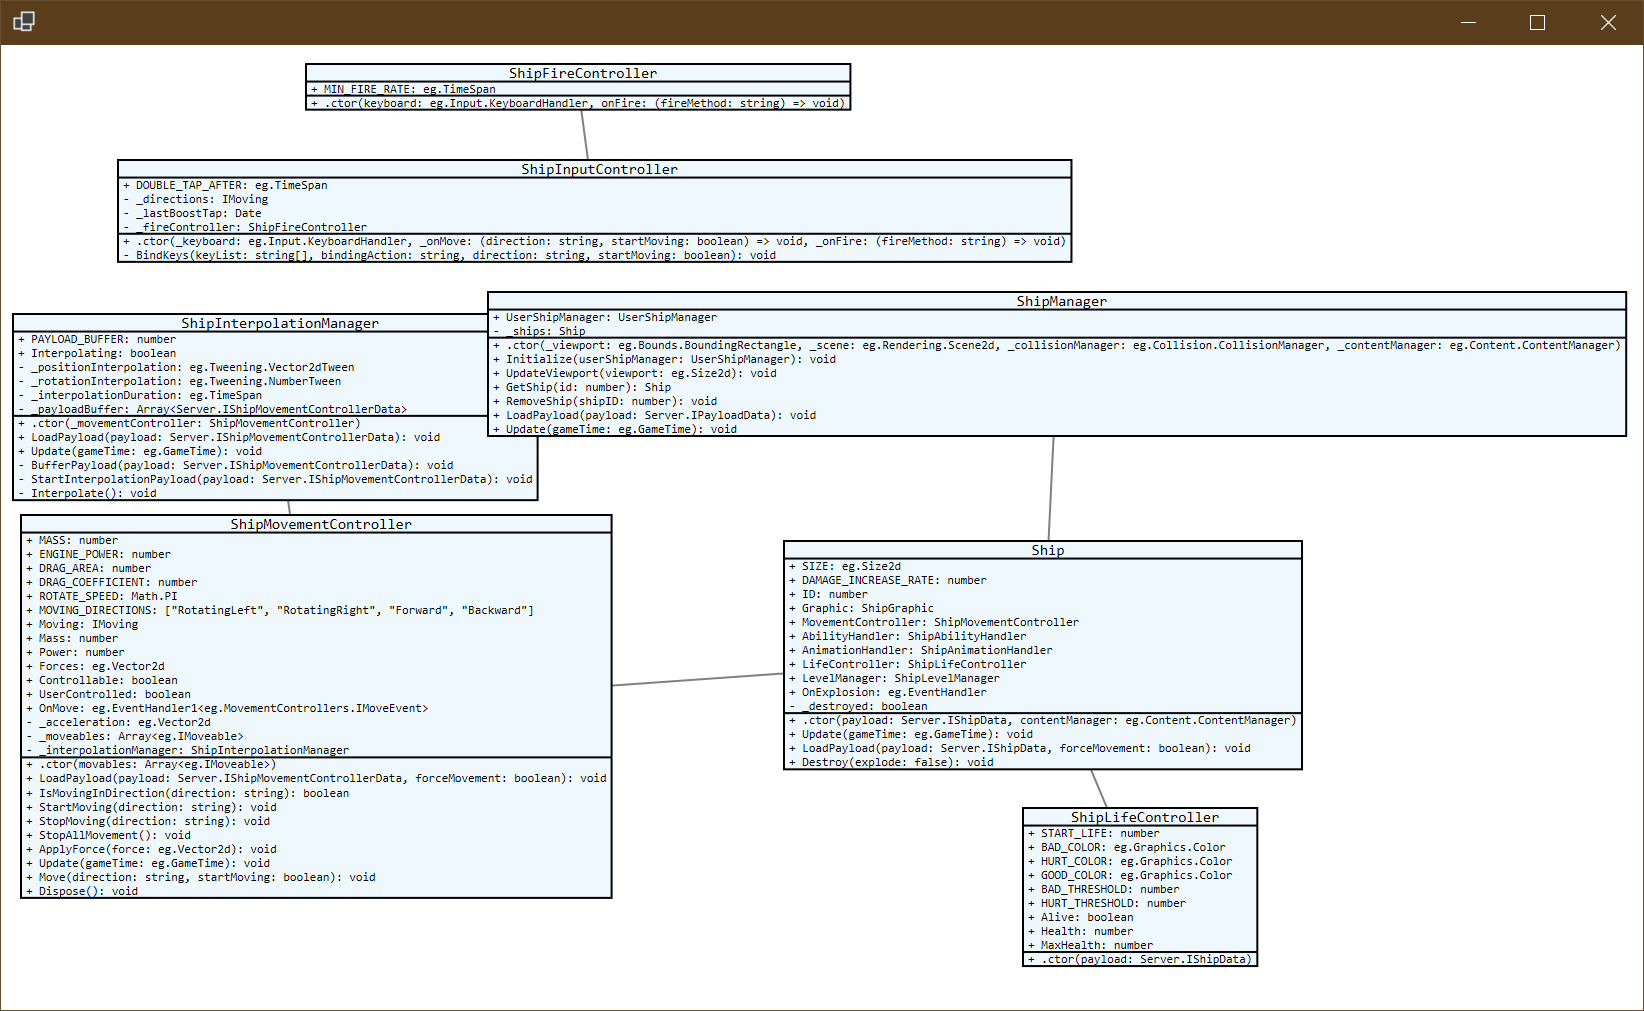
注意:在真正的
UML图中,除了依赖关系,继承关系也是需要体现的。而且线条是有箭头、且线条类型也是有讲究的,Direct2D支持自定义线条,这些都能做,权当留给各位自己去挑战尝试了。
方框顺序
现在我们不能决定哪个在前,哪个在后,想象中方框可能应该就像窗体一样,客户点击哪个哪个就应该提到最前,这可以通过一个ZIndex变量来表示,首先在RenderingClassDef类中加一个属性:
public int ZIndex { get; set; } = 0;
然后在鼠标点击事件中,判断如果击中该类的方框,则将ZIndex赋值为最大值加1:
protected override void OnClick(EventArgs e)
{
    foreach (var item in this.AllClass.Values)
    {
        if (item.TestPoint(mousePos))
        {
            item.ZIndex = this.AllClass.Values.Max(v => v.ZIndex) + 1;
        }
    }
}
然后在OnDraw方法的第二个foreach循环,改成按ZIndex从小到大排序渲染即可:
// 其它代码...
foreach (var classDef in AllClass.Values.OrderBy(x => x.ZIndex))
// 其它代码...
运行效果如下(注意我的鼠标点击和前后顺序):

总结
其实这是一个真实的需求,我们公司写代码时要求设计文档,通常我们都使用ProcessOn等工具来绘制,但前端开发者通过需要面对好几屏幕的类、方法和属性,然后弄将其名称、参数和类型一一拷贝到该工具中,这是一个需要极大耐心的工作。
“哪里有需求,哪里就有办法”,这个小工具也许能给我们的客户少许帮助,我正准备“说干就干”时——有人提醒我,我们的开发流程要先出文档,再写代码。所以……理论上不应该存在这种工具😂
但后来有一天,某同事突然点醒了我,“为什么不能有呢?这就叫Code First设计!”——是啊,Entity Framework也提供了Code First设计,很合理嘛,所以最后,就有了本篇文章😁。
本文所用到的完整代码,可以在我的Github仓库中下载:
https://github.com/sdcb/blog-data/tree/master/2019/20191113-ts-uml-with-dotnet
喜欢的朋友 请关注我的微信公众号:【DotNet骚操作】


