Core篇——初探Core的Http请求管道&&Middleware
目录:
1、Core 处理HTTP请求流程
2、中间件(Middleware)&&处理流程
3、创建自定义中间件&&模拟Core的请求管道
Core 处理HTTP请求流程
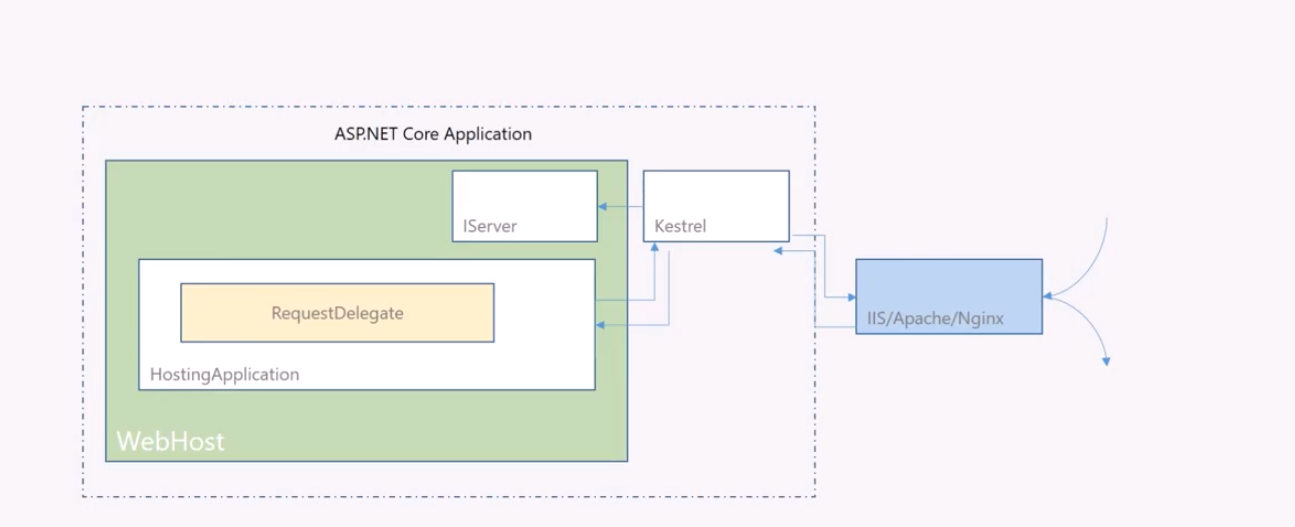
Http请求来到之后,会先由WebServer( 例如IIS,Nginx) 拿到然后丢给Kestrel WebServer,再有Kestrel 将Http请求封装为HttpContext后传入给.net core 请求管道(RequestDelegate)。HttpContext经过一系列middleware后返回response给WebServer。
中间件(Middleware)&&处理流程
微软官方文档给出的解释是这样的:中间件是加载在应用程序管道中以处理和相应请求的组件。其中每个组件都可以 选择是否可以将请求传递给管道中下一个组件;可以在调用管道的下一个组件之前或之后执行。下面是官方文档给出的一张图。

也就是说一个http请求的处理过程为,经过中间件1的处理逻辑(这个时候可以在中间件1中对httpcontext做一些处理,例如写入一段内容),调用next()方法,进入到中间件2中,重复以上步骤。最终,所有中间件的处理逻辑的输出结果都会叠加到HttpResponse中去。
.net core 中有三种方式调用中间件。在StartUp的Configure方法中,分别可以调用app.Use(),app.Run(),app.Map() 来调用中间件。接下来让我们来看下:
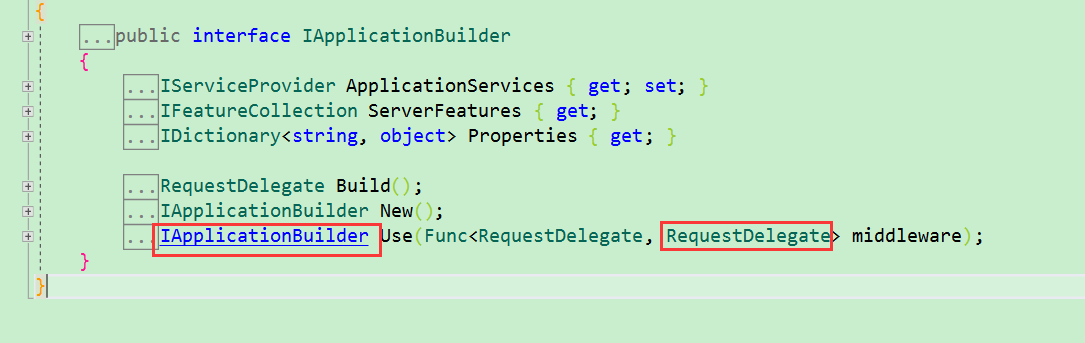
app.Use方法有两个重载形式:


第一个方法接收一个中间件,第二个方法接收一个上下文和一个中间件。让我们来分别调用下:
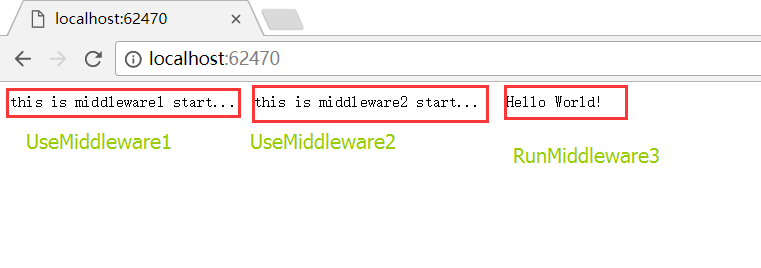
 1             app.Use(next =>
 2             {
 3                 return context =>
 4                 {
 5                     context.Response.WriteAsync("this is middleware1 start...  ");
 6                     return next(context);
 7                 };
 8             });
 9             app.Use(async (context, next) =>
10             {
11                 await context.Response.WriteAsync("this is middleware2 start...   ");
12                 await next();
13             });
app.Run方法会终止管道,返回HttpResponse。在我们Configure方法中,默认最后一个方法就是app.Run 输出一句HelloWorld ,如下图

Use和Run都比较简单,不再详细介绍了。来看一眼程序运行结果:
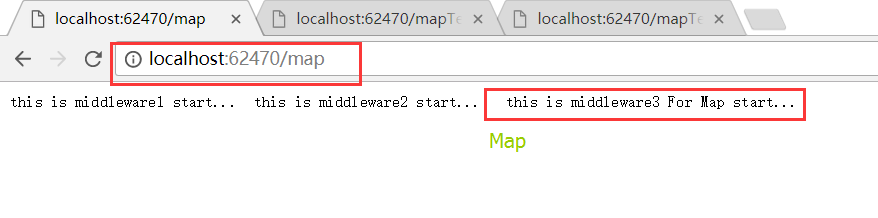
app.Map 方法用来构建分支管线,它会启用一个新的ApplicationBuilder。Map根据请求的路径来匹配分支管线。Map方法也可以根据不同的PathString来匹配多个分支管线或嵌套匹配。
            app.Map("/task", build =>
            {
                build.Run(async (context) =>
                {
                    await context.Response.WriteAsync("this is middleware3 For Map start...  ");
                });
            });
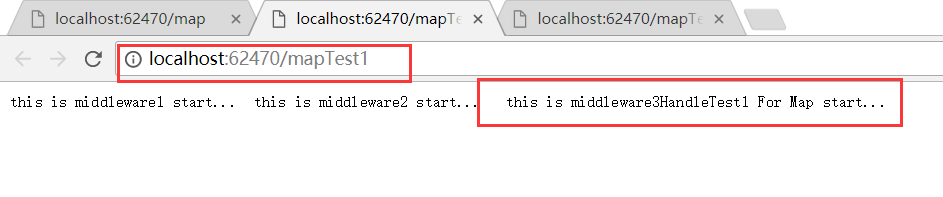
1             app.Map("/map", build =>
2             {
3                 build.Map("/mapTest2", MapHandleTest2);
4                 build.Run(async (context) =>
5                 {
6                     await context.Response.WriteAsync("this is middleware3 For Map start...  ");
7                 });
8             });
9             app.Map("/mapTest1", MapHandleTest1);
 1         private void MapHandleTest1(IApplicationBuilder applicationBuilder)
 2         {
 3             applicationBuilder.Run(async context =>
 4             {
 5                 await context.Response.WriteAsync("this is middleware3HandleTest1 For Map start...  ");
 6             });
 7         }
 8         private void MapHandleTest2(IApplicationBuilder applicationBuilder)
 9         {
10             applicationBuilder.Run(async context =>
11             {
12                 await context.Response.WriteAsync("this is middleware3HandleTest2 For Map start...  ");
13             });
14         }

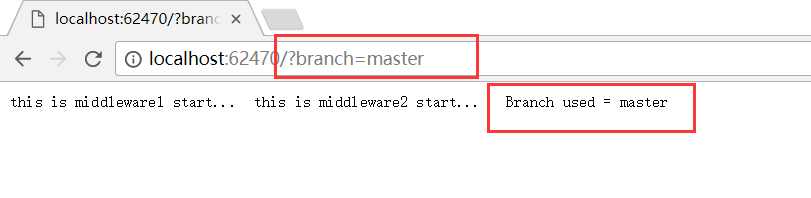
Map还有个特殊的方法,MapWhen, 它接收一个Func<HttpContext, bool>的参数,可以根据Http请求上下文做一些逻辑判断。然后继续执行管道
1             app.MapWhen(context => context.Request.Query.ContainsKey("branch"),
2                 build =>
3                     build.Run(async context =>
4                     {
5                         var branchVer = context.Request.Query["branch"];
6                         await context.Response.WriteAsync($"Branch used = {branchVer}");
7                     })
8                 );
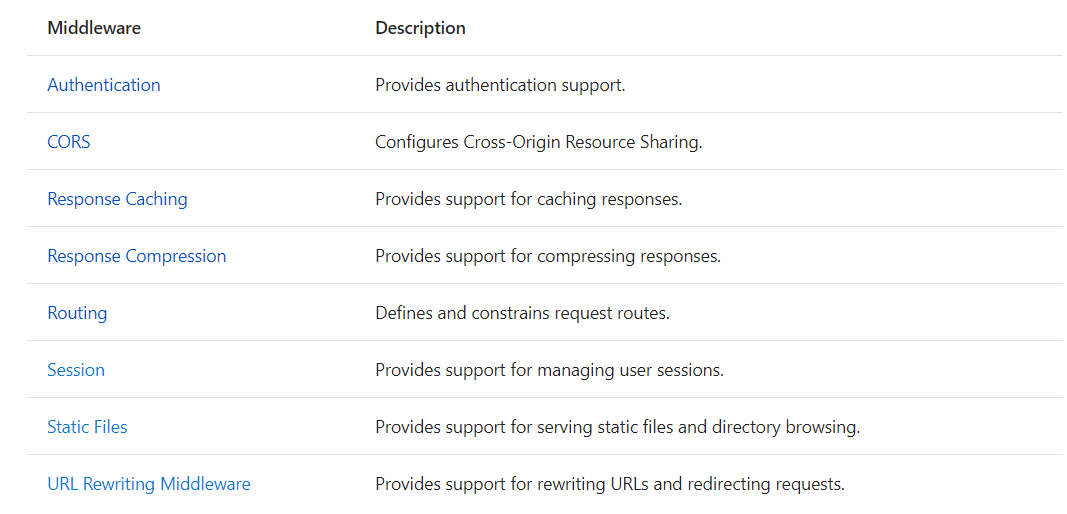
 ,这里再贴张.net core 自带的中间件
创建自定义中间件&&模拟Core的请求管道
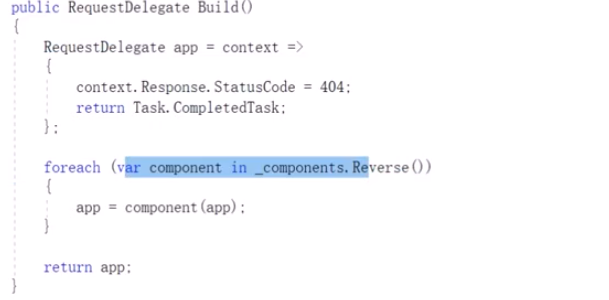
管道的实现机制由ApplicationBuilder 和 RequestDelegate 组成。RequestDelegate是Middleware的核心,Use方法会将RequestDelegate加入到ApplicationBuilder 中去,最后执行Build方法,把所有RequestDelegate reverse之后挨个执行一遍。

接下来编写一个自定义的Middleware。
    public class RequestTestMiddleware
    {
        private readonly RequestDelegate _next;     //中间件核心RequestDelegate,_next 表示执行下一个中间件。
        public RequestTestMiddleware(RequestDelegate next)
        {
            _next = next;
        }
        public Task Invoke(HttpContext context)
        {
            context.Response.WriteAsync("hello this is my RequestTestMiddleware");
            return _next(context);                 //覆盖delegate 的Inboke方法,将http上下文传入下一个中间件
        }
    }

    public static class RequestTestMiddlewareExtensions
    {
        public static IApplicationBuilder UseRequestTest(this IApplicationBuilder builder)      //使用扩展方法使我们的中间件对外开放。
        {
            return builder.UseMiddleware<RequestTestMiddleware>();  //将我们中间件加入到IApplicationBuilder中去。
        }
    }
  //在StartUp 中使用我们的自定义中间件。
    app.UseRequestTest();

Http请求管道的模拟构建


 1     /// <summary>
 2     /// 拿到请求上下文,返回一个委托
 3     /// </summary>
 4     /// <param name="contex"></param>
 5     /// <returns></returns>
 6     public delegate Task RequestDelegate(Context contex);
 7     /// <summary>
 8     /// 模拟http请求上下文
 9     /// </summary>
10     public class Context
11     {
12
13     }
 1         public static IList<Func<RequestDelegate, RequestDelegate>> _list = new
 2             List<Func<RequestDelegate, RequestDelegate>>();
 3         static void Main(string[] args)
 4         {
 5             Use(next =>                                 //加入中间件1
 6             {
 7                 return context =>
 8                 {
 9                     Console.WriteLine("this is use middleware1");
10                     return next.Invoke(context);
11                 };
12             });
13             Use(next =>                               //加入中间件2
14             {
15                 return context =>
16                 {
17                     Console.WriteLine("this is use middleware2");
18                     return next.Invoke(context);
19                 };
20             });
21             RequestDelegate end = context =>
22             {
23                 Console.WriteLine("this is end...");        //管道
24                 return Task.CompletedTask;
25             };
26             _list.Reverse();
27             foreach (var middleware in _list)
28             {
29                 end = middleware.Invoke(end);
30             }
31             end.Invoke(new Context());              //实例化一个上下文实例
32             Console.ReadLine();
33         }
34         /// <summary>
35         /// 将middleware 加入到list(applicationbuilder)中
36         /// </summary>
37         public static void Use(Func<RequestDelegate, RequestDelegate> iMiddleware)
38         {
39             _list.Add(iMiddleware);
40         }

Jesse博客学习笔记。传送门=》 http://video.jessetalk.cn/

 浙公网安备 33010602011771号