

环境交代:
172.18.47.91 master
172.18.47.92 node1
172.18.47.93 node2
1 关闭防火墙 关闭selinux
[root@localhost ~]# systemctl stop firewalld
[root@localhost ~]# setenforce  0
禁用swap内存交换
swapoff -a
echo "swapoff -a" >>/etc/rc.d/rc.local
chmod +x /etc/rc.d/rc.local
#或开机禁用swap: 编辑/etc/fstab --> 注释掉swap 分区
配置iptable管理ipv4/6请求
[root@localhost ~]# cat /etc/sysctl.d/k8s.conf
net.bridge.bridge-nf-call-ip6tables = 1
net.bridge.bridge-nf-call-iptables = 1
在 /etc/sysctl.conf 中 设置 net.ipv4.ip_forward=1,开启路由功能。
[root@localhost ~]# sysctl --system
2 修改主机名
[root@localhost ~]# hostnamectl set-hostname k8s-master
[root@localhost ~]# hostnamectl set-hostname k8s-node1
[root@localhost ~]# hostnamectl set-hostname k8s-node2
编辑hosts文件
[root@localhost ~]# cat /etc/hosts
127.0.0.1   localhost localhost.localdomain localhost4 localhost4.localdomain4
::1         localhost localhost.localdomain localhost6 localhost6.localdomain6
172.18.47.90 k8s-master
172.18.47.91 k8s-node1
172.18.47.92 k8s-node2
3 安装docker
查询可用版本
yum list docker-ce --showduplicates | sort -r
[root@localhost ~]# wget https://mirrors.aliyun.com/docker-ce/linux/centos/docker-ce.repo -O /etc/yum.repos.d/docker-ce.repo
[root@localhost ~]# yum -y install docker-ce-18.06.3.ce-3.el7
[root@localhost ~]# systemctl enable docker && systemctl start docker
docker 镜像加速:
[root@k8s-master ~]# vim /etc/docker/daemon.json

{
    "exec-opts": ["native.cgroupdriver=systemd"],
    "log-driver": "json-file",
    "log-opts": {
    "max-size": "100m"
    },
    "storage-driver": "overlay2",
    "registry-mirrors":[
        "https://kfwkfulq.mirror.aliyuncs.com",
        "https://2lqq34jg.mirror.aliyuncs.com",
        "https://pee6w651.mirror.aliyuncs.com",
        "http://hub-mirror.c.163.com",
        "https://docker.mirrors.ustc.edu.cn",
        "https://registry.docker-cn.com"
    ]
}
[root@localhost ~]# docker --version
Docker version 18.06.3, build 633a0ea
4 编辑k8s yum源
[root@localhost ~]# cat /etc/yum.repos.d/kubernets.repo
[kubernetes]
name=Kubernetes
baseurl=https://mirrors.aliyun.com/kubernetes/yum/repos/kubernetes-el7-x86_64
enabled=1
gpgcheck=0
repo_gpgcheck=0
gpgkey=https://mirrors.aliyun.com/kubernetes/yum/doc/yum-key.gpg https://mirrors.aliyun.com/kubernetes/yum/doc/rpm-package-key.gpg
yum install kubelet-1.15.5 kubeadm-1.15.5 kubectl-1.15.5
kubelet是Master在Node节点上的Agent .运行在集群所有的节点上,负责启动pod和容器
[root@localhost ~]# systemctl enable kubelet
5 初始化集群
master节点上操作:比较费时间
[root@localhost ~]# kubeadm init --apiserver-advertise-address=172.18.47.90 --image-repository registry.aliyuncs.com/google_containers --kubernetes-version v1.15.5 --service-cidr=10.1.0.0/16 --pod-network-cidr=10.244.0.0/16
当出现下面的内容说明你的集群初始化好了
Your Kubernetes control-plane has initialized successfully!

To start using your cluster, you need to run the following as a regular user:

  mkdir -p $HOME/.kube
  sudo cp -i /etc/kubernetes/admin.conf $HOME/.kube/config
  sudo chown $(id -u):$(id -g) $HOME/.kube/config

You should now deploy a pod network to the cluster.
Run "kubectl apply -f [podnetwork].yaml" with one of the options listed at:
  https://kubernetes.io/docs/concepts/cluster-administration/addons/

Then you can join any number of worker nodes by running the following on each as root:

kubeadm join 172.18.47.90:6443 --token 9zazdr.rv4son42i1a71zhh \
    --discovery-token-ca-cert-hash sha256:6b0832857ca0e5b85c95a6ab8167563397d2e312e1ecfde9e89d42676f474ffd
master上执行
mkdir -p $HOME/.kube
  sudo cp -i /etc/kubernetes/admin.conf $HOME/.kube/config
  sudo chown $(id -u):$(id -g) $HOME/.kube/config
将node节点加入集群(node节点上执行)
kubeadm join 172.18.47.90:6443 --token 9zazdr.rv4son42i1a71zhh \
    --discovery-token-ca-cert-hash sha256:6b0832857ca0e5b85c95a6ab8167563397d2e312e1ecfde9e89d42676f474ffd
当出现以下内容说明node节点加入了集群中
This node has joined the cluster:
* Certificate signing request was sent to apiserver and a response was received.
* The Kubelet was informed of the new secure connection details.

Run 'kubectl get nodes' on the control-plane to see this node join the cluster.
6 查看集群节点状态(master上执行)
[root@localhost ~]# kubectl get nodes
NAME         STATUS     ROLES    AGE     VERSION
k8s-master   NotReady   master   13m     v1.15.5
k8s-node1    NotReady   <none>   5m16s   v1.15.5
k8s-node2    NotReady   <none>   107s    v1.15.5
状态为NotReady
查看日志:[root@k8s-master ~]# journalctl -f -u kubelet
1月 04 08:59:59 k8s-master kubelet[12978]: W0104 08:59:59.412423   12978 cni.go:213] Unable to update cni config: No networks found in /etc/cni/net.d
1月 04 09:00:01 k8s-master kubelet[12978]: E0104 09:00:01.770601   12978 kubelet.go:2173] Container runtime network not ready: NetworkReady=false reason:NetworkPluginNotReady message:docker: network plugin is not ready: cni config uninitialized
报错信息显示容器运行时需要的网络环境没有准备好!
7 安装k8s 的网络组件 Falnnel
https://github.com/coreos/flannel/blob/master/Documentation/kube-flannel.yml
[root@docker-server1 ~]# wget https://raw.githubusercontent.com/coreos/flannel/master/Documentation/kube-flannel.yml
[root@k8s-master ~]# kubectl apply -f kube-flannel.yml
podsecuritypolicy.policy/psp.flannel.unprivileged created clusterrole.rbac.authorization.k8s.io/flannel created clusterrolebinding.rbac.authorization.k8s.io/flannel created serviceaccount/flannel created configmap/kube-flannel-cfg created daemonset.apps/kube-flannel-ds-amd64 created daemonset.apps/kube-flannel-ds-arm64 created daemonset.apps/kube-flannel-ds-arm created daemonset.apps/kube-flannel-ds-ppc64le created daemonset.apps/kube-flannel-ds-s390x created
8 安装完falneel 网络插件,过上几分钟后,再次查看集群状态,已经变成了ready。
[root@k8s-master ~]# kubectl get nodes
NAME         STATUS   ROLES    AGE     VERSION
k8s-master   Ready    master   2d22h   v1.15.5
k8s-node1    Ready    <none>   2d22h   v1.15.5
k8s-node2    Ready    <none>   2d22h   v1.15.5
本地也多一个虚拟网络
flannel.1: flags=4163<UP,BROADCAST,RUNNING,MULTICAST>  mtu 1450
        inet 10.244.0.0  netmask 255.255.255.255  broadcast 0.0.0.0
        inet6 fe80::74b1:34ff:fec4:8896  prefixlen 64  scopeid 0x20<link>
        ether 76:b1:34:c4:88:96  txqueuelen 0  (Ethernet)
        RX packets 0  bytes 0 (0.0 B)
        RX errors 0  dropped 0  overruns 0  frame 0
        TX packets 0  bytes 0 (0.0 B)
        TX errors 0  dropped 8 overruns 0  carrier 0  collisions 0
9 安装 dashboard
下载yaml 文件 安装版本为v1.10.1
[root@k8s-master k8s_ui]# wget https://raw.githubusercontent.com/kubernetes/dashboard/v1.10.1/src/deploy/recommended/kubernetes-dashboard.yaml
kubectl apply -f kubernetes-dashboard.yaml
[root@k8s-master k8s_ui]# kubectl apply -f kubernetes-dashboard.yaml
secret/kubernetes-dashboard-certs created
serviceaccount/kubernetes-dashboard created
role.rbac.authorization.k8s.io/kubernetes-dashboard-minimal created
rolebinding.rbac.authorization.k8s.io/kubernetes-dashboard-minimal created
deployment.apps/kubernetes-dashboard created
service/kubernetes-dashboard created
查看资源运行状态
-A, --all-namespaces
-o, --output 输出格式
[root@k8s-master k8s_ui]# kubectl get pod -A -o wide|grep dash
kube-system   kubernetes-dashboard-7d75c474bb-7rm44   0/1     ImagePullBackOff   0          3m17s   10.244.1.2     k8s-node1    <none>           <none>
显示镜像下载失败
删除掉之前部署的资源
[root@k8s-master k8s_ui]# kubectl  delete -f kubernetes-dashboard.yaml
secret "kubernetes-dashboard-certs" deleted
serviceaccount "kubernetes-dashboard" deleted
role.rbac.authorization.k8s.io "kubernetes-dashboard-minimal" deleted
rolebinding.rbac.authorization.k8s.io "kubernetes-dashboard-minimal" deleted
deployment.apps "kubernetes-dashboard" deleted
service "kubernetes-dashboard" deleted
修改yaml文件,使用阿里云的镜像
[root@k8s-master k8s_ui]# vim kubernetes-dashboard.yaml
spec:
      containers:
      - name: kubernetes-dashboard
        #image: k8s.gcr.io/kubernetes-dashboard-amd64:v1.10.1
        image: registry.cn-hangzhou.aliyuncs.com/google_containers/kubernetes-dashboard-amd64:v1.10.1
        ports:
        - containerPort: 8443
          protocol: TCP
# ------------------- Dashboard Service ------------------- #

kind: Service
apiVersion: v1
metadata:
  labels:
    k8s-app: kubernetes-dashboard
  name: kubernetes-dashboard
  namespace: kube-system
spec:
  type: NodePort
  ports:
    - port: 443
      targetPort: 8443
  selector:
    k8s-app: kubernetes-dashboard
再次查看资源运行状态 随机部署在node1上了
[root@k8s-master k8s_ui]# kubectl get pod -A -o wide|grep dash
kube-system   kubernetes-dashboard-86844cc55f-8bdfn   1/1     Running   0          4m49s   10.244.1.3     k8s-node1    <none>           <none>
[root@k8s-master k8s_ui]# kubectl get svc -A -o wide|grep dash
kube-system   kubernetes-dashboard   NodePort    10.1.206.102   <none>        443:31760/TCP            3m46s   k8s-app=kubernetes-dashboard
创建登录用户
serviceaccount:创建一个指定名称的 service account
[root@k8s-master ~]# kubectl  create serviceaccount --help
Create a service account with the specified name.

Aliases:
serviceaccount, sa

Examples:
  # Create a new service account named my-service-account
  kubectl create serviceaccount my-service-account
clusterrolebinding:为一个指定的 ClusterRole 创建一个 ClusterRoleBinding
[root@k8s-master ~]# kubectl  create clusterrolebinding --help
Create a ClusterRoleBinding for a particular ClusterRole.

Examples:
  # Create a ClusterRoleBinding for user1, user2, and group1 using the cluster-admin ClusterRole
  kubectl create clusterrolebinding cluster-admin --clusterrole=cluster-admin --user=user1 --user=user2 --group=group1
执行以下两条命令创建登录用户:dashboard-admin
[root@k8s-master ~]# kubectl create serviceaccount dashboard-admin -n kube-system
serviceaccount/dashboard-admin created
[root@k8s-master ~]# kubectl create clusterrolebinding dashboard-admin --clusterrole=cluster-admin --serviceaccount=kube-system:dashboard-admin
clusterrolebinding.rbac.authorization.k8s.io/dashboard-admin created
生成登录秘钥:
[root@k8s-master k8s_ui]# kubectl describe secrets -n kube-system $(kubectl -n kube-system get secret | awk '/dashboard-admin/{print $1}')
秘钥信息:
ca.crt: 1025 bytes
namespace: 11 bytes
token: eyJhbGciOiJSUzI1NiIsImtpZCI6IiJ9.eyJpc3MiOiJrdWJlcm5ldGVzL3NlcnZpY2VhY2NvdW50Iiwia3ViZXJuZXRlcy5pby9zZXJ2aWNlYWNjb3VudC9uYW1lc3BhY2UiOiJrdWJlLXN5c3RlbSIsImt1YmVybmV0ZXMuaW8vc2VydmljZWFjY291bnQvc2VjcmV0Lm5hbWUiOiJkYXNoYm9hcmQtYWRtaW4tdG9rZW4td2I5ZnAiLCJrdWJlcm5ldGVzLmlvL3NlcnZpY2VhY2NvdW50L3NlcnZpY2UtYWNjb3VudC5uYW1lIjoiZGFzaGJvYXJkLWFkbWluIiwia3ViZXJuZXRlcy5pby9zZXJ2aWNlYWNjb3VudC9zZXJ2aWNlLWFjY291bnQudWlkIjoiOWQzYzRjOGUtYWY0Ny00ZWYxLWIwNTgtMTM2MTcxYzQyNmZiIiwic3ViIjoic3lzdGVtOnNlcnZpY2VhY2NvdW50Omt1YmUtc3lzdGVtOmRhc2hib2FyZC1hZG1pbiJ9.n8ZLmSY1ASiLubpAG1LN6u9G4u_liKedr7LWpo3aQkF9w3Cb2NcpsaHQA8uyB0f84JKrdAWXvhxM7ujmWgoukeOaNM_WGTPgTFqTgT5bnrPqDpLe_r0rM6RZjnjTqtiJbjI4YwlIe6oTV87YnXZ7iHgTGw7BE5WsgoDlHJfnCwapT9O3iWgSsoLHWXGv4F0VymL-5RD3VR313RHN66gkCZPy8VLk-Cfg7xRBCMPfIU_DCP_ZdJRkXWHNYzYLr06QRZ9WFhgm1kqv23FfpSLjIE0akymUlpmFv5B9_RQouqM3btPQ4zuQQwm8jAydB-08QEJkMgfJpnPY1z3-x04h5Q
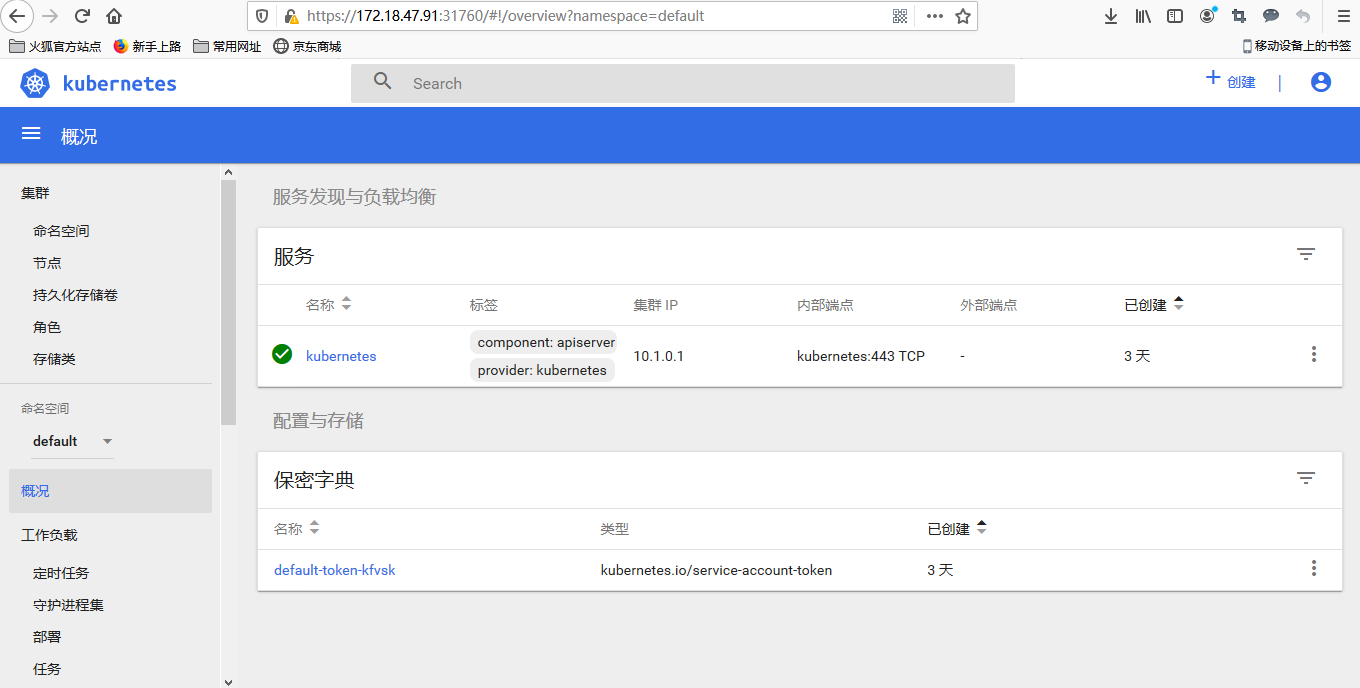
10 输入token信息,然后浏览器登录
########### 解决google浏览器不能访问dashboard页面 https://IP:30389 #########
#拷贝api证书充当dashboard的证书签名, 删除默认它的证书
cp /etc/kubernetes/pki/{apiserver.crt,apiserver.key} .
kubectl delete secret kubernetes-dashboard-certs -n kube-system
kubectl create secret generic kubernetes-dashboard-certs --from-file=./ -n kube-system
#修改dashboard.yaml,配置生成自定义证书(修改args内容)
- --auto-generate-certificates
- --tls-key-file=apiserver.key
- --tls-cert-file=apiserver.crt
#重启dashboard
kubectl apply -f kubernetes-dashboard.yaml
