BERT实战——基于Keras
keras_bert 和 kert4keras
keras_bert 是 CyberZHG 大佬封装好了Keras版的Bert,可以直接调用官方发布的预训练权重。
github:https://github.com/CyberZHG/keras-bert
快速安装:pip install keras-bert
kert4keras 是 苏剑林 大佬参考 keras-bert 重新编写的一个 keras 版的 bert,所以使用体验差不多,但 kert4keras 可以适配 albert
github:https://github.com/bojone/bert4keras
快速安装:pip install git+https://www.github.com/bojone/bert4keras.git
keras_bert
Tokenizer
在 keras-bert 里面,使用 Tokenizer 会将文本拆分成字并生成相应的id。
我们需要提供一个字典,字典存放着 token 和 id 的映射。字典里还有 BERT 里特别的 token。
[CLS],[SEP],[UNK]等
在下面的示例中,如果文本拆分出来的字在字典不存在,它的 id 会是 5,代表 [UNK],即 unknown
from keras_bert import Tokenizer
#字典
token_dict = {
    '[CLS]': 0,
    '[SEP]': 1,
    'un': 2,
    '##aff': 3,
    '##able': 4,
    '[UNK]': 5,
}

tokenizer = Tokenizer(token_dict)

# 拆分单词实例
print(tokenizer.tokenize('unaffable'))
# ['[CLS]', 'un', '##aff', '##able', '[SEP]']

# indices是字对应索引
# segments表示索引对应位置上的字属于第一句话还是第二句话
# 这里只有一句话 unaffable,所以segments都是0
indices, segments = tokenizer.encode('unaffable')
print(indices)
# [0, 2, 3, 4, 1]
print(segments)
# [0, 0, 0, 0, 0]
我们用同样的字典,拆分不存在 字典 中的单词,结果如下,可以看到英语中会直接把不存在字典中的部分直接按字母拆分。
print(tokenizer.tokenize('unknown'))
# ['[CLS]', 'un', '##k', '##n', '##o', '##w', '##n', '[SEP]']

indices, segments = tokenizer.encode('unknown')
# [0, 2, 5, 5, 5, 5, 5, 1]
# [0, 0, 0, 0, 0, 0, 0, 0]
下面是输入两句话的例子,encode 函数中 我们可以带上参数 max_len,只看文本拆分出来的 max_len 个字
如果拆分完的字不超过max_len,则用 0 填充
print(tokenizer.tokenize(first='unaffable', second='钢'))
# ['[CLS]', 'un', '##aff', '##able', '[SEP]', '钢', '[SEP]']
indices, segments = tokenizer.encode(first='unaffable', second='钢', max_len=10)
print(indices)
# [0, 2, 3, 4, 1, 5, 1, 0, 0, 0]
print(segments)
# [0, 0, 0, 0, 0, 1, 1, 0, 0, 0]
注意这个 max_len 包括 BERT 中的特殊 token,比如下面的代码
tokenizer.encode('unaffable', max_len=3)
# [0, 2, 1]
我们得到的结果是 [0, 2, 1],0 和 1 分别代表 [CLS] 和 [SEP]
模型的训练和使用
函数介绍
keras_bert 中我们可以使用 get_model() 来取得 BERT 模型,它有以下参数可供选择
- token_num:token 的数量
- pos_num:最大 position 。默认512
- seq_len:输入序列的最大长度,为 None 时不限制。默认512
- embed_dim:嵌入维度,默认768
- transformer_num:transformer的个数,默认12
- head_num:每个 transformer 中 multi-head attention 中 heads 的个数,默认12
- feed_forward_dim:每个 transformer 中 feed-forward 层的维度,默认3072
- dropout_rate:dropout 的概率
- attention_activation:attention 层的激活函数
- feed_forward_activation:feed forward 层使用的激活函数,默认是gelu
- training:如果为True,则将返回带有 MLM 和 NSP输出的模型;否则,将返回输入层和最后一个特征提取层。默认 True
- trainable:模型是否是可训练的,默认和 training 一样的设置
- output_layer_num:多少个FeedForward-Norm层的输出被连接为单个输出。仅在 training 为 False 时可用。默认1
- use_task_embed:是否将 task embedding 加到现有的 embedding 中,默认 False
- task_num:任务数,默认10
- use_adapter:是否在每个残差网络前使用 feed-forward adapter,默认 False
- adapter_units:feed-forward adapter 中第一个 transformation 的维度
关于adapter可以参考这篇论文:https://arxiv.org/pdf/1902.00751.pdf
gen_batch_inputs() 函数可以产生我们用于训练的数据,可用参数如下
- sentence_pairs:列表,这个包含了许多 token 组成的句子对。
- token_dict:包括 BERT 所用的特殊符号在内的字典
- token_list:包括所有 token 的列表
- seq_len:序列的长度,默认512
- mask_rate:随机 token 被替换为 [MASK] 的概率,然后预测这个被替换的 token。默认0.15
- mask_mask_rate:如果一个 token 要被替换为 [MASK],真正替换为 [MASK] 的概率。默认0.8
- mask_random_rate:如果一个 token 要被替换为 [MASK],替换成一个随机的 token。默认0.1
- swap_sentence_rate:交换第一个句子和第二个句子的概率。默认0.5
- force_mask:至少一个位置的 token 被 masked,默认 True
compile_model() 函数用来编译我们的模型,可用参数如下
- model:要编译的模型
- weight_decay:权重衰减率,默认0.01
- decay_steps:学习率会在这个步长中线性衰减至0,默认100000
- warmup_steps:学习率会在预热步长中线性增长到设置的学习率,默认10000
- learning_rate:学习率,默认1e-4
warmup可以参考这篇文章:https://yinguobing.com/tensorflowzhong-de-xue-xi-lu-re-shen/
当step小于warm up setp时,学习率等于基础学习率×(当前step/warmup_step),由于后者是一个小于1的数值,因此在整个warm up的过程中,学习率是一个递增的过程!当warm up结束后,学习率开始递减。
load_trained_model_from_checkpoint() 函数用来加载官方训练好的模型,可用参数如下
- config_file:JSON 配置文件路径
- checkpoint_file:checkpoint 文件路径
- training:True 的话,会返回整个模型,否则会忽略 MLM 和 NSP 部分。默认 False
- trainable:模型是否可训练,默认和 training 设置一样
- output_layer_num:多少个FeedForward-Norm层的输出被连接为单个输出。仅在 training 为 False 时可用。默认1
- seq_len:如果这个数值比配置文件中的长度小,position embeddings 会被切成适用于这个长度。默认1e9
构建和训练模型
这个例子里面,我们的不用 Tokenizer 将文本拆分成 “字”,而是使用 “词” 级别作为模型的输入
这里跟 keras 的文本处理很像,可以参考下面这篇文章
用keras_bert进行情感分析的实例可以参考下面的文章
import keras
from keras_bert import get_base_dict, get_model, compile_model, gen_batch_inputs


# 输入示例
sentence_pairs = [
    [['all', 'work', 'and', 'no', 'play'], ['makes', 'jack', 'a', 'dull', 'boy']],
    [['from', 'the', 'day', 'forth'], ['my', 'arm', 'changed']],
    [['and', 'a', 'voice', 'echoed'], ['power', 'give', 'me', 'more', 'power']],
]

# 构建 token 字典
# 这个字典存放的是【词】
token_dict = get_base_dict()
# get_base_dict()返回一个字典
# 字典预置了一些特殊token,具体内容如下
# {'': 0, '[UNK]': 1, '[CLS]': 2, '[SEP]': 3, '[MASK]': 4}
for pairs in sentence_pairs:
    for token in pairs[0] + pairs[1]:
        if token not in token_dict:
            token_dict[token] = len(token_dict)
# token_dict 是由词组成的字典,大致如下
# {'': 0, '[UNK]': 1, '[CLS]': 2, '[SEP]': 3, '[MASK]': 4, 'all': 5, 'work': 6,..., 'me': 26, 'more': 27}

token_list = list(token_dict.keys())


# 构建和训练模型
model = get_model(
    token_num=len(token_dict),
    head_num=5,
    transformer_num=12,
    embed_dim=25,
    feed_forward_dim=100,
    seq_len=20,
    pos_num=20,
    dropout_rate=0.05,
)
compile_model(model)
model.summary()

def _generator():
    while True:
        yield gen_batch_inputs(
            sentence_pairs,
            token_dict,
            token_list,
            seq_len=20,
            mask_rate=0.3,
            swap_sentence_rate=1.0,
        )

model.fit_generator(
# 这里测试集和验证集使用了同样的数据
# 实际中使用时不能这样
    generator=_generator(),
    steps_per_epoch=1000,
    epochs=100,
    validation_data=_generator(),
    validation_steps=100,
    callbacks=[
        keras.callbacks.EarlyStopping(monitor='val_loss', patience=5)
    ],
)


# 使用训练好的模型
# 取出 输入层 和 最后一个特征提取层
inputs, output_layer = get_model(
    token_num=len(token_dict),
    head_num=5,
    transformer_num=12,
    embed_dim=25,
    feed_forward_dim=100,
    seq_len=20,
    pos_num=20,
    dropout_rate=0.05,
    training=False,
    trainable=False,
    output_layer_num=4,
)
下载和使用预训练模型
参考地址:https://github.com/CyberZHG/keras-bert/tree/master/demo
我们可以使用 load_trained_model_from_checkpoint() 函数使用本地已经下载好的预训练模型,可以从 BERT 的 github 上获取下载地址
谷歌BERT地址:https://github.com/google-research/bert
中文预训练BERT-wwm:https://github.com/ymcui/Chinese-BERT-wwm
下面是使用预训练模型提取输入文本的特征
import os

# 设置预训练模型的路径
pretrained_path = 'chinese_L-12_H-768_A-12'
config_path = os.path.join(pretrained_path, 'bert_config.json')
checkpoint_path = os.path.join(pretrained_path, 'bert_model.ckpt')
vocab_path = os.path.join(pretrained_path, 'vocab.txt')

# 构建字典
# 也可以用 keras_bert 中的 load_vocabulary() 函数
# 传入 vocab_path 即可
# from keras_bert import load_vocabulary
# token_dict = load_vocabulary(vocab_path)
import codecs
token_dict = {}
with codecs.open(vocab_path, 'r', 'utf8') as reader:
    for line in reader:
        token = line.strip()
        token_dict[token] = len(token_dict)

# 加载预训练模型
from keras_bert import load_trained_model_from_checkpoint
model = load_trained_model_from_checkpoint(config_path, checkpoint_path)

# Tokenization
from keras_bert import Tokenizer

tokenizer = Tokenizer(token_dict)
text = '语言模型'
tokens = tokenizer.tokenize(text)
# ['[CLS]', '语', '言', '模', '型', '[SEP]']
indices, segments = tokenizer.encode(first=text, max_len=512)
print(indices[:10])
# [101, 6427, 6241, 3563, 1798, 102, 0, 0, 0, 0]
print(segments[:10])
# [0, 0, 0, 0, 0, 0, 0, 0, 0, 0]

# 提取特征
import numpy as np

predicts = model.predict([np.array([indices]), np.array([segments])])[0]
for i, token in enumerate(tokens):
    print(token, predicts[i].tolist()[:5])

下面我们用预训练模型预测句子中被 MASKED 掉的词语是什么
token_dict = {}
with codecs.open(vocab_path, 'r', 'utf8') as reader:
    for line in reader:
        token = line.strip()
        token_dict[token] = len(token_dict)

token_dict_rev = {v: k for k, v in token_dict.items()}

model = load_trained_model_from_checkpoint(config_path, checkpoint_path, training=True)

text = '数学是利用符号语言研究数量、结构、变化以及空间等概念的一门学科'
tokens = tokenizer.tokenize(text)
tokens[1] = tokens[2] = '[MASK]'# ['[CLS]', '[MASK]', '[MASK]', '是', '利',..., '学', '科', '[SEP]']

indices = np.array([[token_dict[token] for token in tokens] + [0] * (512 - len(tokens))])
segments = np.array([[0] * len(tokens) + [0] * (512 - len(tokens))])
masks = np.array([[0, 1, 1] + [0] * (512 - 3)])
predicts = model.predict([indices, segments, masks])[0].argmax(axis=-1).tolist()
print('Fill with: ', list(map(lambda x: token_dict_rev[x], predicts[0][1:3])))
# Fill with:  ['数', '学']
albert 和 keras4bert
使用示例:https://github.com/bojone/bert4keras/tree/master/examples
albert中文预训练模型:https://github.com/brightmart/albert_zh
基本使用
本文代码已不全部适用最新的bert4keras,部分函数名字、位置发生了变化。
keras4bert 是基于 keras-bert 重新编写的一个 keras 版的 bert,可以适配 albert,只需要在load_pretrained_model函数里加上albert=True。
使用体验和 keras_bert 差不多,下面是 github 提供的使用例子。
SimpleTokenizer是一个简单的分词器,直接将文本分割为单字符序列,专为中文处理设计,原则上只适用于中文模型。
load_pretrained_model 可用参数如下
- config_path:JSON 配置文件路径
- checkpoint_file:checkponit 文件路径
- with_mlm:是否包含 MLM 部分,默认 False
- seq2seq:True 则用来做seq2seq任务的Bert,默认 False
- keep_words:要保留的词ID列表
- albert:是否是 ALBERT 模型
from bert4keras.bert import load_pretrained_model
from bert4keras.utils import SimpleTokenizer, load_vocab
import numpy as np

config_path = './albert/albert_config_large.json'
checkpoint_path = './albert/albert_model.ckpt'
dict_path = './albert/vocab.txt'

token_dict = load_vocab(dict_path)
tokenizer = SimpleTokenizer(token_dict)
# 使用ALBERT
model = load_pretrained_model(config_path, checkpoint_path, albert=True)

# 编码测试
token_ids, segment_ids = tokenizer.encode(u'语言模型')
print(model.predict([np.array([token_ids]), np.array([segment_ids])]))
预测 MASKED 掉的词汇
# 建立ALBERT模型,加载权重
# 预测 MASKED 掉的词汇,需要 MLM 层
model = load_pretrained_model(config_path, checkpoint_path, with_mlm=True, albert=True)

token_ids, segment_ids = tokenizer.encode(u'科学技术是第一生产力')

# mask掉“技术”
token_ids[3] = token_ids[4] = token_dict['[MASK]']

# 用mlm模型预测被mask掉的部分
probas = model.predict([np.array([token_ids]), np.array([segment_ids])])[0]
print(tokenizer.decode(probas[3:5].argmax(axis=1)))
# 技术
情感分析实例
数据集:https://github.com/bojone/bert4keras/tree/master/examples/datasets
或百度网盘下载:链接: https://pan.baidu.com/s/1OAhNbRYpU1HW25_vChdRng 提取码: uxax
测试环境:
Ubuntu 16.04.6
Anaconda Python 3.7.3
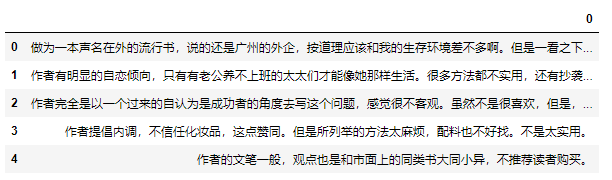
数据集是两个 excel 表,分别存放着正面和负面评价,下面是负面评价的内容
先设置预训练模型的路径,并读取原始数据
# 序列最大长度
maxlen = 100
config_path = './albert_base_zh/bert_config.json'
checkpoint_path = './albert_base_zh/bert_model.ckpt'
dict_path = './albert_base_zh/vocab.txt'


neg = pd.read_excel('datasets/neg.xls', header=None)
pos = pd.read_excel('datasets/pos.xls', header=None)
构建字典并建立分词器
# 字出现的次数
chars = {}
# 数据集
data = []

for d in neg[0]:
    data.append((d, 0))
    for c in d:
        chars[c] = chars.get(c, 0) + 1

for d in pos[0]:
    data.append((d, 1))
    for c in d:
        chars[c] = chars.get(c, 0) + 1

# 保留出现次数大于 4 次的字
chars = {i: j for i, j in chars.items() if j >= 4}

# 读取字典
_token_dict = load_vocab(dict_path)
# 构造字典
# token_dict 里是存放的都是本任务里用得到的字
# keep_words 存放的是索引
token_dict, keep_words = {}, []

for c in ['[PAD]', '[UNK]', '[CLS]', '[SEP]', '[unused1]']:
    token_dict[c] = len(token_dict)
    keep_words.append(_token_dict[c])

for c in chars:
    if c in _token_dict:
        token_dict[c] = len(token_dict)
        keep_words.append(_token_dict[c])

tokenizer = SimpleTokenizer(token_dict) # 建立分词器
构建训练数据和测试数据
if not os.path.exists('./random_order.json'):
    random_order = list(range(len(data)))
    np.random.shuffle(random_order)
    json.dump(
        random_order,
        open('./random_order.json', 'w'),
        indent=4
    )
else:
    random_order = json.load(open('./random_order.json'))

# 按照9:1的比例划分训练集和验证集
train_data = [data[j] for i, j in enumerate(random_order) if i % 10 != 0]
valid_data = [data[j] for i, j in enumerate(random_order) if i % 10 == 0]

def seq_padding(X, padding=0):
    # 用 0 填充序列
    # 让所有输入序列长度一致
    L = [len(x) for x in X]
    ML = max(L)
    return np.array([
        np.concatenate([x, [padding] * (ML - len(x))]) if len(x) < ML else x for x in X
    ])

class data_generator:
    def __init__(self, data, batch_size=32):
        self.data = data
        self.batch_size = batch_size
        self.steps = len(self.data) // self.batch_size
        if len(self.data) % self.batch_size != 0:
            self.steps += 1
    def __len__(self):
        return self.steps
    def __iter__(self):
        while True:
            idxs = list(range(len(self.data)))
            np.random.shuffle(idxs)
            X1, X2, Y = [], [], []
            for i in idxs:
                d = self.data[i]
                text = d[0][:maxlen]
                # x1 是字对应的索引
                # x2 是句子对应的索引
                x1, x2 = tokenizer.encode(first=text)
                y = d[1]
                X1.append(x1)
                X2.append(x2)
                Y.append([y])
                if len(X1) == self.batch_size or i == idxs[-1]:
                    X1 = seq_padding(X1)
                    X2 = seq_padding(X2)
                    Y = seq_padding(Y)
                    yield [X1, X2], Y
                    [X1, X2, Y] = [], [], []


train_D = data_generator(train_data)
valid_D = data_generator(valid_data)
构建模型并训练
from keras.layers import *
from keras.models import Model
import keras.backend as K
from keras.optimizers import Adam

model = load_pretrained_model(
    config_path,
    checkpoint_path,
    keep_words=keep_words,
    albert=True
)

output = Lambda(lambda x: x[:, 0])(model.output)
output = Dense(1, activation='sigmoid')(output)
model = Model(model.input, output)

model.compile(
    loss='binary_crossentropy',
    optimizer=Adam(1e-5),  # 用足够小的学习率
    # optimizer=PiecewiseLinearLearningRate(Adam(1e-5), {1000: 1e-5, 2000: 6e-5}),
    metrics=['accuracy']
)
model.summary()

model.fit_generator(
    train_D.__iter__(),
    steps_per_epoch=len(train_D),
    epochs=10,
    validation_data=valid_D.__iter__(),
    validation_steps=len(valid_D)
)

