

上一篇文章中,我大概介绍了一下实现自动定时执行任务的三种方法,接下来的几篇文章,我主要是介绍一个轻量型的,可扩展的AutoExcuteJob小框架,主要是用Windows Service 实现,里面可能用到一些Enterprise Library的Configuration的知识。
先大概讲一下实现 AutoExcuteJob 的用途和目标。AutoExcuteJob主要用来自动定时(或者相隔某一固定时间段)执行某一程序,并且做到容易扩展和使用。大概的需求是:
- 用来自动定时(或者相隔某一固定时间段)执行某一程序
- 能够在WindowsService部署成功后,控制Job的执行
- 在WindowsService部署成功后,随意添加和删除Job
好,我们闲话少说,先来看一下如何构建Windows Service 并且部署,卸载:
构建一个Windows Service类型的项目:

我们可以从新建的AutoExcuteJobService类中看到:
 代码
代码

{
public AutoExcuteJobService()
{
InitializeComponent();
}
protected override void OnStart(string[] args)
{
JobsManager.Current.Start();
}
protected override void OnStop()
{
JobsManager.Current.Stop();
}
}
OnStart 和 OnStop 是Windows Service启动和停止的两个比较重要的方法,当Windows Service启动的时候,会自动调用OnStart方法,同样,当他停止的时候,会调用OnStop方法。其中 JobsManager.Current.Start(); 和 JobsManager.Current.Stop(); 是我写的启动和停止Job的方法。
当然,我们还可以override ServiceBase 的其他方法,比如:OnContinue(), OnPause(),我们可以直接从方法名判断该方法是干什么的。
在项目中,Program.cs 是Windows Service 的入口点,见如下代码
代码
{
/// <summary>
/// The main entry point for the application.
/// </summary>
static void Main()
{
ServiceBase[] ServicesToRun;
ServicesToRun = new ServiceBase[]
{
new AutoExcuteJobService()
};
ServiceBase.Run(ServicesToRun);
}
}
到这里,一个基本的Windows Service已经创建完成。
如果我们利用SC 命令来安装该服务的话,直接编译该项目,在CMD窗口中:
sc create NewServiceDisplayName binPath= ServiceExePath
其中 NewServiceDisplayName 是该服务显示的名称
ServiceExePath 是该服务编译后执行文件的路径
注意: binPath= 后面一定要有个空格
该命令用来创建新的windows 服务,另外还可以增加其他的option,具体的见 sc create /?
sc delete 命令用来删除windows 服务。
如果我们用InstallUtil或者自定义Installer的方式来安装部署该服务,则还需要多做下面一个步骤,否则该服务会安装不上(或者执行不成功);
除了要构建一个继承自ServiceBase的Service类后,我们还需要为该Windows Service 创建安装ProjectInstaller .
在 AutoExcuteJobService 的 Designer窗口,右键快捷菜单 Add Installer ,

Add Installer操作会在项目中添加一个ProjectInstaller的安装类,
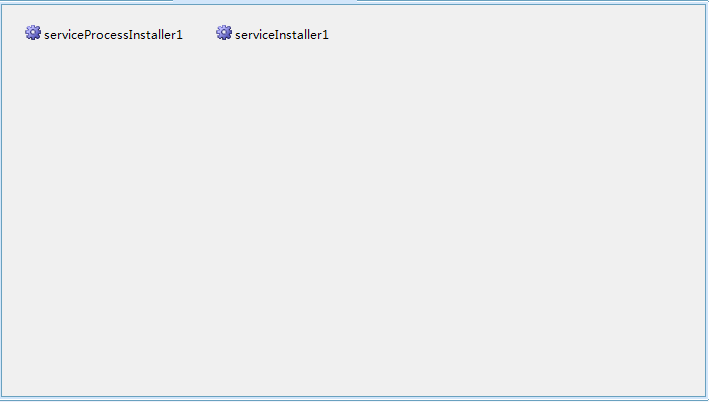

我们需要更改 serviceProcessInstaller1和serviceInstaller1的一些属性:
serviceProcessInstaller1: Account 更改Windows Service 启动的账户类型
serviceInstaller1 : ServiceName ,Modifiers, DisplayName,Description .
这样,我们就可以编译该项目,并且用InstallUtil.exe来安装该服务了!
命令形式如下:
InstallUtil [/u] ServiceExeFilePath
如果是安装就不用 /u,卸载的话加上 /u 或者 /uninstall
前面我们也已经提及过,如果我们不想用直接用InstallUtil.exe命令来安装该服务,也可以通过向Main()入口函数添加参数的形式,手动调用Installer来实现安装和卸载。
接下来,我会通过在 Main() 入口函数添加参数和添加自定义Installer类的方式,运行该服务程序来实现安装和卸载!
我将Main()方法改造如下:
代码
{
// run service
if (args.Length == 0)
{
ServiceBase[] ServicesToRun;
ServicesToRun = new ServiceBase[]
{
new AutoExcuteJobService()
};
ServiceBase.Run(ServicesToRun);
}
else
{
string arg0 = args[0].ToLower();
string[] cmdLine ={};
string fileName = Assembly.GetExecutingAssembly().Location;
IDictionary mySavedState = new Hashtable();
AssemblyInstaller myAssemblyInstaller = new AssemblyInstaller();
myAssemblyInstaller.UseNewContext = true;
myAssemblyInstaller.Path = fileName;
myAssemblyInstaller.CommandLine = cmdLine;
//install service
if (arg0 == "/i" || arg0 == "-i")
{
try
{
myAssemblyInstaller.Install(mySavedState);
myAssemblyInstaller.Commit(mySavedState);
}
catch
{
myAssemblyInstaller.Rollback(mySavedState);
}
finally
{
myAssemblyInstaller.Dispose();
}
}
//uninstall service
else if (arg0 == "/u" || arg0 == "-u")
{
try
{
myAssemblyInstaller.Uninstall(mySavedState);
myAssemblyInstaller.Commit(mySavedState);
}
catch
{
myAssemblyInstaller.Rollback(mySavedState);
}
finally
{
myAssemblyInstaller.Dispose();
}
}
}
}
我们在这里,只对Main()增加一个 params string[] args 的参数,当然,
如果没有传递任何参数,我们就正常调用Service;
如果传入的第一个参数是 /i 或者 -i,那就是Install 该Service;
而如果传入的第一个参数是 /u 或者 -u,那么就是UnInstall 该Service
在手动调用Install或者UnInstall的时候,我们创建了一个 AssemblyInstaller对象,用该对象调用该项目中标有 [RunInstaller(true)] Attribute的Installer的子类,在这里,也就是 ProjectInstaller 的实例,进而进行安装或者卸载。
这样,我们就可以在该项目的生成目录下面创建一个bat文件,里面就只需要:
如果是Install.bat:
WindowsServiceInvest.exe -i
而如果是 UnInstall.bat
WindowsServiceInvest.exe -u
直接运行Install.bat 或者 UnInstall.bat 进行安装或卸载。
如果我们需要在上面的两个bat文件中对安装的某些属性进行参数设置,比如:要设置 安装Service显示名称,启动方式。。。,那我们可以使用args的后续的参数。这里,可以用一个简单的例子来说明一下,当然获取有其他的更好的方法,比如我们需要在命令行里设置Service启动方式。
而Service的启动方式是设置 ProjectInstaller类的serviceInstaller1的 StartType属性,
增加一个Install参数类
代码
{
private static InstallParams current;
public static InstallParams Current
{
get {
if (current == null)
{
current = new InstallParams();
}
return current;
}
}
public ServiceStartMode StartType
{ get; set; }
public string ServiceName
{ get; set; }
public InstallParams()
{
}
public const string StartTypePropertyName = "StartType";
public const string ServiceNamePropertyName = "ServiceName";
public static void LoadFromParams(params string[] args)
{
current = new InstallParams();
foreach (string arg in args)
{
int index = arg.IndexOf("=");
if (arg.Trim().StartsWith(StartTypePropertyName + "="))
{
current.StartType = GetStartMode(arg.Substring(index + 1));
}
if (arg.Trim().StartsWith(ServiceNamePropertyName + "="))
{
current.ServiceName = arg.Substring(index + 1);
}
}
}
static ServiceStartMode GetStartMode(string startModeStr)
{
if (startModeStr == ServiceStartMode.Automatic.ToString())
return ServiceStartMode.Automatic;
else if (startModeStr == ServiceStartMode.Disabled.ToString())
return ServiceStartMode.Disabled;
else
return ServiceStartMode.Manual;
}
}
这样,我们在 Main()中的开始加上:
然后,在ProjectInstaller的构造函数中加上:
代码
{
InitializeComponent();
serviceInstaller1.StartType = InstallParams.Current.StartType;
serviceInstaller1.ServiceName =String.IsNullOrEmpty ( InstallParams.Current.ServiceName)?serviceInstaller1.ServiceName :InstallParams.Current.ServiceName ;
}
这样,在Main()中的args就传递到ProjectInstaller中的serviceInstaller1的相关属性中。
至此,Windows Service的创建,部署,卸载都已经介绍完毕!
小结一下:
- 使用sc部署和卸载:创建 Windows Service -> 添加Service内容->SC安装和部署
- 使用InstallUtil.exe或者自定义Installer: 创建Windows Service -> 添加Service内容 -> 添加ProjectInstaller -> InstallUtil.exe安装和部署(或者添加手动调用Install的代码和install.bat和uninstall.bat文件)
下一篇,我将要介绍自动定时执行任务Jobs的设计和代码!

