【MySQL】数据库配置
目录
安装mysql
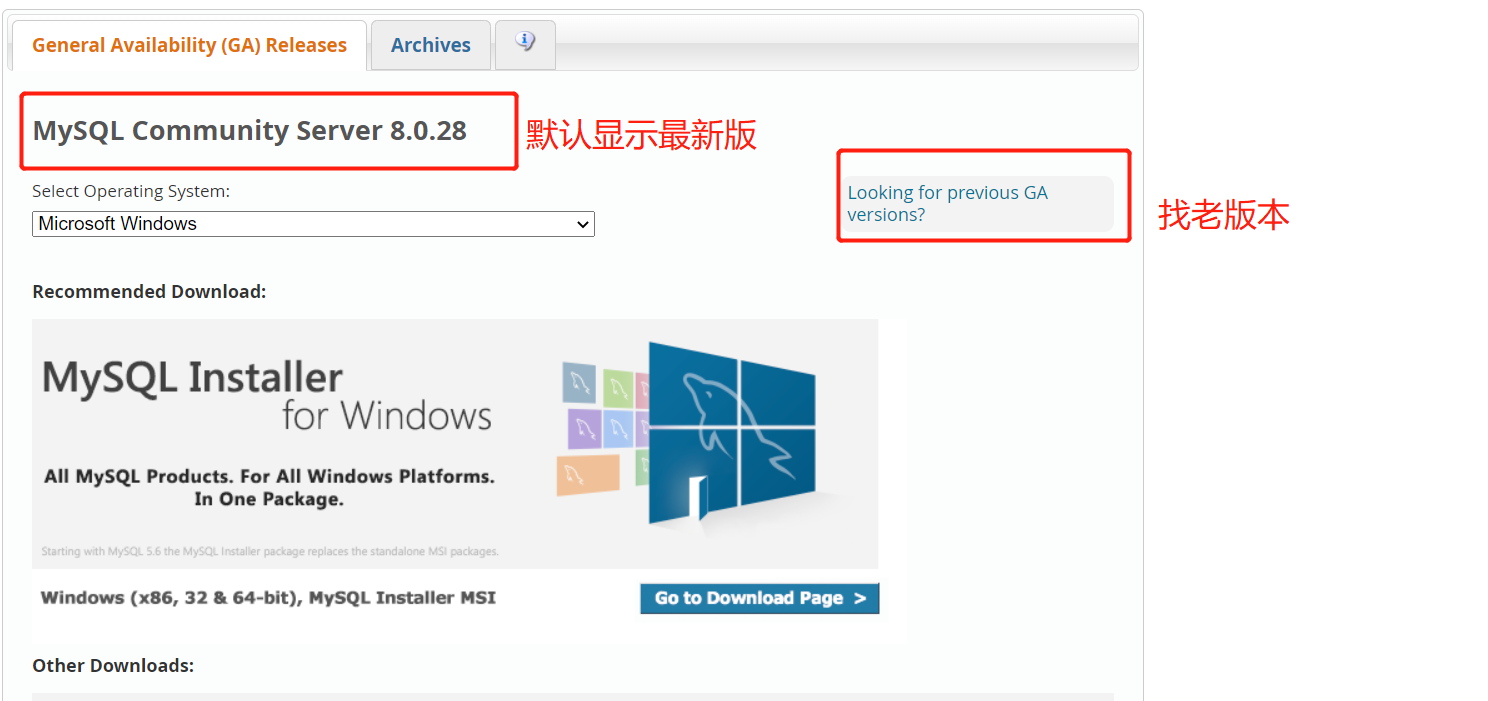
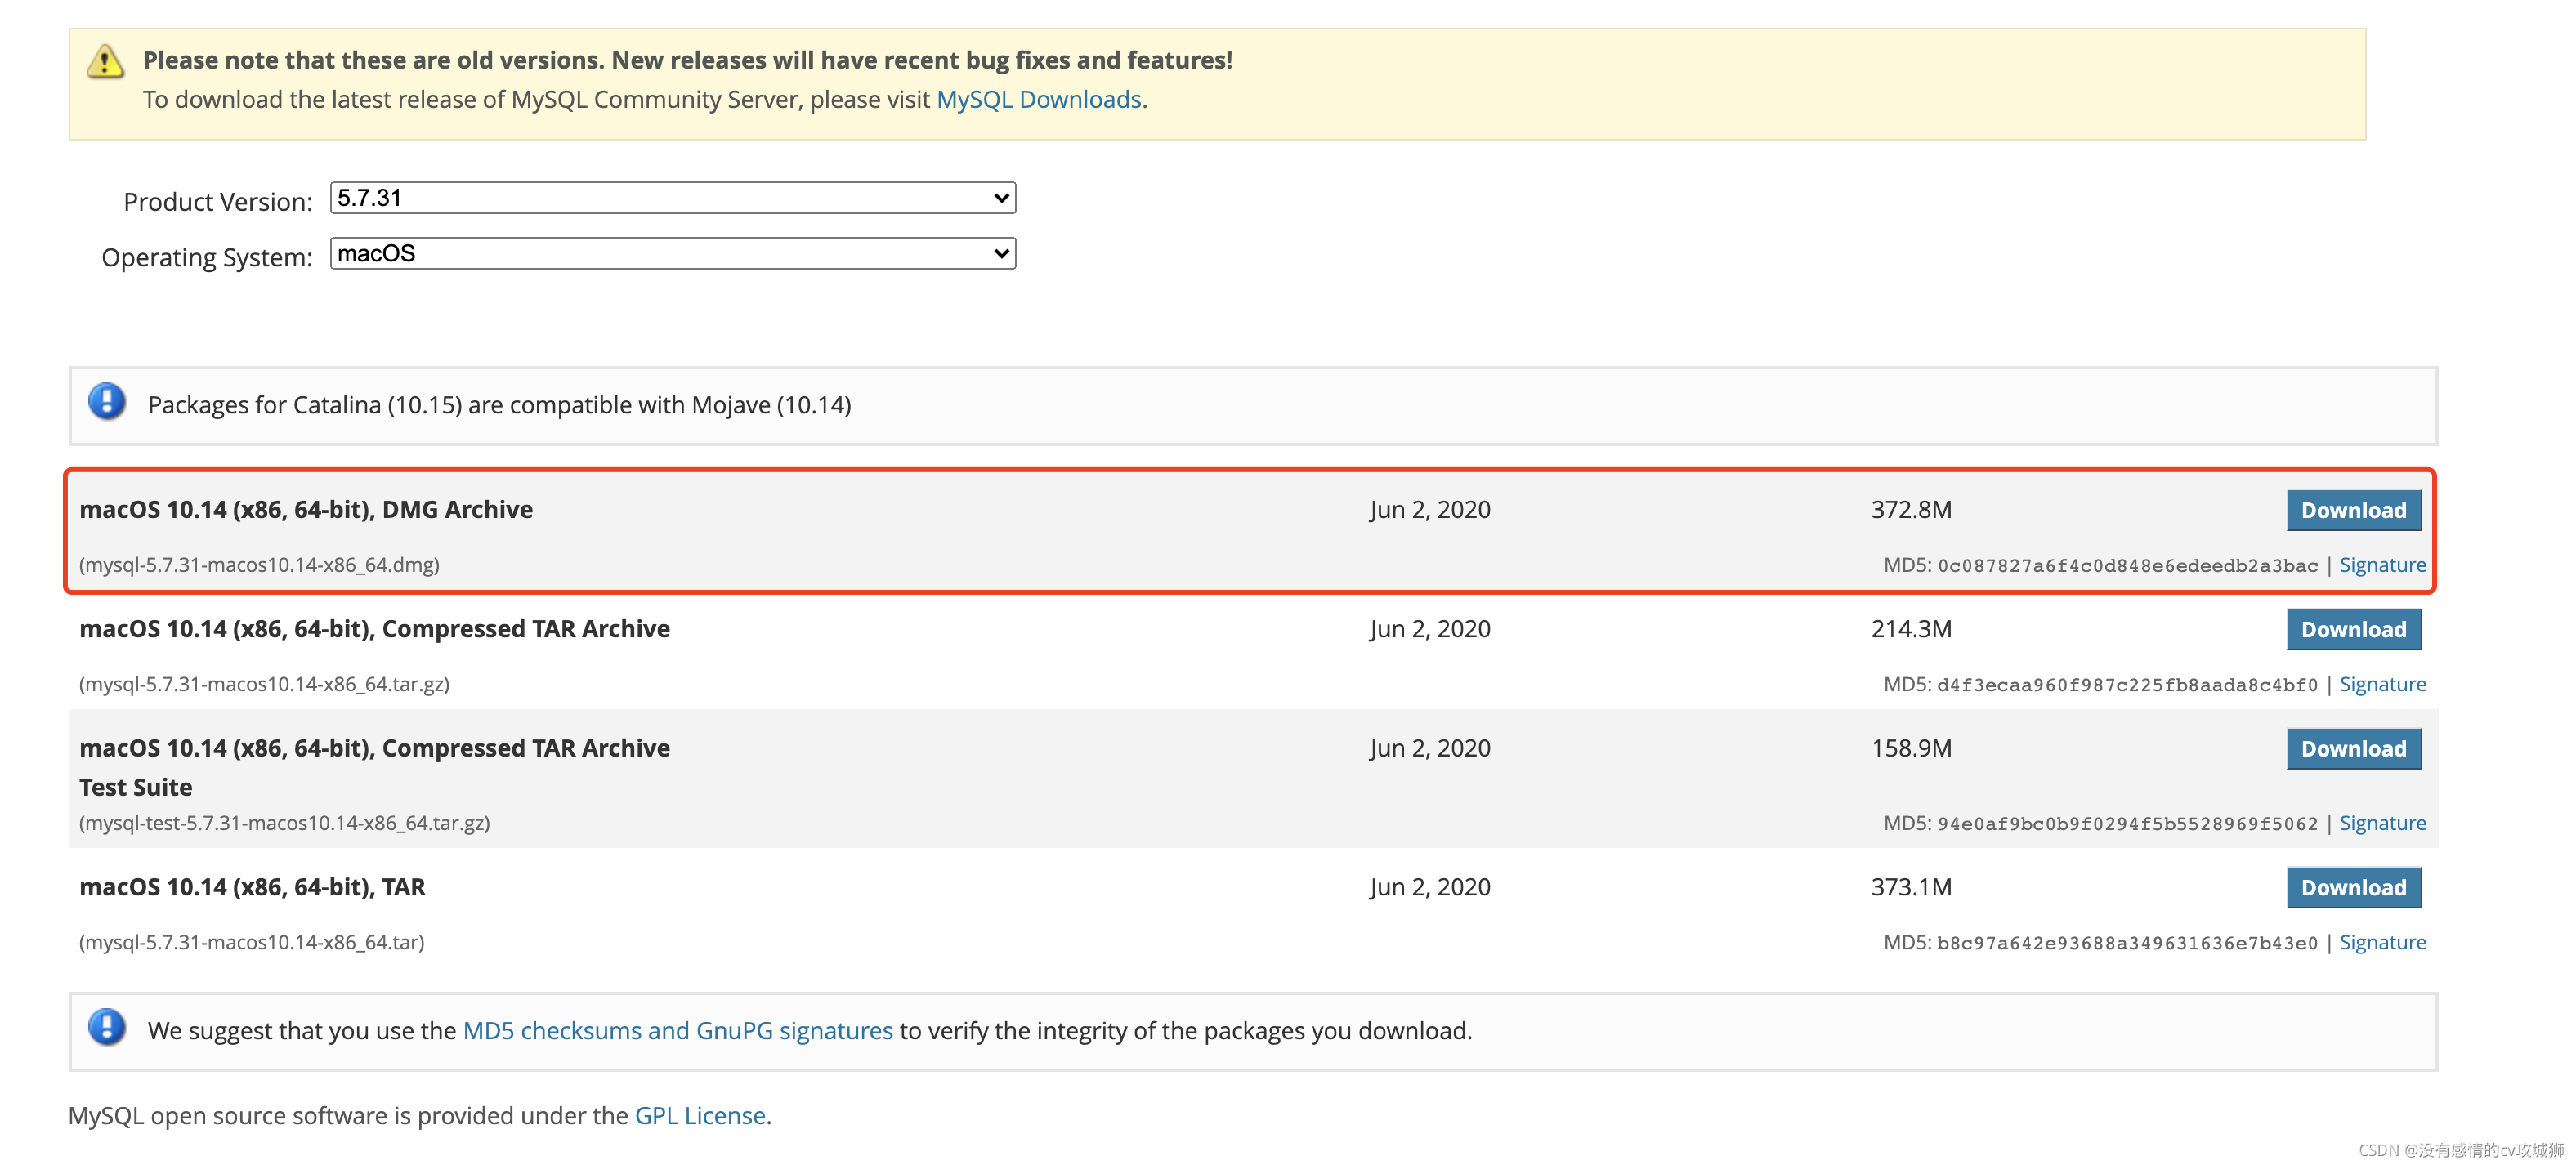
推荐下载5.6,5.7版本左右的,尽量不要下载最新版本
Mac无法打开“XXXX”,因为Apple无法检查其是否包含恶意软件
sudo spctl --master-disable  --打开任何来源

sudo spctl --master-enable   --关闭任何来源
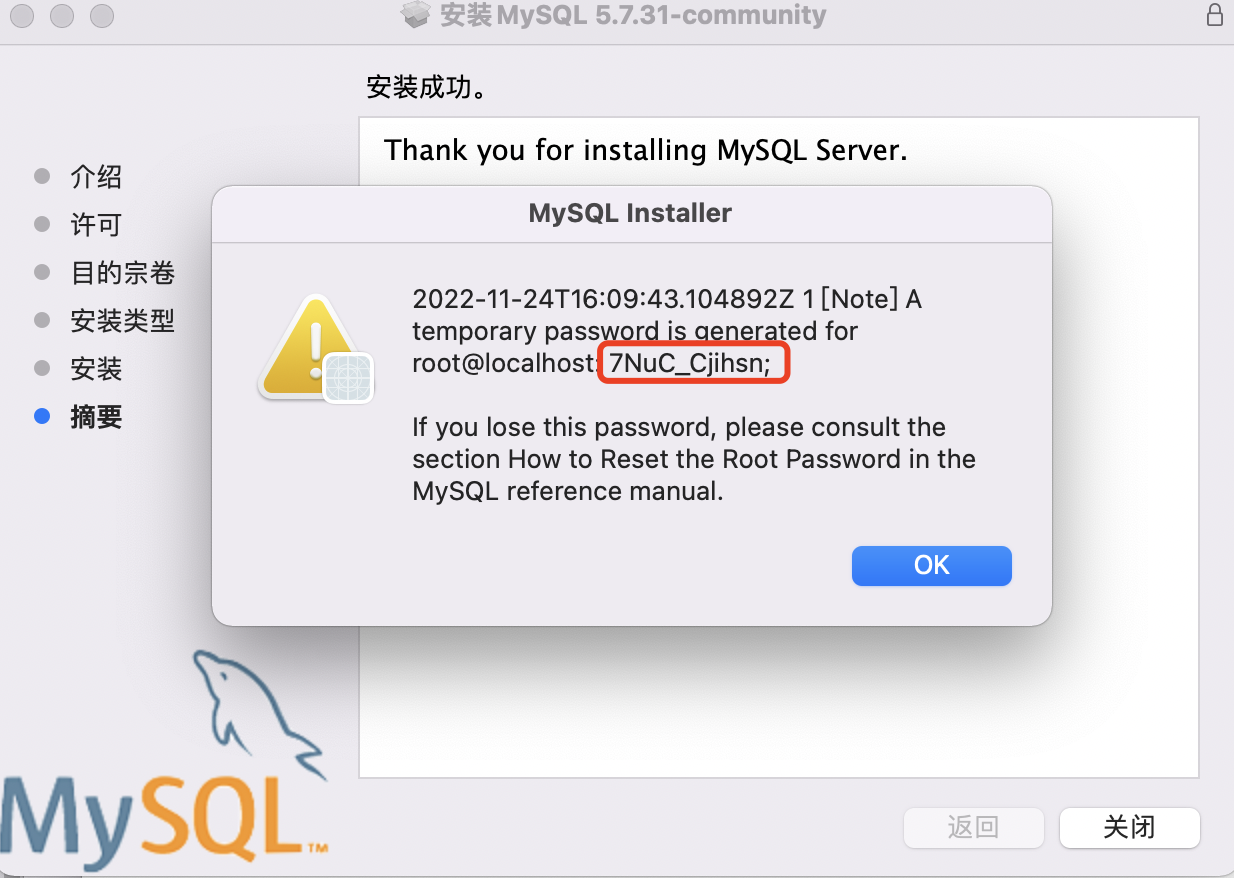
7NuC_Cjihsn;
登录mysql
-
Navicat手动连接
-
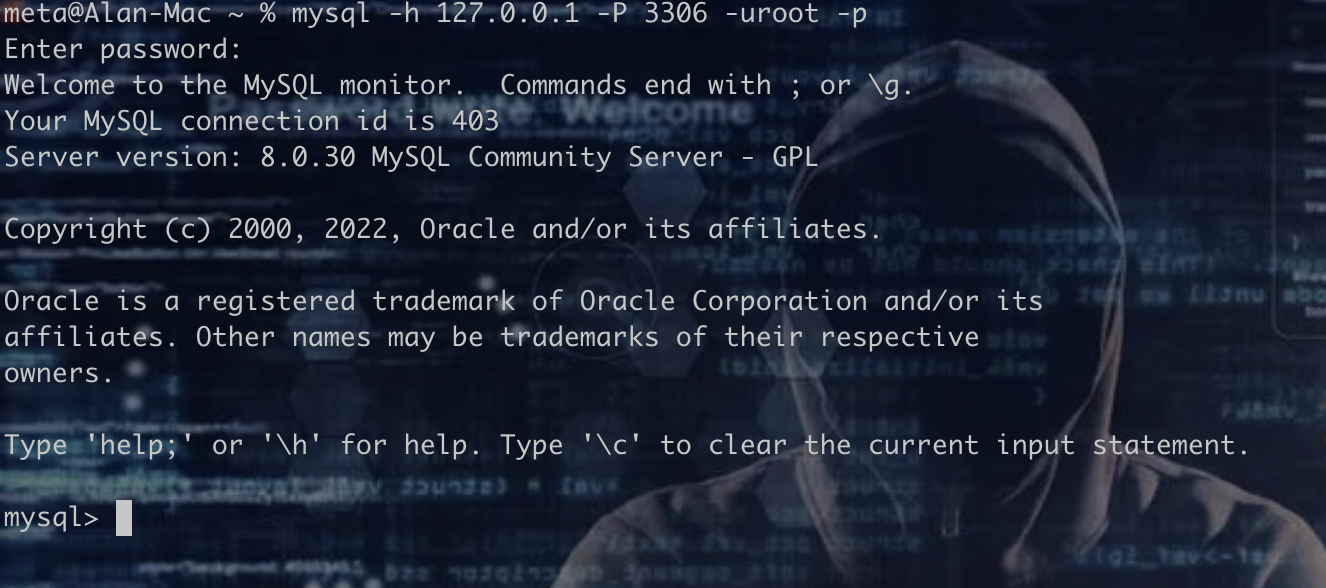
命令行连接
mysql -h 127.0.0.1 -P 3306 -uroot -pmysql -uroot -p有区别,如果在本地连接,使用这个,速度会快
-
登录成功后修改初始密码
修改密码【红字为密码,根据自身需求修改】
1:SET PASSWORD FOR 'root'@'localhost' = PASSWORD('12345678');
2:FLUSH PRIVILEGES;
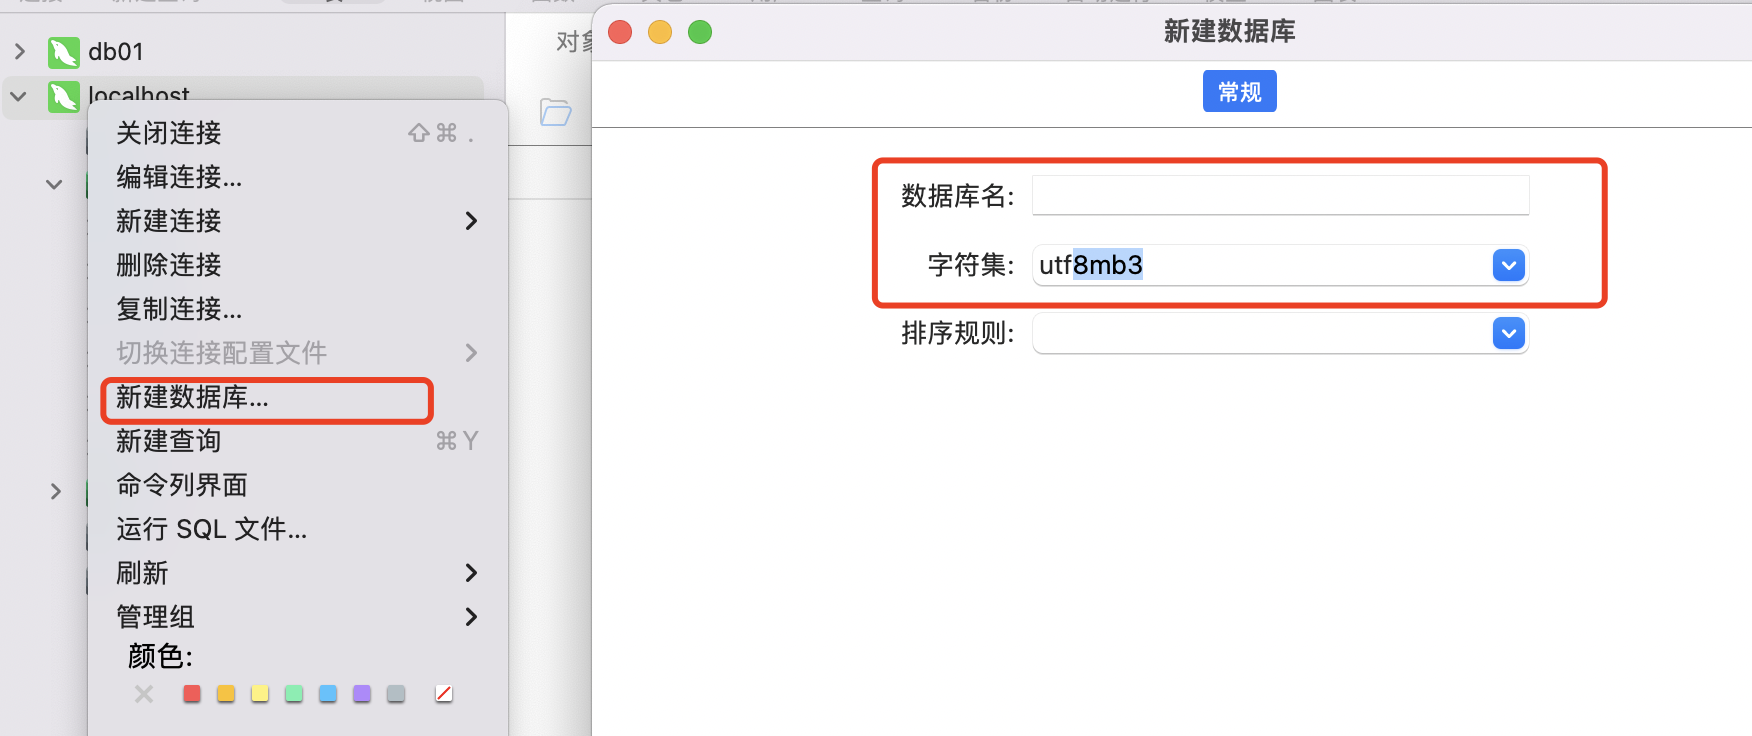
创建一个库
-
使用Navicat图形化操作
-
命令行创建
create database 【name】 default charset=utf8;
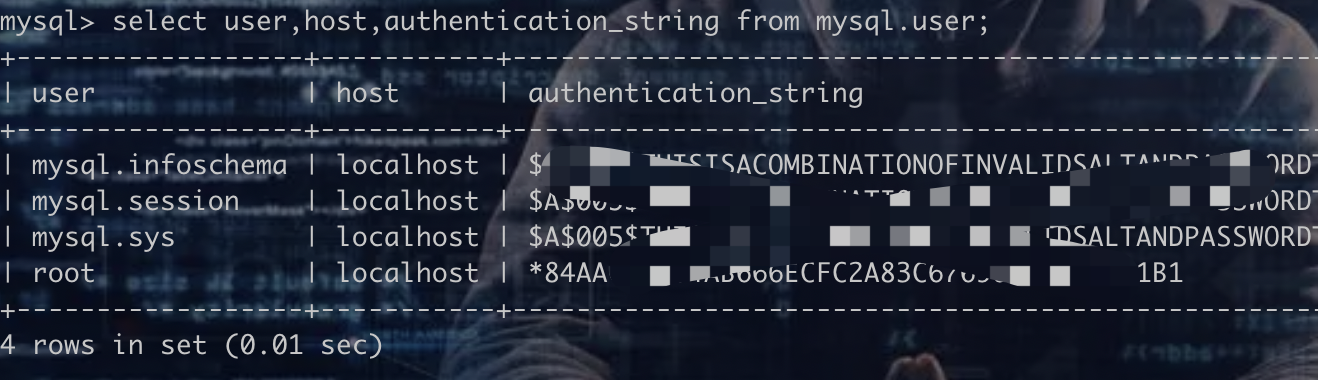
查看用户
-
5.7之前版本
select user,host,password from mysql.user; -
5.7往后的版本
select user,host,authentication_string from mysql.user;
创建用户
-
一键建用户加赋权
官方已弃用
grant 权限(create, update) on 库.表 to '账号'@'host' identified by '密码'- 举例
grant all privileges on 【库名】.* to '【用户名】'@'%' identified by 'xxxyyy';
grant all privileges on 【库名】.* to '【用户名】'@'localhost' identified by 'xxxyyy';
- 举例
-
分布式建用户
不仅仅适用8.0,还适用5.7版本
mysql> create user test@'localhost' identified by '12345678';

mysql> grant all privileges on test.* to test@'localhost';

mysql> flush privileges;
项目配置文件加入
DATABASES = {
    # 'default': {
    #     'ENGINE': 'django.db.backends.sqlite3',
    #     'NAME': os.path.join(BASE_DIR, 'db.sqlite3'),
    # }
    'default': {
        'ENGINE': 'django.db.backends.mysql',
        'NAME': 'luffy', # 数据库名字
        'USER': 'test', # 用户名
        'PASSWORD': '12345678',
        'HOST': 'localhost',
        'PORT': 3306
    }
}
用pymsql连接数据库
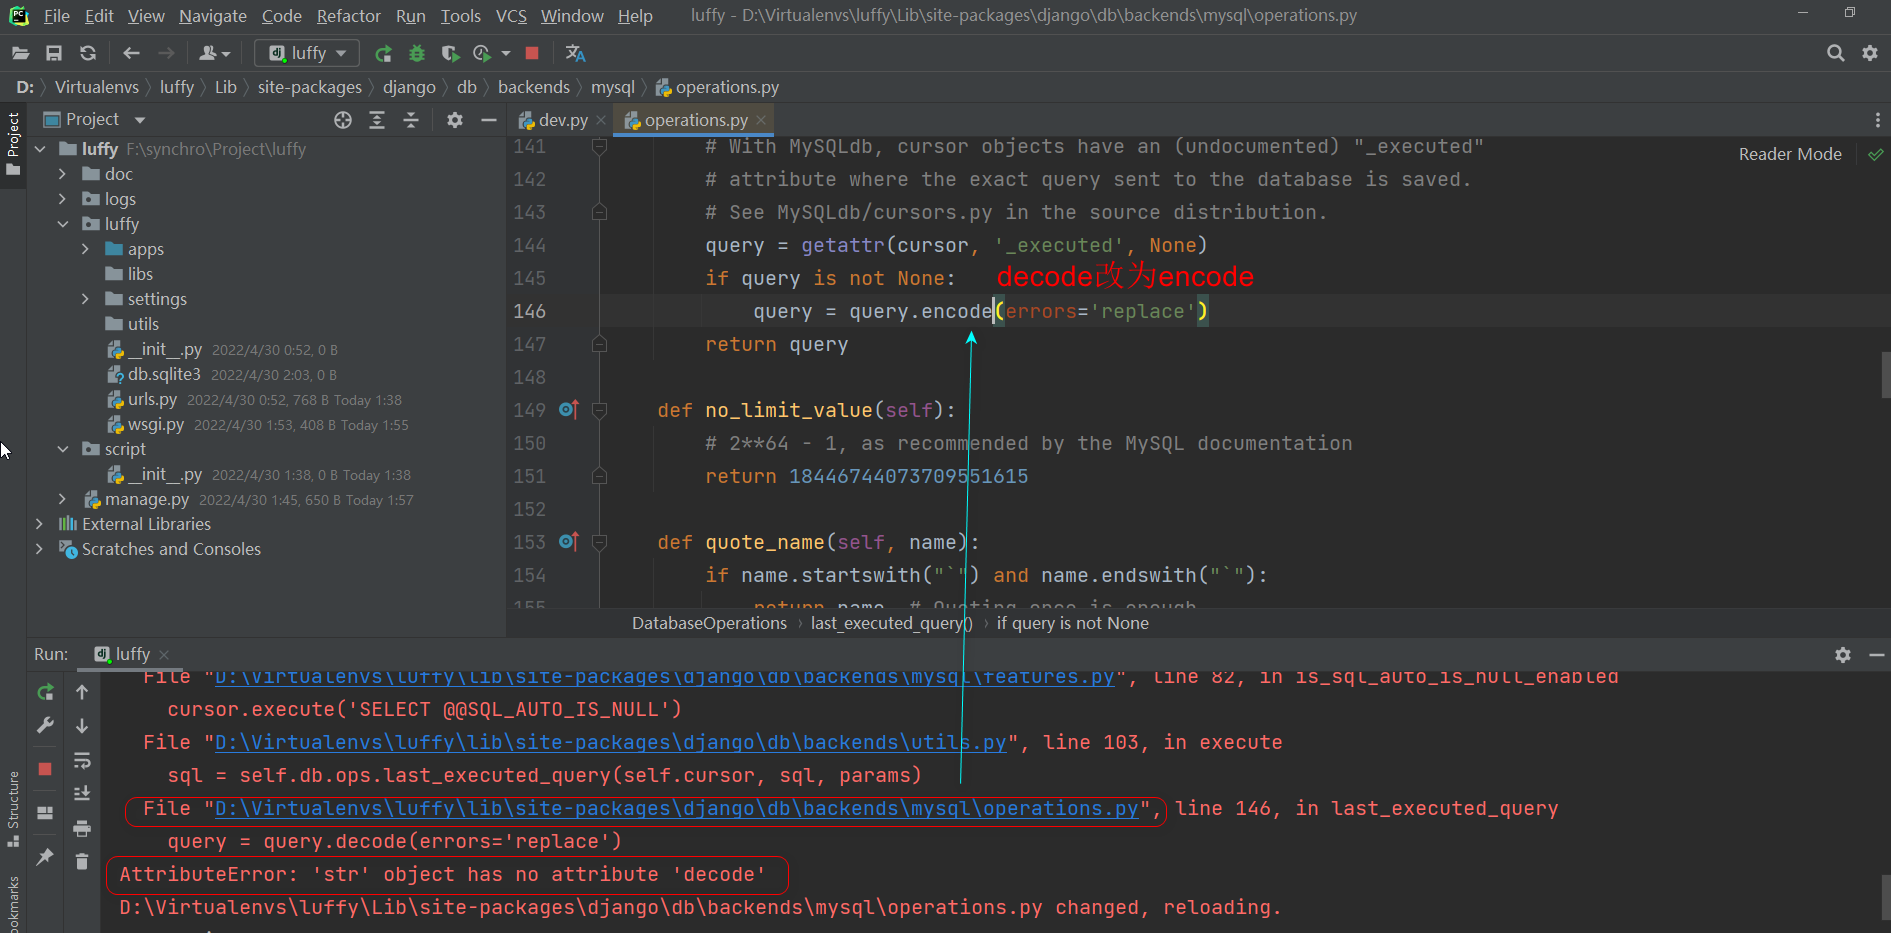
django超过2.0.7就需要改源码
# 在任意__init__文件中写下这个

import pymysql
pymysql.install_as_MySQLdb()


改源码>>>decode----encode即可