

2. 使用Visual Studio 2005准备开发ASP.NET AJAX应用
3. 创建一个ASP.NET AJAX Futures 的启动模型
4.1 添加ScriptManager and UpdatePanel
4.3 使用AutoCompleteExtender异步调用Web service
4.4 使用AJAX Control Toolkit中的例子
4.6 在AJAX Framework中使用ASP.NET’s Profile服务
目标: 在下面的示例中,我们使用AutoComplete扩展控件来使普通的TextBox控件完成用户的文本输入。这个扩展控件从一个Web service中获取数据。因此,我们将在CheckOut.asmx中实现邮政编码TextBox。
步骤4.3a:运行解决方案并转到Shopping页面。使用Add to cart功能,在购物车中放置几个产品。然后,浏览Shopping Basket并且点击Proceed to Checkout。页面将要求你注册或登录。
这个应用程序的默认用户和密码显示在下面的表格中。你可以使用这个默认的用户,或者点击Click here to register来创建你自己的用户。
| Username | Test |
| Password | test@test |
完成这些操作并关闭浏览器。
步骤4.3b: 在Visual Studio中,在项目中右击解决方案浏览器并选择”添加新项…”来创建一个新的Web service。
命名Web Service为ZipService.asmx,选择C#语言并选中”将代码放在单独的文件中”

图4.3a: 创建新的 Web service
步骤4.3c: 在App_Code文件夹中打开ZipService.cs。声明下列命名空间。
2
3 using System.IO;
4
5 using System.Web;
6
7 using System.Collections;
8
9 using System.Collections.Generic;
10
11 using System.Threading;
12
13 using System.Web.Services;
14
15 using System.Web.Services.Protocols;
16
17 using System.Xml.Serialization;
18
19

20
在ZipService类前写上"[System.Web.Script.Services.ScriptService]"属性,以便ASP.NET可以用客户端JavaScript来访问该服务。
[System.Web.Script.Services.ScriptService]
public class ZipService : System.Web.Services.WebService {
在ZipService()和HelloWorld方法中删除预定义的构造函数,并输入下列代码。
[WebMethod]
public String[] GetZipTownList(string prefixText, int count)
{
if (autoCompleteWordList == null)
{
string[] temp = File.ReadAllLines(Server.MapPath("~/App_Data/zip.txt"));
Array.Sort(temp, new CaseInsensitiveComparer());
autoCompleteWordList = temp;
}
int index = Array.BinarySearch(autoCompleteWordList, prefixText,
new CaseInsensitiveComparer());
if (index < 0)
index = ~index;
int matchingCount;
for (matchingCount = 0;
matchingCount < count && index + matchingCount < autoCompleteWordList.Length;
matchingCount++)
{
if (!autoCompleteWordList[index + matchingCount].StartsWith(prefixText, StringComparison.CurrentCultureIgnoreCase))
break;
}
String[] returnValue = new string[matchingCount];
if (matchingCount > 0)
Array.Copy(autoCompleteWordList, index, returnValue, 0, matchingCount);
return returnValue;
}
这段代码从"~/App_Data/zip.txt"文本文件中读出所有的邮政编码和地名并写入一个数组中,然后排序,并通过字符串prefixText提供的字母元素进行搜索。这些元素被写入一个新的由Web Service返回的数组(returnValue)。
步骤4.3d:打开CheckOut.aspx并且放一个UpdatePanel控件放在Panel1上面,那是一个浅褐色/橙色背景的控件。
拖动panel1并放进UpdatePanel中。
在UpdatePanel1中插入一个AutoCompleteExtender。如果提示你是否替换"/Bin/Microsoft.Web.Preview.dll",你可以选择"是”
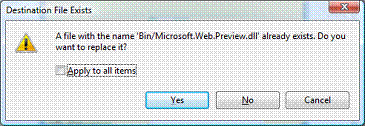
图4.3b: Visual Studio 提示替换 Microsoft.Web.Preview.dll.
在AutoCompleteExtender1属性中,在Behavior(行为)中使用下列值:(在实际操作的时候,不知为何AutoCompleteExtender1的Behavior中,无法找到前面4个属性,只能在源代码视图中进行编写)
|
EnableCaching |
True |
|
MinimumPrefixLength |
1 |
|
ServiceMethod |
GetZipTownList |
|
ServicePath |
~/ZipService.asmx |
|
TargetControlID |
tbZipTown |

图4.3c: The UpdatePanel1 and AutoCompleteExtender1 控件.
测试:运行解决方案并浏览Shopping页面。使用Add to cart,在购物篮中放一些产品并且浏览Shopping Basket。点击Proceed to Checkout。登录或注册来开始一个会话。
在邮政编码文本框中,键入一个数字并且暂停一会儿。AutoCompleteExtender控件会提供一系列以你键入的数字开始的邮政编号

图4.3d: 工作中的AutoCompleteExtender 控件
关闭浏览器。

