
JMS消息中间件之ActiveMQ学习
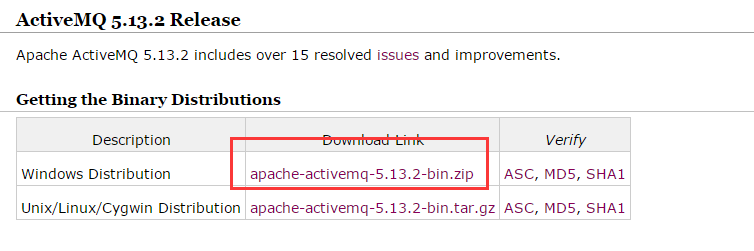
1、下载
下载二进制bin文件:http://activemq.apache.org/activemq-5132-release.html
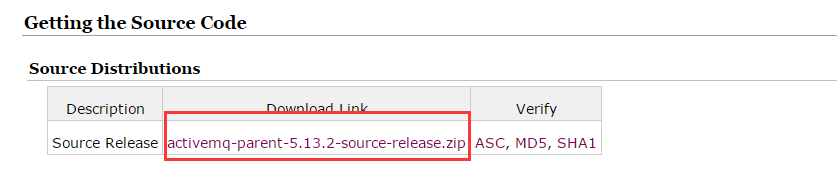
下载源码:
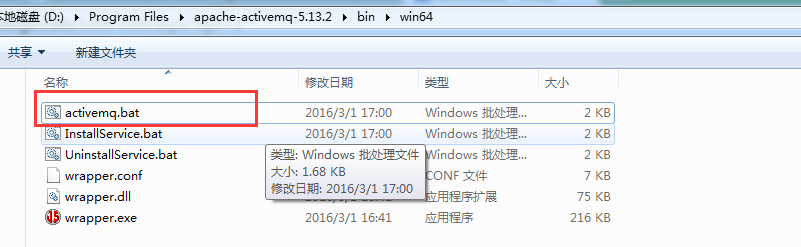
2、启动:
解压任意路径:
启动后:
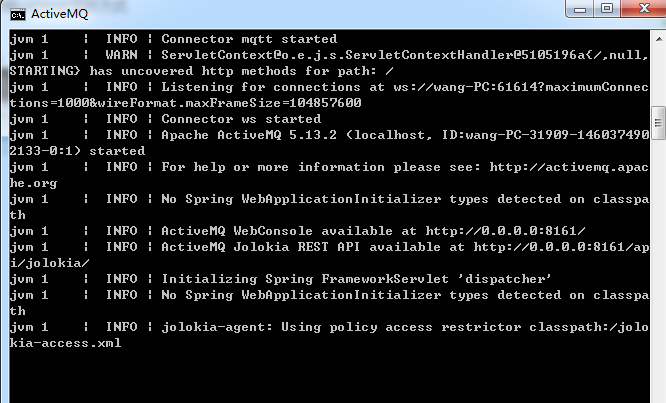
3、访问:
访问http://localhost:8161/admin/ 用户名&密码:admin
4、主要应用:
5、点对点消息发送&接收
首先是producer方:
package com.activemq.test;

import javax.jms.Connection;
import javax.jms.ConnectionFactory;
import javax.jms.Destination;
import javax.jms.JMSException;
import javax.jms.MessageProducer;
import javax.jms.Session;
import javax.jms.TextMessage;

import org.apache.activemq.ActiveMQConnectionFactory;

/**
 * 消息生产者
 *
 * @author Administrator
 *
 */
public class JMSProducer {

    private static final String USERNAME = ActiveMQConnectionFactory.DEFAULT_USER; // 默认连接用户
    private static final String PASSWORD = ActiveMQConnectionFactory.DEFAULT_PASSWORD; // 默认连接密码
    private static final String BROKERURL = ActiveMQConnectionFactory.DEFAULT_BROKER_URL; // 默认消息总线

    private static final int SENDNUM = 10; // 发送消息总量

    public static void main(String[] args) {

        ConnectionFactory connectionFactory = null; // 连接工厂
        Connection connection = null; // 连接对象

        Session session = null; // 会话级session,接收或发送消息的线程
        Destination destination = null; // 消息发送的目的地

        MessageProducer messageProducer = null; // 消息生产者

        connectionFactory = new ActiveMQConnectionFactory(JMSProducer.USERNAME, JMSProducer.PASSWORD,
                JMSProducer.BROKERURL);
        try {
            connection = connectionFactory.createConnection();

            connection.start(); // 启动连接

            session = connection.createSession(true, Session.AUTO_ACKNOWLEDGE); // 创建session,true表示添加事务

            destination = session.createQueue("FirstQueue"); // 创建消息队列

            messageProducer = session.createProducer(destination); // 创建消息生产者

            sendMessage(session, messageProducer);

            session.commit();            //commit提交
        } catch (Exception e) {
            e.printStackTrace();
        }finally {
            if(connection != null){
                try {
                    connection.close();
                } catch (JMSException e) {
                    e.printStackTrace();
                }
            }
        }
    }

    /**
     * 发送消息
     *
     * @param session
     * @param messageProducer
     * @throws Exception
     */
    public static void sendMessage(Session session, MessageProducer messageProducer) throws Exception {
        for (int i = 0; i < SENDNUM; i++) {
            TextMessage textMessage = session.createTextMessage("Active MQ消息"+i);        //文本消息
            System.out.println("发送消息: Active MQ消息"+i);
            messageProducer.send(textMessage);
        }
    }

}
然后是消费方实现,主要有两种,一种是直接receive方法接收消息,一种是通过监听实现:
receive:
package com.activemq.test;

import javax.jms.Connection;
import javax.jms.ConnectionFactory;
import javax.jms.Destination;
import javax.jms.JMSException;
import javax.jms.MessageConsumer;
import javax.jms.Session;
import javax.jms.TextMessage;

import org.apache.activemq.ActiveMQConnectionFactory;

/**
 * 消息消费者
 * 普通receive方式接收消息
 * @author Administrator
 *
 */
public class JMSConsumer {

    private static final String USERNAME = ActiveMQConnectionFactory.DEFAULT_USER; // 默认连接用户
    private static final String PASSWORD = ActiveMQConnectionFactory.DEFAULT_PASSWORD; // 默认连接密码
    private static final String BROKERURL = ActiveMQConnectionFactory.DEFAULT_BROKER_URL; // 默认消息总线
    public static void main(String[] args) {

        ConnectionFactory connectionFactory = null; // 连接工厂
        Connection connection = null; // 连接对象

        Session session = null; // 会话级session,接收或发送消息的线程
        Destination destination = null; // 消息发送的目的地

        MessageConsumer messageConsumer = null;        //消息消费者

        connectionFactory = new ActiveMQConnectionFactory(JMSConsumer.USERNAME, JMSConsumer.PASSWORD,
                JMSConsumer.BROKERURL);

        try {
            connection = connectionFactory.createConnection();

            connection.start(); // 启动连接

            session = connection.createSession(false, Session.AUTO_ACKNOWLEDGE); // 创建session,false表示不添加事务

            destination = session.createQueue("FirstQueue"); // 创建消息队列

            messageConsumer = session.createConsumer(destination); // 创建消息消费者

            while (true) {
                TextMessage textMessage = (TextMessage)messageConsumer.receive(100000);        //接收消息(文本消息)
                if(textMessage != null){
                    System.out.println("接收到的消息:"+textMessage.getText());
                }else{
                    break;
                }
            }
        } catch (JMSException e) {
            e.printStackTrace();
        }

    }

}
监听方式:
package com.activemq.test;

import javax.jms.JMSException;
import javax.jms.Message;
import javax.jms.MessageListener;
import javax.jms.TextMessage;

/**
 * 消息监听
 * @author Administrator
 *
 */
public class Listener implements MessageListener{

    @Override
    public void onMessage(Message message) {

        try {
            System.out.println("接收到的消息:"+((TextMessage)message).getText());
        } catch (JMSException e) {
            e.printStackTrace();
        }

    }
}
package com.activemq.test;

import javax.jms.Connection;
import javax.jms.ConnectionFactory;
import javax.jms.Destination;
import javax.jms.JMSException;
import javax.jms.MessageConsumer;
import javax.jms.Session;

import org.apache.activemq.ActiveMQConnectionFactory;

/**
 * 消息消费者
 * 普通receive方式接收消息
 * @author Administrator
 *
 */
public class JMSConsumer2 {

    private static final String USERNAME = ActiveMQConnectionFactory.DEFAULT_USER; // 默认连接用户
    private static final String PASSWORD = ActiveMQConnectionFactory.DEFAULT_PASSWORD; // 默认连接密码
    private static final String BROKERURL = ActiveMQConnectionFactory.DEFAULT_BROKER_URL; // 默认消息总线
    public static void main(String[] args) {

        ConnectionFactory connectionFactory = null; // 连接工厂
        Connection connection = null; // 连接对象

        Session session = null; // 会话级session,接收或发送消息的线程
        Destination destination = null; // 消息发送的目的地

        MessageConsumer messageConsumer = null;        //消息消费者

        connectionFactory = new ActiveMQConnectionFactory(JMSConsumer2.USERNAME, JMSConsumer2.PASSWORD,
                JMSConsumer2.BROKERURL);

        try {
            connection = connectionFactory.createConnection();

            connection.start(); // 启动连接

            session = connection.createSession(false, Session.AUTO_ACKNOWLEDGE); // 创建session,false表示不添加事务

            destination = session.createQueue("FirstQueue"); // 创建消息队列

            messageConsumer = session.createConsumer(destination); // 创建消息消费者

            messageConsumer.setMessageListener(new Listener());        //注册监听
        } catch (JMSException e) {
            e.printStackTrace();
        }

    }

}
几轮测试下来,消费生产记录:

6、发布订阅模式
新建订阅1:
package com.activemq.test2;

import javax.jms.Connection;
import javax.jms.ConnectionFactory;
import javax.jms.Destination;
import javax.jms.JMSException;
import javax.jms.MessageConsumer;
import javax.jms.Session;

import org.apache.activemq.ActiveMQConnectionFactory;

/**
 * 消息消费者    -- 消息订阅者1
 * 普通receive方式接收消息
 * @author Administrator
 *
 */
public class JMSConsumer {

    private static final String USERNAME = ActiveMQConnectionFactory.DEFAULT_USER; // 默认连接用户
    private static final String PASSWORD = ActiveMQConnectionFactory.DEFAULT_PASSWORD; // 默认连接密码
    private static final String BROKERURL = ActiveMQConnectionFactory.DEFAULT_BROKER_URL; // 默认消息总线
    public static void main(String[] args) {

        ConnectionFactory connectionFactory = null; // 连接工厂
        Connection connection = null; // 连接对象

        Session session = null; // 会话级session,接收或发送消息的线程
        Destination destination = null; // 消息发送的目的地

        MessageConsumer messageConsumer = null;        //消息消费者

        connectionFactory = new ActiveMQConnectionFactory(JMSConsumer.USERNAME, JMSConsumer.PASSWORD,
                JMSConsumer.BROKERURL);

        try {
            connection = connectionFactory.createConnection();

            connection.start(); // 启动连接

            session = connection.createSession(false, Session.AUTO_ACKNOWLEDGE); // 创建session,false表示不添加事务

            destination = session.createTopic("SecondTopic"); // 创建消息订阅

            messageConsumer = session.createConsumer(destination); // 创建消息消费者

            messageConsumer.setMessageListener(new Listener());        //注册监听
        } catch (JMSException e) {
            e.printStackTrace();
        }

    }

}
package com.activemq.test2;

import javax.jms.JMSException;
import javax.jms.Message;
import javax.jms.MessageListener;
import javax.jms.TextMessage;

/**
 * 消息监听-消息订阅者1的监听
 * @author Administrator
 *
 */
public class Listener implements MessageListener{

    @Override
    public void onMessage(Message message) {

        try {
            System.out.println("订阅者1接收到的消息:"+((TextMessage)message).getText());
        } catch (JMSException e) {
            e.printStackTrace();
        }

    }
}
订阅2:
package com.activemq.test2;

import javax.jms.Connection;
import javax.jms.ConnectionFactory;
import javax.jms.Destination;
import javax.jms.JMSException;
import javax.jms.MessageConsumer;
import javax.jms.Session;

import org.apache.activemq.ActiveMQConnectionFactory;

/**
 * 消息消费者    -- 消息订阅者2
 * 普通receive方式接收消息
 * @author Administrator
 *
 */
public class JMSConsumer2 {

    private static final String USERNAME = ActiveMQConnectionFactory.DEFAULT_USER; // 默认连接用户
    private static final String PASSWORD = ActiveMQConnectionFactory.DEFAULT_PASSWORD; // 默认连接密码
    private static final String BROKERURL = ActiveMQConnectionFactory.DEFAULT_BROKER_URL; // 默认消息总线
    public static void main(String[] args) {

        ConnectionFactory connectionFactory = null; // 连接工厂
        Connection connection = null; // 连接对象

        Session session = null; // 会话级session,接收或发送消息的线程
        Destination destination = null; // 消息发送的目的地

        MessageConsumer messageConsumer = null;        //消息消费者

        connectionFactory = new ActiveMQConnectionFactory(JMSConsumer2.USERNAME, JMSConsumer2.PASSWORD,
                JMSConsumer2.BROKERURL);

        try {
            connection = connectionFactory.createConnection();

            connection.start(); // 启动连接

            session = connection.createSession(false, Session.AUTO_ACKNOWLEDGE); // 创建session,false表示不添加事务

            destination = session.createTopic("SecondTopic"); // 创建消息订阅

            messageConsumer = session.createConsumer(destination); // 创建消息消费者

            messageConsumer.setMessageListener(new Listener2());        //注册监听
        } catch (JMSException e) {
            e.printStackTrace();
        }

    }

}
package com.activemq.test2;

import javax.jms.JMSException;
import javax.jms.Message;
import javax.jms.MessageListener;
import javax.jms.TextMessage;

/**
 * 消息监听-消息订阅者1的监听
 * @author Administrator
 *
 */
public class Listener2 implements MessageListener{

    @Override
    public void onMessage(Message message) {

        try {
            System.out.println("订阅者2接收到的消息:"+((TextMessage)message).getText());
        } catch (JMSException e) {
            e.printStackTrace();
        }

    }
}
消息一定要先订阅,然后producer再发布,否则先发布再订阅的话后边才订阅的一方是收不到之前发布的消息的!
然后是发布方:
package com.activemq.test2;

import javax.jms.Connection;
import javax.jms.ConnectionFactory;
import javax.jms.Destination;
import javax.jms.JMSException;
import javax.jms.MessageProducer;
import javax.jms.Session;
import javax.jms.TextMessage;

import org.apache.activemq.ActiveMQConnectionFactory;

/**
 * 消息生产者
 *
 * @author Administrator
 *
 */
public class JMSProducer {

    private static final String USERNAME = ActiveMQConnectionFactory.DEFAULT_USER; // 默认连接用户
    private static final String PASSWORD = ActiveMQConnectionFactory.DEFAULT_PASSWORD; // 默认连接密码
    private static final String BROKERURL = ActiveMQConnectionFactory.DEFAULT_BROKER_URL; // 默认消息总线

    private static final int SENDNUM = 10; // 发送消息总量

    public static void main(String[] args) {

        ConnectionFactory connectionFactory = null; // 连接工厂
        Connection connection = null; // 连接对象

        Session session = null; // 会话级session,接收或发送消息的线程
        Destination destination = null; // 消息发送的目的地

        MessageProducer messageProducer = null; // 消息生产者

        connectionFactory = new ActiveMQConnectionFactory(JMSProducer.USERNAME, JMSProducer.PASSWORD,
                JMSProducer.BROKERURL);
        try {
            connection = connectionFactory.createConnection();

            connection.start(); // 启动连接

            session = connection.createSession(true, Session.AUTO_ACKNOWLEDGE); // 创建session,true表示添加事务

            destination = session.createTopic("SecondTopic"); // 创建发布主题

            messageProducer = session.createProducer(destination); // 创建消息发布者

            sendMessage(session, messageProducer);

            session.commit(); // commit提交
        } catch (Exception e) {
            e.printStackTrace();
        } finally {
            if (connection != null) {
                try {
                    connection.close();
                } catch (JMSException e) {
                    e.printStackTrace();
                }
            }
        }
    }

    /**
     * 发送消息
     *
     * @param session
     * @param messageProducer
     * @throws Exception
     */
    public static void sendMessage(Session session, MessageProducer messageProducer) throws Exception {
        for (int i = 0; i < SENDNUM; i++) {
            TextMessage textMessage = session.createTextMessage("Active MQ发布消息" + i); // 文本消息
            System.out.println("发送消息: Active MQ 发布的消息" + i);
            messageProducer.send(textMessage);
        }
    }
}
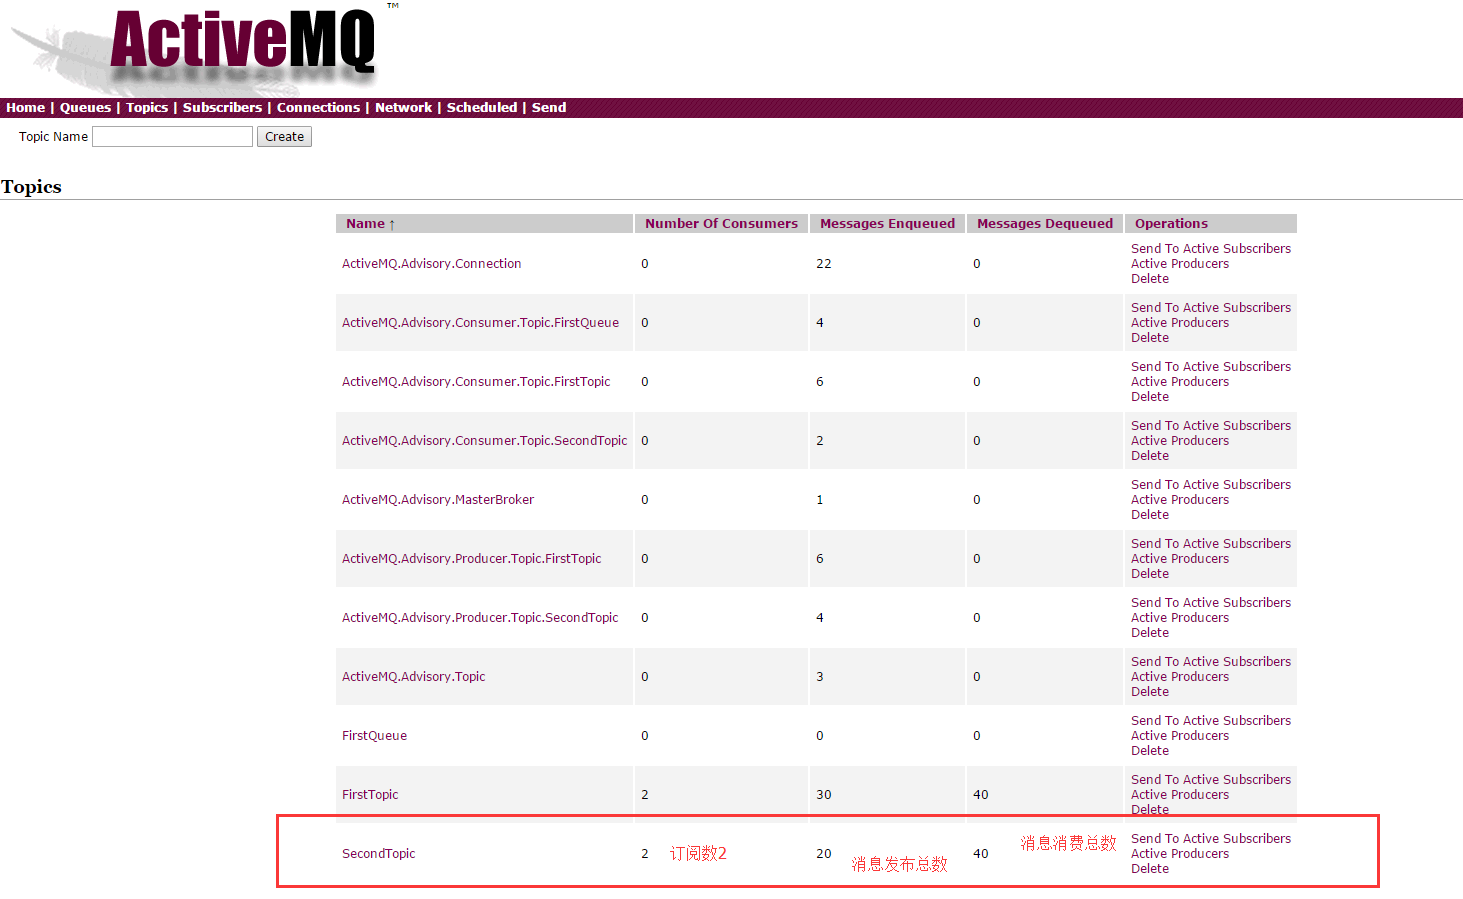
运行效果查看:
作者:程序员小波与Bug
出处:https://codetrips.cn
本文版权归作者所有,欢迎转载,但未经作者同意必须保留此段声明,且在文章页面明显位置给出原文连接。如有问题,可以邮件:caiya928@aliyun.com
QQ:1419901425 联系我
如果喜欢我的文章,请关注我的公众号:程序员小波与Bug

