使用Spring框架入门二:基于注解+XML配置的IOC/DI的使用
一、简述
本文主要讲使用注解+xml配合使用的几种使用方式。基础课程请看前一节。
二、步骤
1、为Pom.xml中引入依赖:本例中使用的是spring-context包,引入此包时系统会自动导入它的依赖包spring-beans\spring-core\spring-expression\spring-context.
<?xml version="1.0" encoding="UTF-8"?>
<project xmlns="http://maven.apache.org/POM/4.0.0"
         xmlns:xsi="http://www.w3.org/2001/XMLSchema-instance"
         xsi:schemaLocation="http://maven.apache.org/POM/4.0.0 http://maven.apache.org/xsd/maven-4.0.0.xsd">
    <modelVersion>4.0.0</modelVersion>

    <groupId>sindrol</groupId>
    <artifactId>SpringDemo</artifactId>
    <version>1.0-SNAPSHOT</version>

    <dependencies>
        <dependency>
            <groupId>org.springframework</groupId>
            <artifactId>spring-context</artifactId>
            <version>5.0.5.RELEASE</version>
        </dependency>
        <dependency>
            <groupId>org.springframework</groupId>
            <artifactId>spring-aop</artifactId>
            <version>5.0.5.RELEASE</version>
        </dependency>
        <dependency>
            <groupId>junit</groupId>
            <artifactId>junit</artifactId>
            <version>4.12</version>
        </dependency>
        <dependency>
            <groupId>org.projectlombok</groupId>
            <artifactId>lombok</artifactId>
            <version>1.16.20</version>
        </dependency>
    </dependencies>
</project>
2、在/src/java/test2下建立下列类:
package test2;

import lombok.Data;
import org.springframework.beans.factory.annotation.Value;
import org.springframework.stereotype.Component;
import org.springframework.stereotype.Controller;
import org.springframework.stereotype.Repository;
import org.springframework.stereotype.Service;

@Data
@Component(value = "product1")
//@Controller("product1") //Controller也是一个Component,一般用于WEB中的Action
//@Service("product1")//Service也是一个Component,一般用于业务逻辑类
//@Repository("product1")//Repository也是一个Component,一般用于持久层类
public class Product {
    @Value("Sindrol")
    private String name;
    @Value("1.5")
    private float price;
}
package test2;

import org.springframework.beans.factory.annotation.Autowired;
import org.springframework.stereotype.Service;

import javax.annotation.Resource;

@Service("productOperate")
public class ProductOperate {
    //使用Resource也可以实现值的注入,使用Resource和Autowired的区别在于,Resource可以指定的名称必须和要注入Comment名称相同的对象,名称不一致时出错。
    @Resource(name = "product1")
    private Product product;
    @Autowired
    private Product product2;

    @Override
    public String toString() {
        return "ProductOperate(product=" + product + " ,product2=" + product2 + ")";
    }
}
package test2;

import jdk.nashorn.internal.objects.annotations.Constructor;
import lombok.Data;
import org.springframework.beans.factory.annotation.Autowired;
import org.springframework.beans.factory.annotation.Value;
import org.springframework.context.annotation.Scope;
import org.springframework.context.annotation.ScopedProxyMode;
import org.springframework.stereotype.Component;

import javax.annotation.Resource;
import java.util.PrimitiveIterator;

@Data
@Component("paramProduct1")
//@Scope("prototype")
@Scope("singleton")
public class ParamProduct {
    @Value("JAVA书集")
    private String name;
    private float price;
    private Product product;

    public ParamProduct(@Autowired Product product, @Value("Sindrol") String name, @Value("28") float price) {
        this.product = product;
        this.name = name;
        this.price = price;
    }

}
package test2;

import java.util.List;

public class ConstructProduct {
    private List<String> list;

    public ConstructProduct(List<String> list) {
        this.list = list;
    }

    @Override
    public String toString() {
        return "ConstructProduct(list=" + list + ")";
    }
}
package test2;

import org.springframework.context.annotation.ComponentScan;

//使用ComponentScan定义类所在包开头名称。
@ComponentScan(basePackages = "test2")
public class SamePackage {
}
3、在/src/test/resources(注意:标记此resources为测试资源)下建立applicationContextTest2.xml,内容如下:
<?xml version="1.0" encoding="UTF-8"?>
<beans xmlns="http://www.springframework.org/schema/beans"
       xmlns:xsi="http://www.w3.org/2001/XMLSchema-instance"
       xmlns:context="http://www.springframework.org/schema/context"
       xsi:schemaLocation="http://www.springframework.org/schema/beans
       http://www.springframework.org/schema/beans/spring-beans.xsd
       http://www.springframework.org/schema/context
       http://www.springframework.org/schema/context/spring-context.xsd">
    <!--开启注解扫描(扫描test2开头的包)-->
    <context:component-scan base-package="test2"/>

    <!--引入配置文件,引入后值中可使用变量。引入方法一:-->
    <!--<context:property-placeholder location="config.properties" file-encoding="UTF-8"/>-->
    <!--引入配置文件,引入后值中可使用变量。引入方法二:-->
    <bean id="propertyConfigurer"
          class="org.springframework.beans.factory.config.PropertyPlaceholderConfigurer">
        <property name="location" value="config.properties" />
        <property name="fileEncoding" value="UTF-8"/>
    </bean>

    <!--扫描属性上面的注解-->
    <!--<context:annotation-config></context:annotation-config>-->
    <bean id="constructProduct" class="test2.ConstructProduct">
        <constructor-arg>
            <array>
                <!--这里可以使用引入的properties文件的变量 -->
                <value>${configKey1}</value>
                <value>${configKey2}</value>
                <value>list_item3</value>
            </array>
        </constructor-arg>
    </bean>
</beans>
4、在/src/test/resources下建立一个名为config.properties的文件,内容如下:(这里一定要注意文件的编码,IDEA在Windows下默认新建的properties是ASCII编码,所以要转成UTF-8编码后测试。)
#这是Key:Value结构。
configKey1:this is my value1.
configKey2:柱柱
5、在/src/test/java/BeanTest下添加Junit测试方法:
import org.junit.Test;
import org.springframework.context.ApplicationContext;
import org.springframework.context.annotation.AnnotationConfigApplicationContext;
import org.springframework.context.support.ClassPathXmlApplicationContext;
import test1.Student;
import test1.User;
import test2.*;
import test3.Bird;

public class BeanTest {

    @Test
    public void test2() {
        //ApplicationContext context = new AnnotationConfigApplicationContext(SamePackage.class);
        ApplicationContext context = new ClassPathXmlApplicationContext("applicationContextTest2.xml");
        Product product1 = (Product) context.getBean("product1");
        System.out.println(product1);
    }

    @Test
    public void test3() {
        ApplicationContext context = new AnnotationConfigApplicationContext(SamePackage.class);
        ParamProduct paramProduct1 = (ParamProduct) context.getBean(ParamProduct.class, new Object[]{ //构造函数值
                context.getBean(Product.class),
                "Product初始名字",
                23
        });
        System.out.println(paramProduct1);
        ParamProduct paramProduct2 = (ParamProduct) context.getBean(ParamProduct.class, new Object[]{ //构造函数值
                context.getBean(Product.class),
                "Product初始名字2",
                333
        });
        System.out.println(paramProduct2); //注意,paramProduct2并未进行真实的构造,而是直接取了单例对象。
        System.out.println("是否是同一实例:" + (paramProduct1 == paramProduct1));
    }

    @Test
    public void test4() {
        ApplicationContext context = new AnnotationConfigApplicationContext(SamePackage.class);
        ProductOperate productOperate = context.getBean(ProductOperate.class);
        System.out.println(productOperate);
    }

    @Test
    public void test5() {
        ApplicationContext context = new ClassPathXmlApplicationContext("applicationContextTest2.xml");
        ConstructProduct constructProduct = context.getBean(ConstructProduct.class);
        System.out.println(constructProduct);
    }

}
6、执行测试,查看测试结果:
test2测试结果:
Product(name=Sindrol, price=1.5)
test3测试结果:
五月 06, 2018 12:40:40 下午 org.springframework.context.support.AbstractApplicationContext prepareRefresh
信息: Refreshing org.springframework.context.annotation.AnnotationConfigApplicationContext@10e92f8f: startup date [Sun May 06 12:40:40 CST 2018]; root of context hierarchy
ParamProduct(name=JAVA书集, price=28.0, product=Product(name=Sindrol, price=1.5))
ParamProduct(name=JAVA书集, price=28.0, product=Product(name=Sindrol, price=1.5))
是否是同一实例:true
test4测试结果:
五月 06, 2018 12:40:40 下午 org.springframework.context.support.AbstractApplicationContext prepareRefresh
信息: Refreshing org.springframework.context.annotation.AnnotationConfigApplicationContext@67a20f67: startup date [Sun May 06 12:40:40 CST 2018]; root of context hierarchy
五月 06, 2018 12:40:40 下午 org.springframework.context.support.AbstractApplicationContext prepareRefresh
信息: Refreshing org.springframework.context.support.ClassPathXmlApplicationContext@31368b99: startup date [Sun May 06 12:40:40 CST 2018]; root of context hierarchy
五月 06, 2018 12:40:40 下午 org.springframework.beans.factory.xml.XmlBeanDefinitionReader loadBeanDefinitions
信息: Loading XML bean definitions from class path resource [applicationContextTest2.xml]
ProductOperate(product=Product(name=Sindrol, price=1.5) ,product2=Product(name=Sindrol, price=1.5))
test5测试结果:
ConstructProduct(list=[this is my value1., 柱柱, list_item3])
三、测试属性文件以Map的形式载入
1、在/src/test/java/test3下建立一个Bird类
package test3;

import org.springframework.beans.factory.annotation.Value;
import org.springframework.stereotype.Component;

import java.util.Map;

@Component
public class Bird {
    @Value("#{configProperties['configKey2']}")
    private String configKey2;
    @Value("#{configProperties}")
    private Map<String, String> properties;

    @Override
    public String toString() {
        return "Bird(properties=" + properties + ",configKey2=" + configKey2 + ")";
    }
}
2、在/src/test/resources下建立一个applicationContextTest3.xml,内容如下:
<?xml version="1.0" encoding="UTF-8"?>
<beans xmlns="http://www.springframework.org/schema/beans"
       xmlns:xsi="http://www.w3.org/2001/XMLSchema-instance"
       xmlns:context="http://www.springframework.org/schema/context"
       xsi:schemaLocation="http://www.springframework.org/schema/beans
       http://www.springframework.org/schema/beans/spring-beans.xsd
       http://www.springframework.org/schema/context
       http://www.springframework.org/schema/context/spring-context.xsd">
    <context:component-scan base-package="test3"/>
    <bean id="configProperties" class="org.springframework.beans.factory.config.PropertiesFactoryBean">
        <property name="locations">
            <list>
                <value>*.properties</value>
            </list>
        </property>
        <property name="fileEncoding" value="UTF-8"/>
    </bean>
</beans>
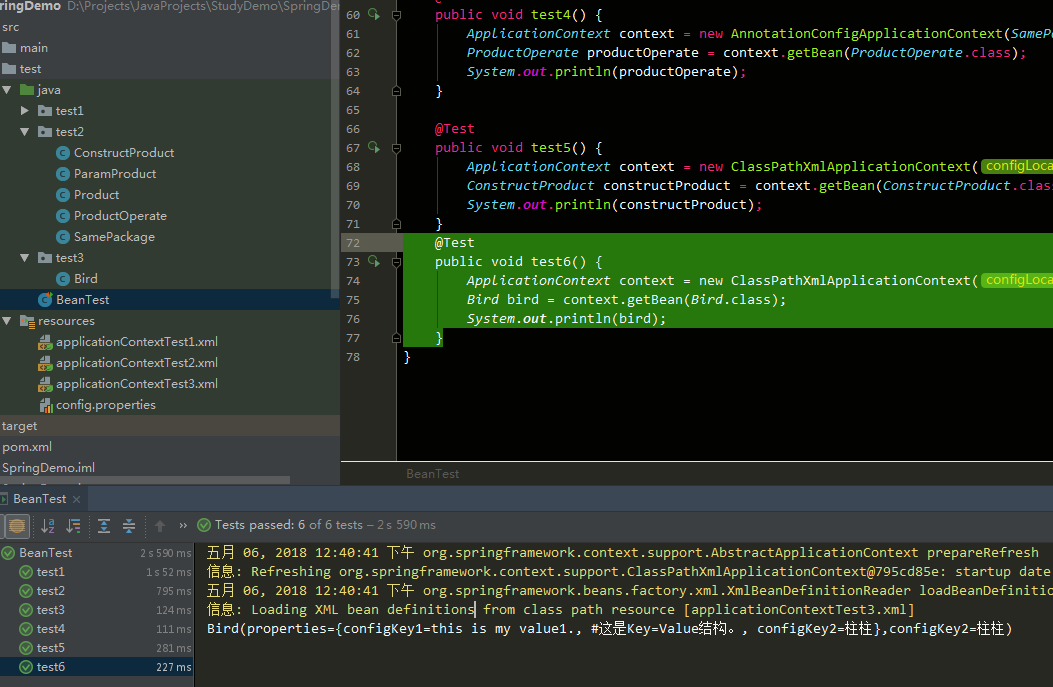
3、在/src/test/java/BeanTest中添加test6测试方法:
    @Test
    public void test6() {
        ApplicationContext context = new ClassPathXmlApplicationContext("applicationContextTest3.xml");
        Bird bird = context.getBean(Bird.class);
        System.out.println(bird);
    }
4、运行查看结果:
五月 06, 2018 12:40:41 下午 org.springframework.context.support.AbstractApplicationContext prepareRefresh
信息: Refreshing org.springframework.context.support.ClassPathXmlApplicationContext@795cd85e: startup date [Sun May 06 12:40:41 CST 2018]; root of context hierarchy
五月 06, 2018 12:40:41 下午 org.springframework.beans.factory.xml.XmlBeanDefinitionReader loadBeanDefinitions
信息: Loading XML bean definitions from class path resource [applicationContextTest3.xml]
Bird(properties={configKey1=this is my value1., #这是Key=Value结构。, configKey2=柱柱},configKey2=柱柱)
宋兴柱(Sindrol):转载内容,请标明出处,谢谢!源文来自 宝贝云知识分享:https://www.dearcloud.cn

