
OpenCv 2.4.9 (二) 核心函数
前言
经过前面一节的怎样读取图片,我们可以做一些有趣的图像变换,下面我们首先介绍使用遍历的方法实现,然后我们使用内置的函数实现。
矩阵掩码实现
矩阵掩码,和卷积神经网络中的卷积类似。一个例子如下:
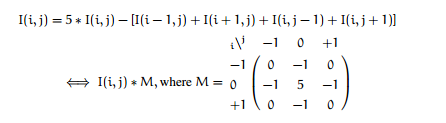
现在我们看看怎么实现:
 1 void Sharpen(const Mat& myImage, Mat& Result)
 2 {
 3     CV_Assert(myImage.depth() == CV_8U);
 4
 5     Result.create(myImage.size(), myImage.type());
 6     const int nChannels = myImage.channels();
 7
 8     for (int j=1; j<myImage.rows-1; ++j) { // 忽略第一和最后一行,防止数组越界
 9         const uchar * previous = myImage.ptr<uchar>(j-1);
10         const uchar * current = myImage.ptr<uchar>(j);
11         const uchar * next = myImage.ptr<uchar>(j+1);
12
13         uchar * output = Result.ptr<uchar>(j);
14
15         // 用连续存储的索引方法,所以每个点有三个uchar值
16         // saturate_cast溢出保护
17         for (int i=nChannels; i < nChannels * (myImage.cols-1); ++i) {
18             *output++ = saturate_cast<uchar>(5 * current[i]
19             - current[i-nChannels] - current[i+nChannels] - previous[i] - next[i]);
20         }
21
22         // 四周设置为0
23         Result.row(0).setTo(Scalar(0));
24         Result.row(Result.rows-1).setTo(Scalar(0));
25         Result.col(0).setTo(Scalar(0));
26         Result.col(Result.cols-1).setTo(Scalar(0));
27     }
28 }
我们看看结果:
因为掩码是增强中间,削弱四周,下面如果我们换掩码,使用内置函数看看效果:
1 void SharpenUseFilter2D(const Mat& src, Mat& dst) {
2     Mat kern = (Mat_<char>(3, 3) << 0,-1,0,
3                                     -1,-1,5,
4                                     0,-1,0);
5     filter2D(src, dst, src.depth(), kern);
6 }
下面是增强右边元素,减弱左边元素的效果(类似浮雕的效果,大家可以换着掩码来玩):

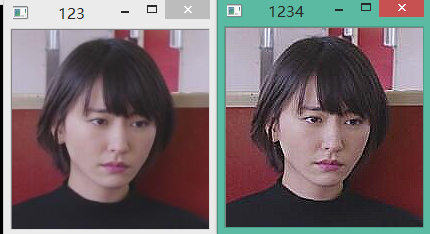
图片混合
下面是线性混合操作:
这个可以实现幻灯片的淡入淡出,通过修改alpha值。
1 resize(src1, src1, cv::Size(200, 200));
2 resize(src2, src2, cv::Size(200, 200));
3
4 namedWindow("123");
5
6 beta = 1.0 - alpha;
7 // dst = alpha * src1 + beta * src2 + gamma
8 // 这里gamma设置为0.0
9 addWeighted(src1, alpha, src2, beta, 0.0, dst);
下面看看结果:
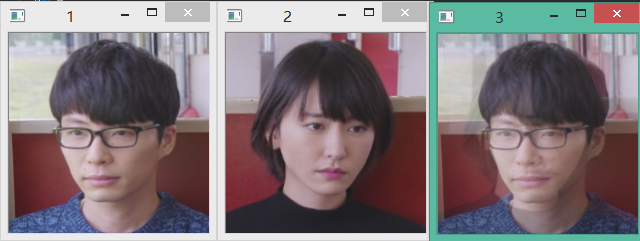
自己实现的简陋版本,除去错误检查等:
 1 void addWeight(Mat& src1, double w1, Mat& src2, double w2, Mat& dst)
 2 {
 3     dst.create(src1.size(), src2.type());
 4
 5     Mat_<Vec3b> _src1 = src1;
 6     Mat_<Vec3b> _src2 = src2;
 7     Mat_<Vec3b> _dst = dst;
 8
 9     for (int i=0; i<src1.rows; ++i) {
10         for (int j=0; j<src1.cols; ++j) {
11             for (int c=0; c<3; ++c)
12                 _dst(i, j)[c] = w1 * _src1(i, j)[c] + w2 * _src2(i, j)[c];
13         }
14     }
15 }
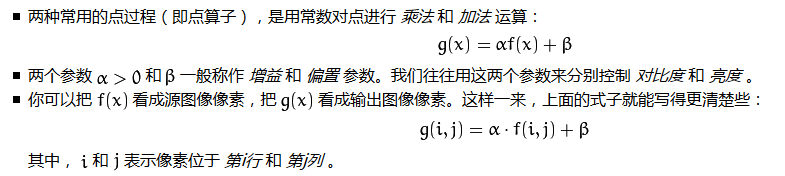
改变图片的对比度和亮度
 1     Mat new_image = Mat::zeros(image.size(), image.type());
 2
 3     alpha = 1.2; // 1.0-3.0
 4     beta = 50;    // 0-100
 5
 6     for (int y=0; y<image.rows; ++y) {
 7         for (int x=0; x<image.cols; ++x) {
 8             for (int c=0; c<3; ++c)
 9                 // Vec3b = [R, G, B]
10                 new_image.at<Vec3b>(y, x)[c] = saturate_cast<uchar>
11                     (alpha * (image.at<Vec3b>(y, x)[c]) + beta);
12         }
13     }
14
15     Mat new_image_2 = Mat::zeros(image.size(), image.type());
16     // -1 代表输入输出类型一样
17     image.convertTo(new_image_2, -1, alpha, beta);
结果如下:

基本绘图
而产生随机数可以使用 RNG rng( 0xFFFFFFFF ); 这样就可以生成符合一定分布的数,例如高斯分布 rng.uniform(1, 10);
快速傅里叶变换
(上图来源:http://www.opencv.org.cn/opencvdoc/2.3.2/html/doc/tutorials/core/discrete_fourier_transform/discrete_fourier_transform.html)
 1     // 当图片大小是2,3,5的倍数的时候,傅里叶变换表现最高
 2     // 所以先获得最好的尺寸 m,n
 3     // 然后再进行填充
 4     Mat padded;
 5     int m = getOptimalDFTSize(I.rows);
 6     int n = getOptimalDFTSize(I.cols);
 7     copyMakeBorder(I, padded, m-I.rows, 0, n-I.cols, 0, BORDER_CONSTANT, Scalar::all(0));
 8
 9     // 对于每个原图,结果是两个图像值
10     // 因为需要储存复数部分,所以需要添加一个额外通道
11     // 存到complexI中
12     Mat planes[] = {Mat_<float>(padded), Mat::zeros(padded.size(), CV_32F)};
13     Mat complexI;
14     merge(planes, 2, complexI);
15
16     dft(complexI, complexI);
17
18     // 将复数转化成幅度
19     split(complexI, planes);    // planes[0] = Re(DFT(I), planes[1] = Im(DFT(I))
20     magnitude(planes[0], planes[1], planes[0]);    // planes[0] = sqrt([0]**2 + [1]**2)
21     Mat magI = planes[0];
22
23     // 为了使变化可以观察,高低连续变换,需要尺度缩放
24     magI += Scalar::all(1);
25     log(magI, magI);
26
27     // 剪切和重分布图像象限
28     magI = magI(Rect(0, 0, magI.cols & -2, magI.rows & -2));
29
30     int cx = magI.cols/2;
31     int cy = magI.rows/2;
32
33     Mat q0(magI, Rect(0, 0, cx, cy)); // 上左
34     Mat q1(magI, Rect(cx, 0, cx, cy));// 上右
35     Mat q2(magI, Rect(0, cy, cx, cy));// 下左
36     Mat q3(magI, Rect(cx, cy, cx, cy));// 下右
37
38     Mat tmp;
39     q0.copyTo(tmp);
40     q3.copyTo(q0);
41     tmp.copyTo(q3);
42
43     q1.copyTo(tmp);
44     q2.copyTo(q1);
45     tmp.copyTo(q2);
46
47     // 归一化
48     normalize(magI, magI, 0, 1, CV_MINMAX);
输出为XML或者YAML文件
输出为XML或者YAML需要借助 FileStorage 和 FileNode 。
首先声明文件名
1 string filename = "store.xml";
对于写入:
1 FileStorage fs(filename, FileStorage::WRITE); // 记得释放, fs.release();
对于读取:
1 FileStorage fs;
2 fs.open(filename, FileStorage::READ);
内置对象的写入读取
1 // 写入
2 fs << "iterationNr" << 100;
3
4 //读取
5 int itNr;
6 itNr = (int) fs["iterationNr"];
存储效果如下:
序列的写入读取
// 序列写入需要使用[]
fs << "strings" << "[";
fs << "image1.jpg" << "Awesoneness" << "babonn.jpg";
fs << "]";

// 读取需要迭代器
FileNode n = fs["strings"];
if (n.type() != FileNode::SEQ) {
    cerr << "string is not a sequence!" << endl;
    return 1;
}
FileNodeIterator it = n.begin(), it_end = n.end();
for (; it != it_end; ++it)
    cout << (string)*it << endl;
存储效果:
Map的写入读取
// map的写入需要{}
fs << "Mapping";
fs << "{" << "One" << 1;
fs << "Two" << 2 << "}";

// 读取
n = fs["Mapping"];
cout << "Two " << (int)(n["Two"]) << ";";
cout << "One " << (int)(n["One"]) << endl << endl;
存储效果: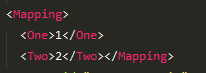
矩阵的写入读取
1 Mat R = Mat_<uchar>::eye(3, 3);
2 fs << "R" << R;
3
4 Mat R;
5 fs["R"] >> R;
存储效果: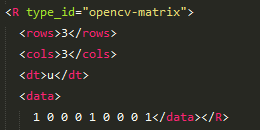
自定义对象的写入和读取
首先自定义对象:
 1 class MyData
 2 {
 3 public:
 4     MyData(): A(0), X(0), id() {};
 5
 6     explicit MyData(int): A(97), X(CV_PI), id("mydata1234") {};
 7
 8     void write(FileStorage& fs) const {
 9         fs << "{" << "A" << A << "X" << X <<"id" << id << "}"; // 自定义写入
10     }
11
12     void read(const FileNode& node) { // 自定义读取
13         A = (int)node["A"];
14         X = (double)node["X"];
15         id = (string)node["id"];
16     }
17 public:
18     int A;
19     double X;
20     string id;
21 };
然后还要重载全局的读取和写入函数:
 1 static void write(FileStorage& fs, const std::string&, const MyData& x) {
 2     x.write(fs);
 3 }
 4
 5 static void read(const FileNode& node, MyData& x, const MyData& default_value = MyData()) {
 6     if (node.empty())
 7         x = default_value;
 8     else
 9         x.read(node);
10 }
这样就可以写入和读取:
1 MyData m(1);
2 fs << "MyData" << m;
3
4 fs["MyData"] >> m;
存储效果如下: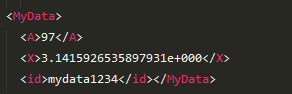
和OpenCV1混合

