

Spring boot通过JPA访问MySQL数据库
本文展示如何通过JPA访问MySQL数据库。
JPA全称Java Persistence API,即Java持久化API,它为Java开发人员提供了一种对象/关系映射工具来管理Java应用中的关系数据,结合其他ORM的使用,能达到简化开发流程的目的,使开发者能够专注于实现自己的业务逻辑上。
Spring boot结合Jpa 能够简化创建 JPA 数据访问层和跨存储的持久层功能,用户的持久层Dao接口只需要继承定义好的接口,无需再写实现类,就可以实现对象的CRUD操作以及分页排序等功能。
环境要求
- Mysql数据库5.6以上
- JDK1.8以上
- 开发工具使用STS
创建项目
使用STS创建项目
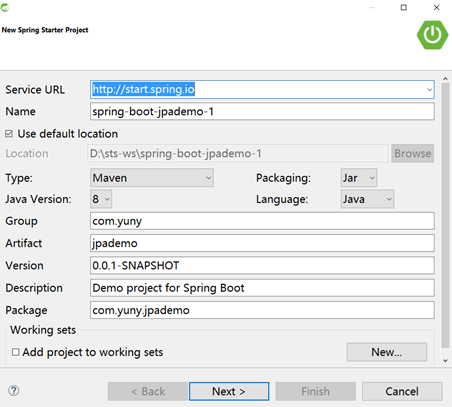
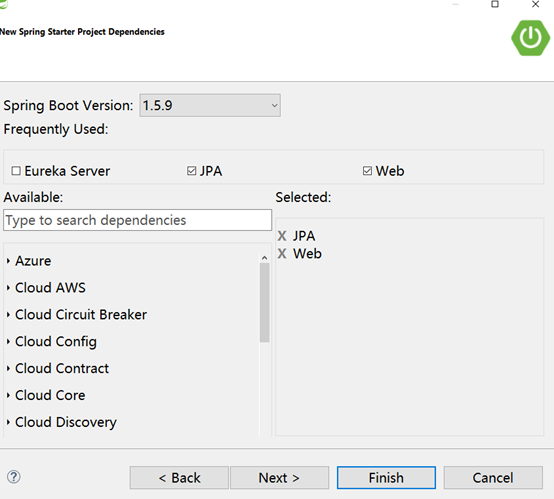
选择web和JPA依赖
添加MySQL数据库驱动依赖
<dependency>
     <groupId>mysql</groupId>
     <artifactId>mysql-connector-java</artifactId>
</dependency>
application.properties中配置数据库连接信息
spring.jpa.hibernate.ddl-auto=create
spring.datasource.url=jdbc:mysql://localhost:3306/db_example
spring.datasource.username=springuser
spring.datasource.password=ThePassword
以上数据库连接信息根据实际情况进行调整。
注意pring.jpa.hibernate.ddl-auto的值可以是none、create、update、create-drop。具体参考hibernate的文档。
创建实体模型
com.yuny.jpademo.pojo.User
import javax.persistence.Entity;
import javax.persistence.GeneratedValue;
import javax.persistence.GenerationType;
import javax.persistence.Id;

@Entity // This tells Hibernate to make a table out of this class
public class User {
    @Id
    @GeneratedValue(strategy=GenerationType.AUTO)
    private Integer id;
    private String name;
private String email;
//此处省略get和set
}
增加数据访问接口
com.yuny.jpademo.repository.UserRepository
public interface UserRepository extends PagingAndSortingRepository<User, Long> {
}
此接口会自动由spring实现,并且产生对应的实例放在容器中,该实例的名称为类名首字母小写userRepository。
创建Controller测试
import org.springframework.beans.factory.annotation.Autowired;
import org.springframework.web.bind.annotation.GetMapping;
import org.springframework.web.bind.annotation.RequestParam;
import org.springframework.web.bind.annotation.ResponseBody;
import org.springframework.web.bind.annotation.RestController;

import com.yuny.jpademo.pojo.User;
import com.yuny.jpademo.repository.UserRepository;
@RestController
public class UserController {
    @Autowired
    private UserRepository userRepository;

    //测试插入新的数据
    @GetMapping(path="/add")
    public @ResponseBody String addNewUser (@RequestParam String name
            , @RequestParam String email) {

        User n = new User();
        n.setName(name);
        n.setEmail(email);
        userRepository.save(n);
        return "保存成功";
    }

    //测试获取全部的数据
    @GetMapping(path="/all")
    public Iterable<User> getAllUsers() {
        return userRepository.findAll();
    }
}
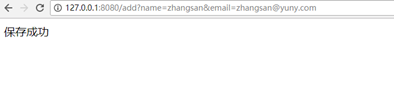
测试
运行SpringBootJpademoApplication后,访问http://localhost:8080/add测试。结果如下:
数据库显示插入数据成功

访问http://localhost:8080/all 测试

总结
在没用使用jpa支持的时候,我们的代码要定义IUserDao(持久层接口)、IUserDaoImpl(持久层实现类)、IUserService(业务层接口)等,这样每写一个实体类,都要衍生出多个类来进行操作。
而在Spring boot 中使用JPA,只需要声明一个接口就可以了。
案例代码
https://github.com/junyanghuang/spring-boot-samples/tree/master/spring-boot-jpademo

