

如果使用的是redis2.x,在项目中使用客户端分片(Shard)机制。(具体使用方式:第九章 企业项目开发--分布式缓存Redis(1) 第十章 企业项目开发--分布式缓存Redis(2))
如果使用的是redis3.x中的集群,在项目中使用jedisCluster。
redis3.2.5集群搭建:第十二章 redis-cluster搭建(redis-3.2.5)
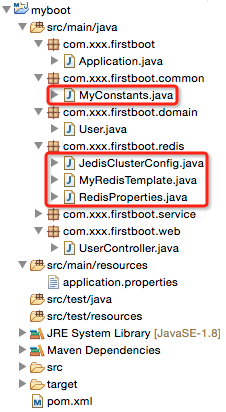
1、项目结构
2、pom.xml


 1 <?xml version="1.0" encoding="UTF-8"?>
 2 <project xmlns="http://maven.apache.org/POM/4.0.0" xmlns:xsi="http://www.w3.org/2001/XMLSchema-instance"
 3     xsi:schemaLocation="http://maven.apache.org/POM/4.0.0 http://maven.apache.org/maven-v4_0_0.xsd">
 4
 5     <modelVersion>4.0.0</modelVersion>
 6
 7     <groupId>com.xxx</groupId>
 8     <artifactId>myboot</artifactId>
 9     <version>1.0-SNAPSHOT</version>
10
11     <properties>
12         <java.version>1.8</java.version><!-- 官方推荐 -->
13     </properties>
14     <!-- 引入spring-boot-starter-parent做parent是最好的方式,
15          但是有时我们可能要引入我们自己的parent,此时解决方式有两种:
16          1)我们自己的parent的pom.xml的parent设为spring-boot-starter-parent(没有做过验证,但是感觉可行)
17          2)使用springboot文档中的方式:见spring-boot-1.2.5-reference.pdf的第13页
18     -->
19     <parent>
20         <groupId>org.springframework.boot</groupId>
21         <artifactId>spring-boot-starter-parent</artifactId>
22         <version>1.2.5.RELEASE</version>
23     </parent>
24
25     <!-- <dependencyManagement>
26         <dependencies>
27             <dependency>
28                 Import dependency management from Spring Boot
29                 <groupId>org.springframework.boot</groupId>
30                 <artifactId>spring-boot-dependencies</artifactId>
31                 <version>1.2.5.RELEASE</version>
32                 <type>pom</type>
33                 <scope>import</scope>
34             </dependency>
35         </dependencies>
36     </dependencyManagement> -->
37
38     <!-- 引入实际依赖 -->
39     <dependencies>
40         <dependency>
41             <groupId>org.springframework.boot</groupId>
42             <artifactId>spring-boot-starter-web</artifactId>
43         </dependency>
44         <dependency>
45             <groupId>redis.clients</groupId>
46             <artifactId>jedis</artifactId>
47         </dependency>
48         <dependency>
49             <groupId>com.alibaba</groupId>
50             <artifactId>fastjson</artifactId>
51             <version>1.1.15</version>
52         </dependency>
53         <dependency>
54             <groupId>org.apache.commons</groupId>
55             <artifactId>commons-lang3</artifactId>
56             <version>3.3.2</version>
57         </dependency>
58     </dependencies>
59
60     <build>
61         <plugins>
62             <!-- 用于将应用打成可直接运行的jar(该jar就是用于生产环境中的jar) 值得注意的是,如果没有引用spring-boot-starter-parent做parent,
63                 且采用了上述的第二种方式,这里也要做出相应的改动 -->
64             <plugin>
65                 <groupId>org.springframework.boot</groupId>
66                 <artifactId>spring-boot-maven-plugin</artifactId>
67             </plugin>
68         </plugins>
69     </build>
70 </project>
说明:相对于上一章的代码仅仅引入了jedis的依赖jar。
3、application.properties
 1 #user info
 2 user.id=1
 3 user.username=zhaojigang
 4 user.password=123
 5
 6 #redis cluster
 7 redis.cache.clusterNodes=localhost:8080
 8 redis.cache.commandTimeout=5
 9 #unit:second
10 redis.cache.expireSeconds=120
说明:相对于上一章的代码仅仅引入了redis cluster的配置信息
4、Application.java(springboot启动类,与上一章一样)
5、RedisProperties.java(Redis属性装配)
 1 package com.xxx.firstboot.redis;
 2
 3 import org.springframework.boot.context.properties.ConfigurationProperties;
 4 import org.springframework.stereotype.Component;
 5
 6 @Component
 7 @ConfigurationProperties(prefix = "redis.cache")
 8 public class RedisProperties {
 9
10     private int    expireSeconds;
11     private String clusterNodes;
12     private int    commandTimeout;
13
14     public int getExpireSeconds() {
15         return expireSeconds;
16     }
17
18     public void setExpireSeconds(int expireSeconds) {
19         this.expireSeconds = expireSeconds;
20     }
21
22     public String getClusterNodes() {
23         return clusterNodes;
24     }
25
26     public void setClusterNodes(String clusterNodes) {
27         this.clusterNodes = clusterNodes;
28     }
29
30     public int getCommandTimeout() {
31         return commandTimeout;
32     }
33
34     public void setCommandTimeout(int commandTimeout) {
35         this.commandTimeout = commandTimeout;
36     }
37
38 }
说明:与上一章的User类似,采用@ConfigurationProperties注解自动读取application.properties文件的内容并装配到RedisProperties的每一个属性中去。
6、JedisClusterConfig.java(获取JedisCluster单例)
 1 package com.xxx.firstboot.redis;
 2
 3 import java.util.HashSet;
 4 import java.util.Set;
 5
 6 import org.springframework.beans.factory.annotation.Autowired;
 7 import org.springframework.context.annotation.Bean;
 8 import org.springframework.context.annotation.Configuration;
 9
10 import redis.clients.jedis.HostAndPort;
11 import redis.clients.jedis.JedisCluster;
12
13 @Configuration
14 public class JedisClusterConfig {
15
16     @Autowired
17     private RedisProperties redisProperties;
18
19     /**
20      * 注意:
21      * 这里返回的JedisCluster是单例的,并且可以直接注入到其他类中去使用
22      * @return
23      */
24     @Bean
25     public JedisCluster getJedisCluster() {
26         String[] serverArray = redisProperties.getClusterNodes().split(",");//获取服务器数组(这里要相信自己的输入,所以没有考虑空指针问题)
27         Set<HostAndPort> nodes = new HashSet<>();
28
29         for (String ipPort : serverArray) {
30             String[] ipPortPair = ipPort.split(":");
31             nodes.add(new HostAndPort(ipPortPair[0].trim(), Integer.valueOf(ipPortPair[1].trim())));
32         }
33
34         return new JedisCluster(nodes, redisProperties.getCommandTimeout());
35     }
36
37 }
说明:
- 该类注入了RedisProperties类,可以直接读取其属性
- 这里没有对jedis链接池提供更多的配置(jedis-2.5.x好像不支持,jedis-2.6.x支持),具体的配置属性可以查看文章开头第一篇博客
注意:
- 该类使用了Java注解,@Configuration与@Bean,
- 在方法上使用@Bean注解可以让方法的返回值为单例,
- 该方法的返回值可以直接注入到其他类中去使用
- @Bean注解是方法级别的
- 如果使用的是常用的spring注解@Component,
- 在方法上没有注解的话,方法的返回值就会是一个多例,
- 该方法的返回值不可以直接注入到其他类去使用
- 该方式的注解是类级别的
7、MyRedisTemplate.java(具体redis操作)
 1 package com.xxx.firstboot.redis;
 2
 3 import org.slf4j.Logger;
 4 import org.slf4j.LoggerFactory;
 5 import org.springframework.beans.factory.annotation.Autowired;
 6 import org.springframework.stereotype.Component;
 7
 8 import redis.clients.jedis.JedisCluster;
 9
10 @Component
11 public class MyRedisTemplate {
12     private static final Logger LOGGER    = LoggerFactory.getLogger(MyRedisTemplate.class);
13
14     @Autowired
15     private JedisCluster        jedisCluster;
16
17     @Autowired
18     private RedisProperties     redisProperties;
19
20     private static final String KEY_SPLIT = ":"; //用于隔开缓存前缀与缓存键值
21
22     /**
23      * 设置缓存
24      * @param prefix 缓存前缀(用于区分缓存,防止缓存键值重复)
25      * @param key    缓存key
26      * @param value  缓存value
27      */
28     public void set(String prefix, String key, String value) {
29         jedisCluster.set(prefix + KEY_SPLIT + key, value);
30         LOGGER.debug("RedisUtil:set cache key={},value={}", prefix + KEY_SPLIT + key, value);
31     }
32
33     /**
34      * 设置缓存,并且自己指定过期时间
35      * @param prefix
36      * @param key
37      * @param value
38      * @param expireTime 过期时间
39      */
40     public void setWithExpireTime(String prefix, String key, String value, int expireTime) {
41         jedisCluster.setex(prefix + KEY_SPLIT + key, expireTime, value);
42         LOGGER.debug("RedisUtil:setWithExpireTime cache key={},value={},expireTime={}", prefix + KEY_SPLIT + key, value,
43             expireTime);
44     }
45
46     /**
47      * 设置缓存,并且由配置文件指定过期时间
48      * @param prefix
49      * @param key
50      * @param value
51      */
52     public void setWithExpireTime(String prefix, String key, String value) {
53         int EXPIRE_SECONDS = redisProperties.getExpireSeconds();
54         jedisCluster.setex(prefix + KEY_SPLIT + key, EXPIRE_SECONDS, value);
55         LOGGER.debug("RedisUtil:setWithExpireTime cache key={},value={},expireTime={}", prefix + KEY_SPLIT + key, value,
56             EXPIRE_SECONDS);
57     }
58
59     /**
60      * 获取指定key的缓存
61      * @param prefix
62      * @param key
63      */
64     public String get(String prefix, String key) {
65         String value = jedisCluster.get(prefix + KEY_SPLIT + key);
66         LOGGER.debug("RedisUtil:get cache key={},value={}", prefix + KEY_SPLIT + key, value);
67         return value;
68     }
69
70     /**
71      * 删除指定key的缓存
72      * @param prefix
73      * @param key
74      */
75     public void deleteWithPrefix(String prefix, String key) {
76         jedisCluster.del(prefix + KEY_SPLIT + key);
77         LOGGER.debug("RedisUtil:delete cache key={}", prefix + KEY_SPLIT + key);
78     }
79
80     public void delete(String key) {
81         jedisCluster.del(key);
82         LOGGER.debug("RedisUtil:delete cache key={}", key);
83     }
84
85 }
注意:
这里只是使用了jedisCluster做了一些字符串的操作,对于list/set/sorted set/hash的操作,可以参考开头的两篇博客。
8、MyConstants.java(缓存前缀常量定义类)
1 package com.xxx.firstboot.common;
2
3 /**
4  * 定义一些常量
5  */
6 public class MyConstants {
7     public static final String USER_FORWARD_CACHE_PREFIX = "myboot:user";// user缓存前缀
8 }
注意:
- 根据业务特点定义redis的缓存前缀,有助于防止缓存重复导致的缓存覆盖问题
- 缓存前缀使用":"做分隔符,这是推荐做法(这个做法可以在使用redis-desktop-manager的过程看出来)
9、UserController.java(测试)
 1 package com.xxx.firstboot.web;
 2
 3 import org.apache.commons.lang3.StringUtils;
 4 import org.springframework.beans.factory.annotation.Autowired;
 5 import org.springframework.web.bind.annotation.RequestMapping;
 6 import org.springframework.web.bind.annotation.RequestParam;
 7 import org.springframework.web.bind.annotation.RestController;
 8
 9 import com.alibaba.fastjson.JSON;
10 import com.xxx.firstboot.common.MyConstants;
11 import com.xxx.firstboot.domain.User;
12 import com.xxx.firstboot.redis.MyRedisTemplate;
13 import com.xxx.firstboot.service.UserService;
14
15 /**
16  * @RestController:spring mvc的注解,
17  * 相当于@Controller与@ResponseBody的合体,可以直接返回json
18  */
19 @RestController
20 @RequestMapping("/user")
21 public class UserController {
22
23     @Autowired
24     private UserService userService;
25
26     @Autowired
27     private MyRedisTemplate myRedisTemplate;
28
29     @RequestMapping("/getUser")
30     public User getUser() {
31         return userService.getUser();
32     }
33
34     @RequestMapping("/testJedisCluster")
35     public User testJedisCluster(@RequestParam("username") String username){
36         String value =  myRedisTemplate.get(MyConstants.USER_FORWARD_CACHE_PREFIX, username);
37         if(StringUtils.isBlank(value)){
38             myRedisTemplate.set(MyConstants.USER_FORWARD_CACHE_PREFIX, username, JSON.toJSONString(getUser()));
39             return null;
40         }
41         return JSON.parseObject(value, User.class);
42     }
43
44 }
说明:相对于上一章,只是添加了测试缓存的方法testJedisCluster。
测试:
在Application.properties右击-->run as-->java application,在浏览器输入"localhost:8080/user/testJedisCluster?username=xxx"即可。
附:对于redis的测试,我们有时需要查看执行set后,缓存是否存入redis的db中了,有两种方式
- 执行set后,get数据,之后修改数据,在get数据,比较两次get的数据是否相同即可
- 有时,这些数据是无法修改的(假设该数据是我们从第三方接口得来的),这个时候可以使用redis-desktop-manager这个软件来查看缓存是否存入redis(该软件的使用比较简单,查看官网)

