
阿里云ECS服务器源配置
前段时间领取了阿里云ECS免费试用6个月的福利,此处记录一下服务器源配置过程和服务器用户创建过程。
一、CentOS源配置
1、备份
mv /etc/yum.repos.d/CentOS-Base.repo /etc/yum.repos.d/CentOS-Base.repo.backup
2、下载新的CentOS-Base.repo 到/etc/yum.repos.d/
CentOS 5
wget -O /etc/yum.repos.d/CentOS-Base.repo http://mirrors.aliyun.com/repo/Centos-5.repo
# 或者
curl -o /etc/yum.repos.d/CentOS-Base.repo http://mirrors.aliyun.com/repo/Centos-5.repo
CentOS 6
wget -O /etc/yum.repos.d/CentOS-Base.repo http://mirrors.aliyun.com/repo/Centos-6.repo
# 或者
curl -o /etc/yum.repos.d/CentOS-Base.repo http://mirrors.aliyun.com/repo/Centos-6.repo
CentOS 7
wget -O /etc/yum.repos.d/CentOS-Base.repo http://mirrors.aliyun.com/repo/Centos-7.repo
# 或者
curl -o /etc/yum.repos.d/CentOS-Base.repo http://mirrors.aliyun.com/repo/Centos-7.repo
3、之后运行命令:yum makecache 生成缓存。
二、服务器用户创建
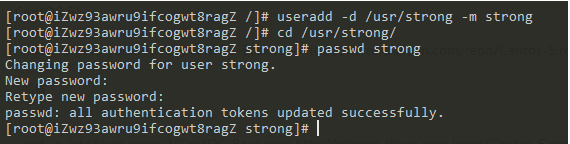
输入命令:
useradd -d /usr/strong -m strong
进入到strong目录下:
cd /usr/strong/
重置密码:
passwd strong
接下来赋予用户strong权限,打开文件:vi /etc/sudoers
/ 搜索 :noh 去除高亮
在root用户下新建一行内容:strong ALL=(ALL) ALL

wq! 保存退出
使用strong用户登录:
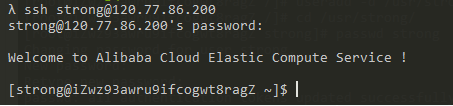
登录成功!

