CentOS6.5 Nginx优化编译配置
说到Nginx,它真的算是我在运维工作中的好朋友,它优异的性能和极高的工作效率实在是让人大爱,来自internet的报告称其epoll模型能够支持高达50000个并发连接数。
Epoll[维基百科]:
epoll是Linux下 多路复用IO接口select/poll的增强版本,它能显著提高程序在大量并发连接中只有少量活跃的情况下的系统CPU利用率,因为它会复用文件描述符 集合来传递结果而不用迫使开发者每次等待事件之前都必须重新准备要被侦听的文件描述符集合,另一点原因就是获取事件的时候,它无须遍历整个被侦听的描述符 集,只要遍历那些被内核IO事件异步唤醒而加入Ready队列的描述符集合就行了。epoll除了提供select/poll那种IO事件的电平触发 (Level Triggered)外,还提供了边沿触发(Edge Triggered),这就使得用户空间程序有可能缓存IO状态,减少epoll_wait/epoll_pwait的调用,提高应用程序效率。
Linux运维交流群 : 344177552
安装Nginx,这里我略过使用包管理器而使用编译的方式让Nginx运行起来:
1、安装Zlib函数库
####Gcc编译环境是必须条件#####[root@i-it ~]# yum install gcc-c++ make autoconf aotomake
[root@i-it ~]# tar zxf zlib-1.2.8.tar.gz
[root@i-it ~]# cd zlib-1.2.8[root@i-it zlib-1.2.8]#./configure --prefix=/software/zlib
[root@i-it zlib-1.2.8]# make && make install
2、添加对rewrite的支持,编译参数中启用了对utf8字符的支持,以便nginx支持中文的正则表达式
[root@i-it ~]# tar zxf pcre-8.35.tar.gz
[root@i-it ~]# cd pcre-8.35[root@i-it pcre-8.35]#./configure --prefix=/software/pcre --enable-utf8 --enable-unicode-properties
[root@i-it pcre-8.35]# make && make install
3、添加对https 的支持
[root@i-it ~]# tar zxf openssl-1.0.1h.tar.gz
[root@i-it ~]# cd openssl-1.0.1h[root@i-it openssl-1.0.1h]#./config --prefix=/software/openssl
[root@i-it openssl-1.0.1h]# make && make install
编 译TCMalloc,它是由Google公司发开的一款开源工具,goole-perftools中的一成员,TCMalloc在内存的分配效率和速度要 比标准的glibc库好得多,它不但可以用来优化高并发下的Mysql,从而降低系统的负载,还可以用于Nginx实现同样的功能,因此,对于高并发的 Nginx来说无疑是如虎添翼。
4、安装libunwind库
[root@i-it ~]# tar zxf libunwind-1.1.tar.gz
[root@i-it ~]# cd libunwind-1.1[root@i-it libunwind-1.1]# CFLAGS=-fPIC ./configure --prefix=/software/google-libunwind
[root@i-it libunwind-1.1]# make CFLAGS=-fPIC && make CFLAGS=-fPIC install
5、安装google-perftools
[root@i-it ~]# tar zxf gperftools-2.2.tar.gz
[root@i-it ~]# cd gperftools-2.2[root@i-it gperftools-2.2]# LDFLAGS="-L/software/google-libunwind/lib" CPPFLAGS="-I/software/google-libunwind/include"./configure --prefix=/software/google-perftools
[root@i-it gperftools-2.2]# make && make install
6、添加共享库路径
[root@i-it ~]# echo "/software/google-libunwind/lib/">>/etc/ld.so.conf
[root@i-it ~]# echo "/software/google-perftools/lib/">>/etc/ld.so.conf
[root@i-it ~]# echo "/software/zlib/lib/">>/etc/ld.so.conf
[root@i-it ~]# echo "/software/pcre/lib/">>/etc/ld.so.conf
[root@i-it ~]# ldconfig -v
7、编译Nginx
[root@i-it ~]# groupadd -g 1500 nginx
[root@i-it ~]# useradd -M -u 1500-g nginx -s /sbin/nologin nginx
[root@i-it ~]# mkdir /var/tmp/nginx
[root@i-it ~]# chown nginx:nginx /var/tmp/nginx/[root@i-it ~]# tar zxf nginx-1.7.1.tar.gz
[root@i-it ~]# cd nginx-1.7.1

#############注释该文件的174行取消debug模式##############

[root@i-it nginx-1.7.1]# vi auto/cc/gcc
    173# debug174# CFLAGS="$CFLAGS -g"

######因为google-perftools库的安装路径并非默认,所以这里又要修改一次源码####

[root@i-it nginx-1.7.1]# sed -i "s#/usr/local#/software/google-perftools#"auto/lib/google-perftools/conf
[root@i-it nginx-1.7.1]#./configure --prefix=/software/nginx --user=nginx --group=nginx --with-http_stub_status_module --with-http_ssl_module --with-http_realip_module --with-http_gzip_static_module --with-debug --http-client-body-temp-path=/var/tmp/nginx/client --http-proxy-temp-path=/var/tmp/nginx/proxy --http-fastcgi-temp-path=/var/tmp/nginx/fastcgi --http-uwsgi-temp-path=/var/tmp/nginx/uwsgi --http-scgi-temp-path=/var/tmp/nginx/scgi --with-pcre=/root/pcre-8.35--with-openssl=/root/openssl-1.0.1h--with-zlib=/root/zlib-1.2.8[root@i-it nginx-1.7.1]# make && make install
8、先添加一个启动脚本,让Nginx run起来
[root@i-it ~]# vi /etc/init.d/nginx
#!/bin/bash# nginx Startup script for the Nginx HTTP Server
# it is v.0.0.2 version.# chkconfig: - 85 15
# description: Nginx is a high-performance web and proxy server.
# It has a lot of features, but it's not for everyone.
# processname: nginx# pidfile: /software/nginx/logs/nginx.pid
# config: /software/nginx/conf/nginx.conf
nginxd=/software/nginx/sbin/nginx
nginx_config=/software/nginx/conf/nginx.conf
nginx_pid=/software/nginx/logs/nginx.pid
RETVAL=0
prog="nginx"# Source function library../etc/rc.d/init.d/functions
# Source networking configuration../etc/sysconfig/network
# Check that networking is up.[ ${NETWORKING}="no"]&&exit0[-x $nginxd ]||exit0
# Start nginx daemons functions.
start(){if[-e $nginx_pid ];then
echo "nginx already running...."exit1fi
echo -n $"Starting $prog: "
daemon $nginxd -c ${nginx_config}
RETVAL=$?
echo
[ $RETVAL =0]&& touch /var/lock/subsys/nginx
return $RETVAL
}
# Stop nginx daemons functions.
stop(){
echo -n $"Stopping $prog: "
killproc $nginxd
RETVAL=$?
echo
[ $RETVAL =0]&& rm -f /var/lock/subsys/nginx /usr/local/nginx/logs/nginx.pid
}
reload(){
echo -n $"Reloading $prog: "
#kill -HUP `cat ${nginx_pid}`
killproc $nginxd -HUP
RETVAL=$?
echo
}
# See how we were called.case"$1"in
start)
start
;;
stop)
stop
;;
reload)
reload
;;
restart)
stop
start
;;
status)
status $prog
RETVAL=$?;;*)
echo $"Usage: $prog {start|stop|restart|reload|status|help}"
exit1esacexit $RETVAL

#########赋权让其run起来#########[root@i-it ~]# chmod 755/etc/init.d/nginx && chkconfig nginx on
[root@i-it ~]# service nginx start
Starting nginx:[  OK  ][root@i-it ~]# netstat -pant | grep 80
tcp        000.0.0.0:800.0.0.0:*                   LISTEN      37831/nginx
9、Nginx run起来了,配置前面的google-perftools库
#####创建线程目录#####

[root@i-it ~]# mkdir /tmp/tcmalloc
[root@i-it ~]# chmod 0777/tmp/tcmalloc/

####修改Nginx配置文件#####

[root@i-it ~]# vi /software/nginx/conf/nginx.conf
pid        logs/nginx.pid;
google_perftools_profiles /tmp/tcmalloc;

###查看google-perftools是否加载###

[root@i-it ~]# service nginx restart
Stopping nginx:[  OK  ]Starting nginx:[  OK  ][root@i-it ~]#  lsof -n | grep tcmalloc
nginx     37882   nginx    9w      REG              253,001179654/tmp/tcmalloc.37882
nginx     37883   nginx   11w      REG              253,001179655/tmp/tcmalloc.37883

####每一行输出的数据表示Nginx主配置文件中worker_processes的值,其每个线程文件后面的数值为Nginx启动的PID####

[root@i-it ~]# ps aux | grep nginx
root     378800.00.230200892?Ss00:270:00 nginx: master process /software/nginx/sbin/nginx -c /software/nginx/conf/nginx.conf
nginx    378820.01.1348043844?        S    00:270:00 nginx: worker process
nginx    378830.01.1348043772?        S    00:270:00 nginx: worker process
####iptables 开80端口####[root@i-it ~]# iptables -I INPUT -p tcp --dport 80-j ACCEPT
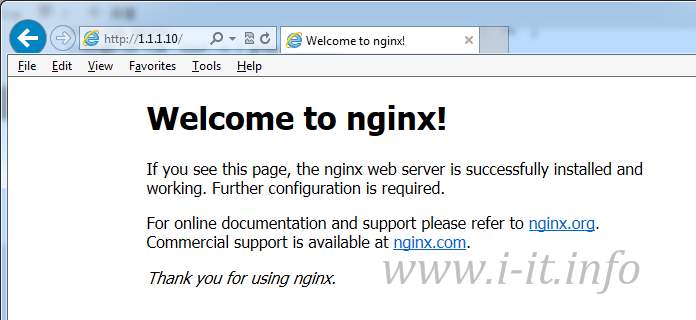
访问Nginx,还有些细节处理本来想一并写在本文中,但是不想一篇文章太长篇了,所以决定分成上下….