

spring boot实现ssm(1)功能
前面完成了ssm的整合, 整个过程可以说很繁杂, 各种配置, 很容易让人晕掉.
这里使用spring boot 的方式来实现 ssm(1) 中的功能.
一. 建项目
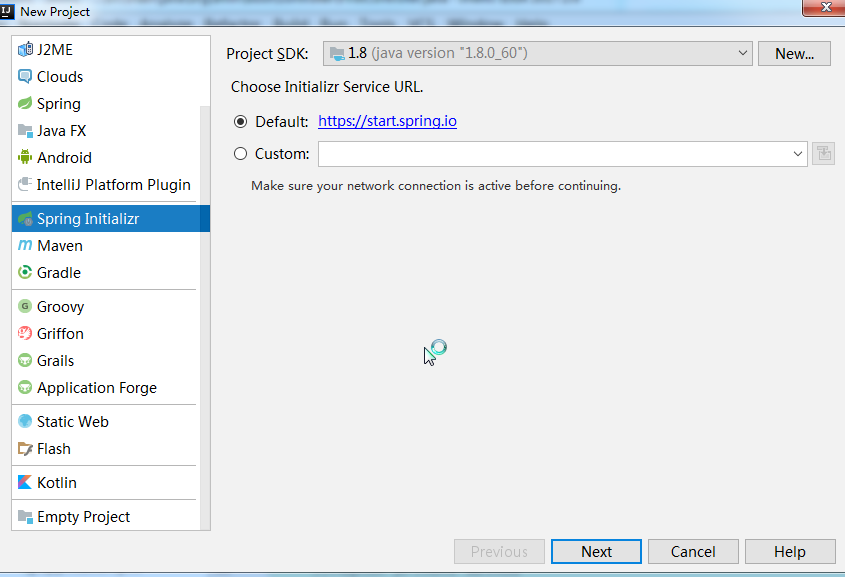
1. 使用 idea 来创建 spring boot 项目, 是比较简单的, 如果使用eclipse的话, 要装插件, 比较麻烦, 那这里, 就直接使用idea来做吧
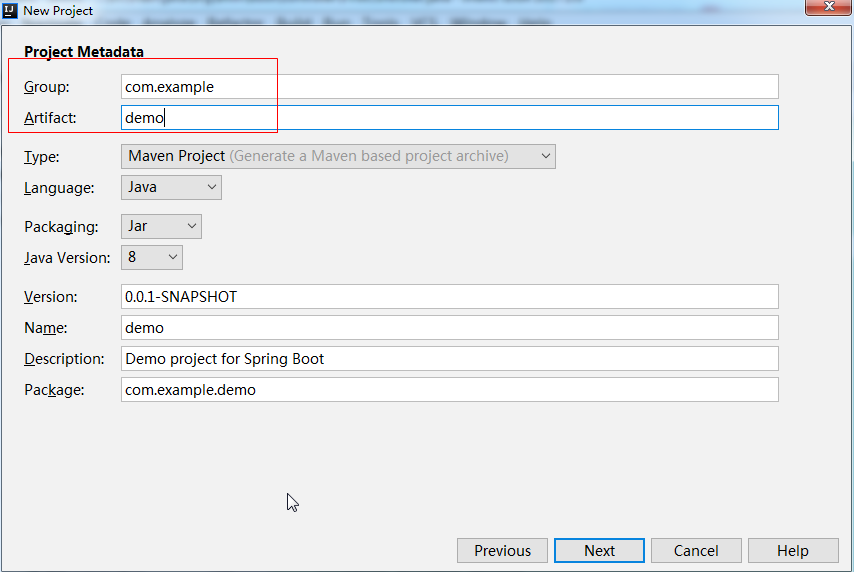
2. 这里只需要修改下面圈出来的部分. Java Version最好使用>=8.
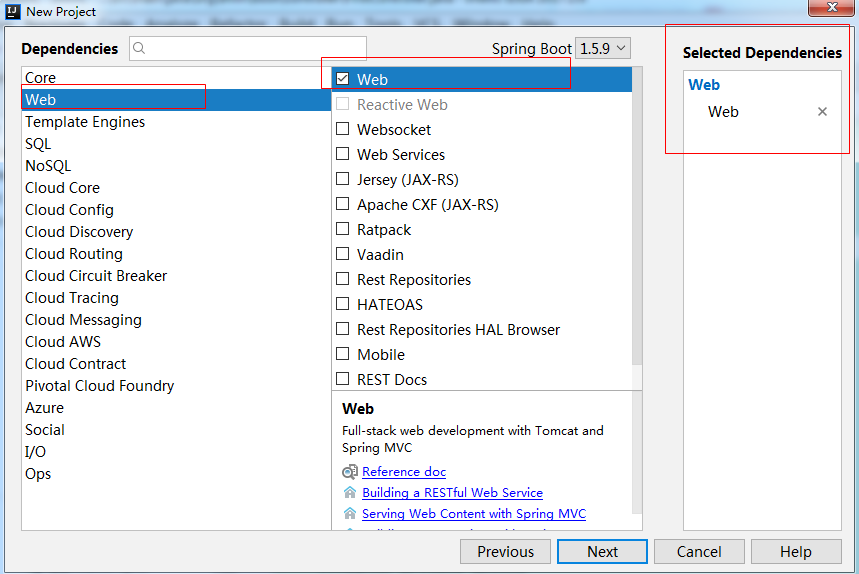
3. 这里直接选择web就可以了, 缺什么, 可以在后面加就好
4. 选择路径
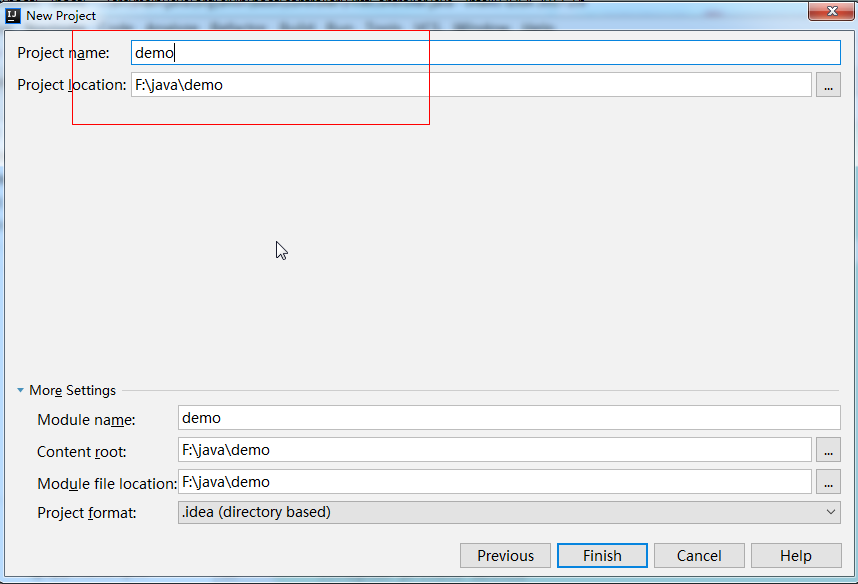
经过这么几步操作, 就完成了基本的新建工作.
在新建的过程中, 可能会非常的慢, 因为第一次建, 要下载很多jar包. 而且可能下载还比较慢.
这里可以在maven 的 setting.xml文件中, 加入一个阿里云的镜像, 对于下载更新jar包, 是有帮助的.
<mirrors>
    <mirror>
            <id>nexus-aliyun</id>
            <mirrorOf>*</mirrorOf>
            <name>Nexus aliyun</name>
            <url>http://maven.aliyun.com/nexus/content/groups/public</url>
    </mirror>
  </mirrors>
二. 目录结构
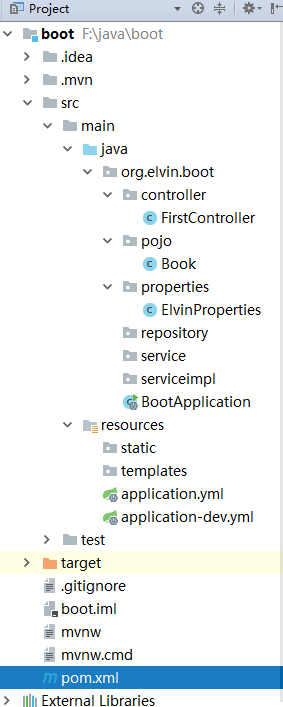
拿到刚建的项目后, 我在里面新增了几个package. 在这里, 除了controller要建之外, 别的都可以先空着.
三. 配置文件 -- 这一步直接跳过, 也是能正常运行的. 不急的话, 就先看看这里把
默认的配置文件是 application.properties, 这里我并没有使用这个格式的文件, 而是使用了 yml 格式的文件, 配置起来, 更加的简洁, 且效果是一样的.
先来看一下application.yml文件
#标明引入那个配置文件
spring:
  profiles:
    active: dev

#自定义属性
elvin:
  name: elvinle
  age: 28
  birthday: 1990-12-02

#自定义属性
content: "elvin's name is ${elvin.name} and age is ${elvin.age} and birthday is ${elvin.birthday}"
开发的过程中, 可能会部署到好几个环境, 比如开发环境, 测试环境, 那么这里的spring.profiles.active就起作用了, 可以新建多个文件, 这里配置, 后面使用哪个文件的配置.
再来看看application-dev.yml文件
#配置项目端口和根路径
server:
  port: 8080
  context-path: /boot

spring:
  #配置项目的数据库链接信息
  datasource:
    driver-class-name: com.mysql.jdbc.Driver
    url: jdbc:mysql:///test?useUnicode=true&characterEncoding=utf-8
    username: root
    password: root
  jpa:
    hibernate:
      ddl-auto: update
    show-sql: true
server.port 和 server.context-path 分别表示端口和根路径. 它们都是可以不配置的. 后面的配置, 暂时不用看
在这两个文件中, 可以看到, 我定义了自己的属性. 那么他们怎么接收呢
在目录中, 有个properties的文件夹, 我在里面建了个类来接收
package org.elvin.boot.properties;

import org.springframework.boot.context.properties.ConfigurationProperties;
import org.springframework.stereotype.Component;

/**
 * author: Elvin
 * Date: 2017/12/4 15:10
 * Description:
 */
@Component
@ConfigurationProperties(prefix = "elvin")
public class ElvinProperties {

    private String name;

    private Integer age;

    private String birthday;

    public String getName() {
        return name;
    }

    @Override
    public String toString() {
        return "Elvin{" +
                "name='" + name + '\'' +
                ", age=" + age +
                ", birthday='" + birthday + '\'' +
                '}';
    }

    public void setName(String name) {
        this.name = name;
    }

    public Integer getAge() {
        return age;
    }

    public void setAge(Integer age) {
        this.age = age;
    }

    public String getBirthday() {
        return birthday;
    }

    public void setBirthday(String birthday) {
        this.birthday = birthday;
    }
}
使用的地方在controller中.
四. 实体类
package org.elvin.boot.pojo;

/**
 * author: Elvin
 * Date: 2017/12/4 15:37
 * Description:
 */

public class Book {

    private Integer id;

    private String name;

    private String publishTime;

    private Integer price;

    @Override
    public String toString() {
        return "Book{" +
                "id=" + id +
                ", name='" + name + '\'' +
                ", publishTime='" + publishTime + '\'' +
                ", price=" + price +
                '}';
    }

    public Integer getId() {
        return id;
    }

    public void setId(Integer id) {
        this.id = id;
    }

    public String getName() {
        return name;
    }

    public void setName(String name) {
        this.name = name;
    }

    public String getPublishTime() {
        return publishTime;
    }

    public void setPublishTime(String publishTime) {
        this.publishTime = publishTime;
    }

    public Integer getPrice() {
        return price;
    }

    public void setPrice(Integer price) {
        this.price = price;
    }
}
这里实体类就随便建一下了, 这里还不是他的完全体, 在下一篇, 会进行部分修改
五. controller
package org.elvin.boot.controller;

import org.elvin.boot.pojo.Book;
import org.elvin.boot.properties.ElvinProperties;
import org.joda.time.DateTime;
import org.springframework.beans.factory.annotation.Autowired;
import org.springframework.beans.factory.annotation.Value;
import org.springframework.web.bind.annotation.GetMapping;
import org.springframework.web.bind.annotation.PostMapping;
import org.springframework.web.bind.annotation.RequestMapping;
import org.springframework.web.bind.annotation.RestController;

import java.util.*;

/**
 * author: Elvin
 * Date: 2017/12/4 15:08
 * Description:
 */
@RestController
@RequestMapping("first")
public class FirstController {

    @Autowired
    private ElvinProperties elvinProperties;

    //接收配置文件中,自定义的content属性
    @Value("${content}")
    private String content;

    @GetMapping("properties")
    public Map<String, Object> properties(){
        Map<String, Object> map = new HashMap<>();
        map.put("content", content);
        map.put("elvinProperties", elvinProperties);
        return map;
    }

    @PostMapping("all")
    public List<Book> all() {
        return getBookList();
    }

    //region private method
    private List<Book> getBookList() {
        List<Book> bookList = new ArrayList<>();
        String[] nameStrs = {"吴", "一", "雪", "动", "额", "阿", "前", "里", "排"};
        Random r = new Random();
        String timeStr = new DateTime().toString("yyyy-MM-dd HH:mm:ss");
        for (int i = 0; i < 10; i++) {
            Book b = new Book();
            b.setId(i + 1);
            b.setName(nameStrs[r.nextInt(5)] + nameStrs[r.nextInt(9)]);
            b.setPublishTime(timeStr);
            b.setPrice(r.nextInt(100));
            bookList.add(b);
        }
        return bookList;
    }
    //endregion
}
如果是做前后端分离的话, 那么到这里, 就告一段落了. 先来看看访问结果吧.
六. 结果(前后端分离)
1. 使用postman发送get请求
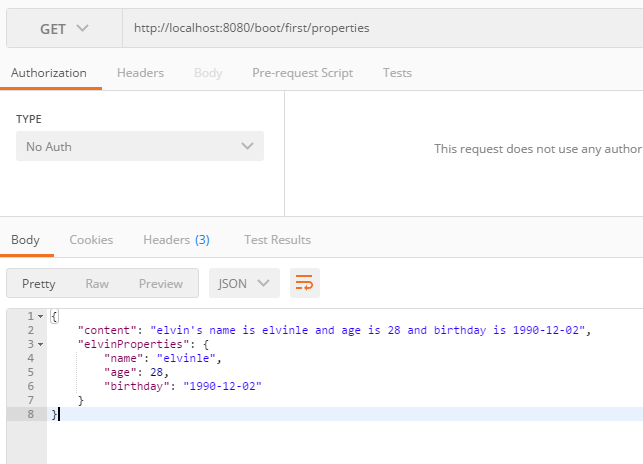
这里可以看到, 自定义配置, 都能够正常获取到
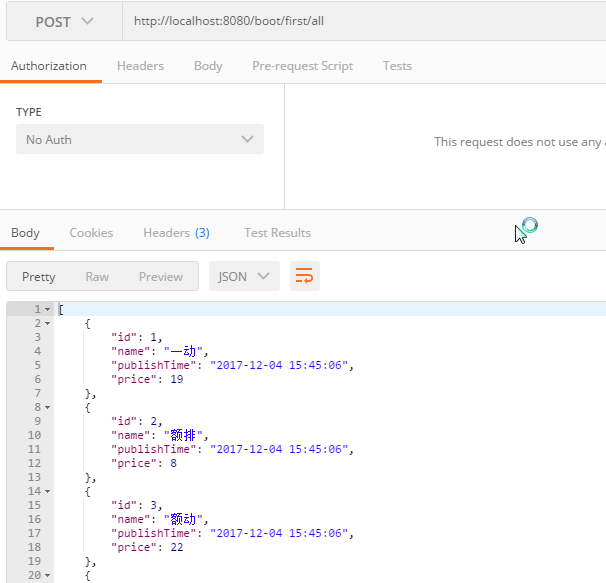
2. 使用postman来发送post请求.
如果还是希望使用返回页面数据的方式, 则还要继续一步配置.
个人还是推荐使用前后端分离的开发方式的. 怎么说呢, 大家都知道, mvc中的v指的就是视图, 在mvc中, 是需要读取视图, 然后解析视图, 最后返回解析完的视图数据的. 过程还是比较复杂和繁琐的, 而且这部分的逻辑处理, 全都在服务器端完成, 即使这里使用了缓存, 对服务器还是有性能损耗的. 如果把这部分损耗转嫁到客户端的浏览器中去, 可以节省不少的性能和空间.
七. view
1. 在pom.xml中, 加入一个配置.
<dependency>
    <groupId>org.springframework.boot</groupId>
    <artifactId>spring-boot-starter-thymeleaf</artifactId>
</dependency>
这里引入的是 Spring boot 推荐使用的 thymeleaf 模板, 和freemarker, jsp 功能是差不多的
2. 开发状态下, 去yml文件中, 修改下缓存配置
spring:
  thymeleaf:
    cache: false
    #以下都是默认配置,可以不写
    prefix: /templates/
    suffix: .html
    mode: HTML5
    encoding: UTF-8
    content-type: text/html
3. controller

在包里面重新建一个控制器文件 TwoController.
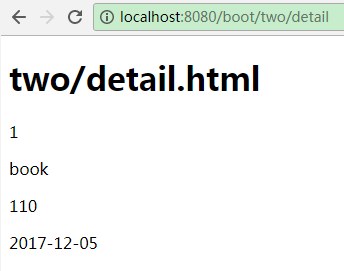
package org.elvin.boot.controller;

import org.elvin.boot.pojo.Book;
import org.joda.time.DateTime;
import org.springframework.stereotype.Controller;
import org.springframework.ui.Model;
import org.springframework.web.bind.annotation.GetMapping;
import org.springframework.web.bind.annotation.RequestMapping;

/**
 * author: Elvin
 * Date: 2017/12/4 16:35
 * Description:
 */
@Controller
@RequestMapping("two")
public class TwoController {
    @GetMapping("hello")
    public String hello(Model model){
        model.addAttribute("hello", "TwoController.hello()");
        return "hello";
    }

    @GetMapping("index")
    public String index(){
        return "/two/index";
    }

    @GetMapping("detail")
    public String detail(Model model){
        Book book = new Book();
        book.setName("book");
        book.setId(1);
        book.setPrice(110);
        book.setPublishTime(new DateTime().toString("yyyy-MM-dd"));
        model.addAttribute("book", book);
        return "two/detail";
    }
}
4. view
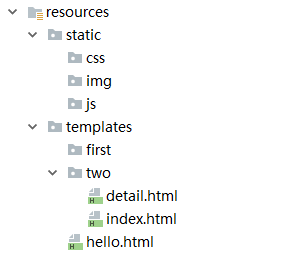
我这里建了三个 html 文件, hello和index就不看了, 里面没有什么内容, 主要看detail.html文件
<!DOCTYPE html>
<html xmlns:th="http://www.thymeleaf.org">
<head>
    <title>detail</title>
</head>
<body>
<h1 th:inline="text">two/detail.html</h1>
<p th:text="${book.id}"></p>
<p th:text="${book.name}"></p>
<p th:text="${book.price}"></p>
<p th:text="${book.publishTime}"></p>
</body>
</html>
5. 结果
八. 配置文件
做完了这么多, 来看看pom.xml文件吧
<?xml version="1.0" encoding="UTF-8"?>
<project xmlns="http://maven.apache.org/POM/4.0.0" xmlns:xsi="http://www.w3.org/2001/XMLSchema-instance"
    xsi:schemaLocation="http://maven.apache.org/POM/4.0.0 http://maven.apache.org/xsd/maven-4.0.0.xsd">
    <modelVersion>4.0.0</modelVersion>

    <groupId>org.elvin</groupId>
    <artifactId>boot</artifactId>
    <version>0.0.1-SNAPSHOT</version>
    <packaging>jar</packaging>

    <name>boot</name>
    <description>Demo project for Spring Boot</description>

    <parent>
        <groupId>org.springframework.boot</groupId>
        <artifactId>spring-boot-starter-parent</artifactId>
        <version>1.5.9.RELEASE</version>
        <relativePath/> <!-- lookup parent from repository -->
    </parent>

    <properties>
        <project.build.sourceEncoding>UTF-8</project.build.sourceEncoding>
        <project.reporting.outputEncoding>UTF-8</project.reporting.outputEncoding>
        <java.version>1.8</java.version>
    </properties>

    <dependencies>
        <dependency>
            <groupId>org.springframework.boot</groupId>
            <artifactId>spring-boot-starter-web</artifactId>
        </dependency>

        <dependency>
            <groupId>joda-time</groupId>
            <artifactId>joda-time</artifactId>
            <version>2.6</version>
        </dependency>

        <dependency>
            <groupId>org.springframework.boot</groupId>
            <artifactId>spring-boot-starter-test</artifactId>
            <scope>test</scope>
        </dependency>

        <dependency>
            <groupId>org.springframework.boot</groupId>
            <artifactId>spring-boot-starter-thymeleaf</artifactId>
        </dependency>
    </dependencies>

    <build>
        <plugins>
            <plugin>
                <groupId>org.springframework.boot</groupId>
                <artifactId>spring-boot-maven-plugin</artifactId>
            </plugin>
        </plugins>
    </build>


</project>
本身就不多的pom文件里面, 绝大部分都是spring boot 自己生成的, 只有 joda-time 和 thymeleaf 是我手动添加的.
从这里的pom文件上看, 少了绝大部分的jar包引用, 十分的方便.
而项目中的yml配置, 如果只是使用最基本的功能, 可以一个都不配置, 照样跑的好好的.

