
IOS 7 Study - UIDatePicker
Picking the Date and Time with UIDatePicker
effect:
1. declaring a property of type UIDatePicker
#import "ViewController.h"

@interface ViewController ()

@property (nonatomic, strong) UIDatePicker *myDatePicker;

@end

@implementation ViewController

...
2. instantiate the date picker
- (void)viewDidLoad{
  [super viewDidLoad];

  self.myDatePicker = [[UIDatePicker alloc] init];
  self.myDatePicker.center = self.view.center;

  [self.view addSubview:self.myDatePicker];
}
3. add receiver target
Just like the UISwitch class, a date picker sends action messages to its targets whenever
the user has selected a different date. To respond to these messages, the receiver must
add itself as the target of the date picker, using the addTarget:action:forControlEvents
- (void)viewDidLoad{
  [super viewDidLoad];

  self.myDatePicker = [[UIDatePicker alloc] init];
  self.myDatePicker.center = self.view.center;

  [self.view addSubview:self.myDatePicker];
  [self.myDatePicker addTarget:self
     action:@selector(datePickerDateChanged:)
     forControlEvents:UIControlEventValueChanged];
}
4. accessing the date
// you can attempt to retrieve its currently selected date using its date property
NSDate *currentDate = self.myDatePicker.date;
NSLog(@"Date = %@", currentDate);
// every time the user changes the date, get a message from the date picker
- (void) datePickerDateChanged:(UIDatePicker *)paramDatePicker{
  if ([paramDatePicker isEqual:self.myDatePicker]){
    NSLog(@"Selected date = %@", paramDatePicker.date);
  }
}
A date picker also lets you set the minimum and the maximum dates that it can display.
For this, let’s first switch our date picker mode to UIDatePickerModeDate and then,
using the maximumDate and the minimumDate properties, adjust this range:
- (void)viewDidLoad{
  [super viewDidLoad];

  self.myDatePicker = [[UIDatePicker alloc] init];
  self.myDatePicker.center = self.view.center;
  self.myDatePicker.datePickerMode = UIDatePickerModeDate;

  [self.view addSubview:self.myDatePicker];

  NSTimeInterval oneYearTime = 365 * 24 * 60 * 60;
  NSDate *todayDate = [NSDate date];
  NSDate *oneYearFromToday
    = [todayDate dateByAddingTimeInterval:oneYearTime];
  NSDate *twoYearsFromToday
    = [todayDate dateByAddingTimeInterval:2 * oneYearTime];
  self.myDatePicker.minimumDate = oneYearFromToday;
  self.myDatePicker.maximumDate = twoYearsFromToday;
}
If you want to use the date picker as a countdown timer, you must set your date picker
mode to UIDatePickerModeCountDownTimer and use the countDownDuration property
of the date picker to specify the default countdown duration.
- (void)viewDidLoad{
  [super viewDidLoad];

  self.myDatePicker = [[UIDatePicker alloc] init];
  self.myDatePicker.center = self.view.center;
  self.myDatePicker.datePickerMode = UIDatePickerModeCountDownTimer;

  [self.view addSubview:self.myDatePicker];

  NSTimeInterval twoMinutes = 2 * 60;
  [self.myDatePicker setCountDownDuration:twoMinutes];
}
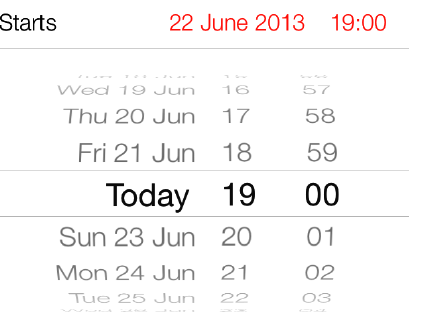
Run Result:


