
学习ASP.NET MVC(十一)——分页
学习ASP.NET MVC 编程系列目录
学习ASP.NET MVC(一)——我的第一个ASP.NET MVC应用程序
学习ASP.NET MVC(二)——我的第一个ASP.NET MVC 控制器
学习ASP.NET MVC(三)——我的第一个ASP.NET MVC 视图
学习ASP.NET MVC(四)——我的第一个ASP.NET MVC 实体对象
学习ASP.NET MVC(五)——我的第一个ASP.NET MVC CURD页面
学习ASP.NET MVC(六)——我的第一个ASP.NET MVC 编辑页面
学习ASP.NET MVC(七)——我的第一个ASP.NET MVC 查询页面
学习ASP.NET MVC(八)——“Code First Migrations ”工具
学习ASP.NET MVC(九)——“Code First Migrations ”工具使用示例
在这一篇文章中,我们将学习如何在MVC页面中实现分页的方法。分页功能是一个非常实用,常用的功能,当数据量过多的时候,必然要使用分页。在今天这篇文章中,我们学习如果在MVC页面中使用PagedList.Mvc包来实现分页功能。
1) 安装PagedList.Mvc
首先,我们需要安装分页组件包,在Visual Studio 2010中点击【项目】-【管理NuGet程序包】,打开NuGet包管理器窗体,在该窗体中,选择“联机”标签,然后搜索pagedlist,如下图所示。点击“安装”按钮安装PagedList.Mvc的最新版本(目前最新版本为4.5.0)。

在把PagedList.Mvc安装完成之后,PagedList包也被安装上了。如下图。 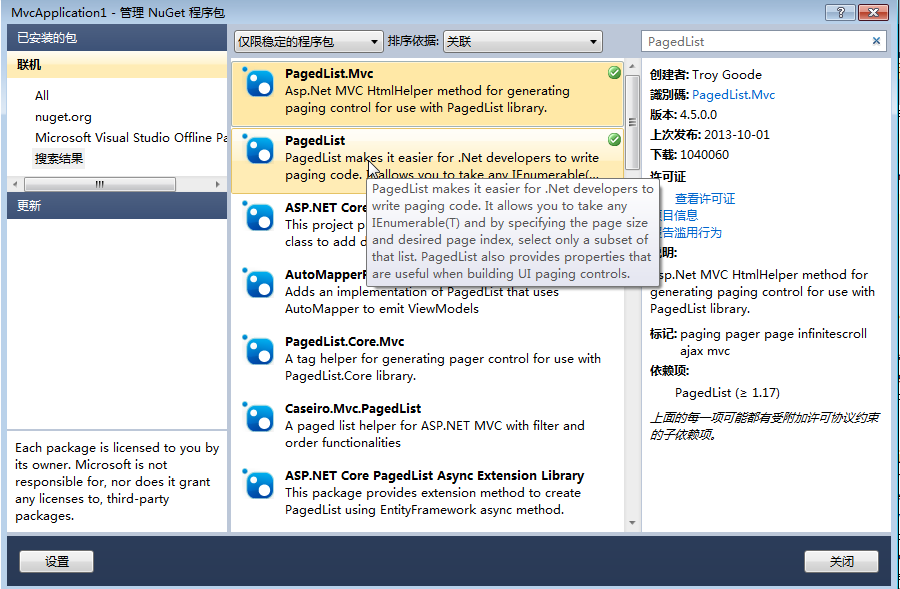
图1:NuGet包管理器中显示的PagedList.Mvc
2) 实现带分页功能的视图实体对象和控制器
把PagedList.Mvc安装完成之后,第一件事就是增加一个视图实体对象,用来放置一些查询属性与查询结果。在Models目录下新增一个ViewBook.cs文件,代码如下列所示:
using System;
using System.Collections.Generic;
using System.Linq;
using System.Web;
using PagedList;

namespace MvcApplication1.Models
{
    public class ViewBook
    {

         public IPagedList<Book> Books { get; set; }
         public string Search { get; set; }

         public string Category { get; set; }
         public string SortBy { get; set; }
    }
}
我们现在需要修改BookController类的SearchIndex方法,以便Books作为PagedList返回(使用ToPagedList()方法完成)。为了使用PagedList,我们还需要设置默认排序。为了使用PagedList包,我们首先需要在该文件的顶部添加using PagedList;代码,然后修改Controllers\BookController.cs文件为下列粗体显示的代码。
        public ActionResult SearchIndex(string Category, string searchString, string sortBy,int? page)
        {

            var cateLst = new List<string>();

            var cateQry = from d in db.Books
                          orderby d.Category
                          select d.Category;
            cateLst.AddRange(cateQry.Distinct());
            ViewBag.category = new SelectList(cateLst);

            //排序选项
                var orderbyLst = new Dictionary<string, string>
     {
         { "价格从低到高", "price_lowest" },
         { "价格从高到低", "price_highest" }
     };

                ViewBag.sortBy = new SelectList(orderbyLst, "Value", "Key");
            //  [2017-2-14 end]
            var books = from m in db.Books
                        select m;

            if (!String.IsNullOrEmpty(searchString))
            {
                books = books.Where(s => s.Name.Contains(searchString));
            }

            // sort the results
            switch (sortBy)
            {

                case "price_lowest":
                    books = books.OrderBy(p => p.Price);
                    break;
                case "price_highest":
                    books = books.OrderByDescending(p => p.Price);
                    break;
                default:
                    books = books.OrderBy(p => p.Name);
                    break;
            }

            //分页
            const int pageItems = 5;
     int currentPage = (page ?? 1);
     IPagedList<Book>  pageBooks = books.ToPagedList(currentPage, pageItems);
     //  [2017-2-14]
     ViewBook vbook = new ViewBook();
     vbook.Books = pageBooks;
     vbook.Category = Category;
     vbook.SortBy = sortBy;
     vbook.Search = searchString;
            if (string.IsNullOrEmpty(Category))
                 vbook.Books =pageBooks;
            else
            {
              vbook.Books =pageBooks.Where(x => x.Category == Category).ToPagedList(currentPage, pageItems);
            }
            return View(vbook);
        }
以上代码进行了以下几次发动,第一处改动是添加了一个int? page参数,它是一个可空整型,表示用户在书籍查询页面中选择的当前页码。当第一次加载书籍查询页面时,用户还没有选择任何页码,因此,这个参数可以为null。
我们必须确保当前的分类也要保存在视图实体对象中,因此,我们添加了vbook.Category = Category;这行代码。
代码books = books.OrderBy(p => p.Name);用于对产品列表进行默认排序,这是因为PagedList要求列表必须是一个有序列表。
接着,我们使用代码const int pageItems = 5;来指定每页显示的数据数量。然后,我们声明了一个整型变量int currentPage = (page ?? 1);来保存当前页码,该变量的值是page参数的值,或者是1(当page变量为null时)。
我们使用代码vbook.Books = books.ToPagedList(currentPage, PageItems);,对产品信息调用了ToPagedList方法,并将当前页和每页显示的条目数传递给了ToPagedList方法,然后将该方法的返回值赋值给了视图实体对象的Books属性。
我们使用代码viewBook.SortBy = sortBy;将sortBy参数的值保存到视图实体对象的SortBy属性中,以便我们从一页移动到另一页时,产品的排序保持不变。
3) 带分页功能的查询页面
在视图实体对象和控制器中对实现分页功能的代码进行修改之后,现在,我们需要更新视图文件\Views\Products\SearchIndex.cshtml,在这个视图文件中显示一个分页控件,以便用户可以在各页之间移动。我们同时也添加了有多少条数据的指示信息。为了完成这些功能,我们在该文件中添加了一个using语句,一个书籍总数的指示信息以及在该页底部显示一个分页控件,具体代码如下面显示:
  @model MvcApplication1.Models.ViewBook
 @using PagedList.Mvc

@{

    ViewBag.Title = "书籍查询";
}
   <link href="/Content/PagedList.css" rel="stylesheet" type="text/css" />
<h2>书籍查询</h2>
     @using (Html.BeginForm("SearchIndex","book",FormMethod.Get)){
         <p>书籍种类: @Html.DropDownList("category", "All")
           书籍名称: @Html.TextBox("SearchString")
              排序: @Html.DropDownList("sortBy", "不排序")
         <input type="submit" value="查询" /> </p>
        }

<table>
    <tr>
        <th>
            @Html.DisplayNameFor(model => model.Books.First().Category)
        </th>
        <th>
            @Html.DisplayNameFor(model => model.Books.First().Name)

        </th>
        <th>
            @Html.DisplayNameFor(model => model.Books.First().Numberofcopies)

        </th>
        <th>
            @Html.DisplayNameFor(model => model.Books.First().AuthorID)

        </th>
        <th>
            @Html.DisplayNameFor(model => model.Books.First().Price)

        </th>
        <th>
            @Html.DisplayNameFor(model => model.Books.First().PublishDate)

        </th>
        <th></th>

    </tr>
@foreach (var item in Model.Books) {

    <tr>
        <td>
            @Html.DisplayFor(modelItem => item.Category)

        </td>
        <td>
            @Html.DisplayFor(modelItem => item.Name)

        </td>
        <td>
            @Html.DisplayFor(modelItem => item.Numberofcopies)

        </td>
        <td>
            @Html.DisplayFor(modelItem => item.AuthorID)

        </td>
        <td>
            @Html.DisplayFor(modelItem => item.Price)

        </td>
        <td>
            @Html.DisplayFor(modelItem => item.PublishDate)

        </td>
        <td>
            @Html.ActionLink("Edit", "Edit", new { id=item.BookID }) |

            @Html.ActionLink("Details", "Details", new { id=item.BookID }) |

            @Html.ActionLink("Delete", "Delete", new { id=item.BookID })

        </td>
    </tr>
}
</table>

<div>
     Page @(Model.Books.PageCount < Model.Books.PageNumber ? 0 : Model.Books.PageNumber) of @Model.Books.PageCount

     @Html.PagedListPager(Model.Books, page => Url.Action("SearchIndex", new { category = Model.Category,
search = Model.Search, sortBy = Model.SortBy, page }))
 </div>
分页链接生成代码包裹在div标签内。其中第一行代码使用?:操作符的第一行代码决定是否有任何页码显示,它显示“Page 0 of 0”或者“Page x of y”,x表示当前页码,y表示总页数。
第二行代码使用来自于PagedList.Mvc命名空间的PagedListPager辅助器。该辅助器接收一个产品列表参数,并为每个页面生成一个超链接。Url.Action用于生成一个含有当前页参数超链接目标。我们将一个匿名类型(含有当前分类、搜索条件、排序信息和分页)传递给该辅助器方法,以便每个页面的链接中都包含一个查询字符串,这个查询字符串包含有当前分类、搜索条件、排序信息和分页信息。这意味着,当从一个页面移动到另一个页面时,搜索条件、选择的分类和排序规则都被保存下来。如果没有这样做,书籍列表将会被重置为显示所有书籍信息。
在使用了上述代码后,按“价格从低到高”排序分页界面,如下图1。

图1
我们发现分页的数字部分,并不好看,原来我们缺少引用了CSS,在查询页面的标题下方添加如下代码。在上述代码中的蓝色字体。
<link href="/Content/PagedList.css" rel="stylesheet" type="text/css" />
再次点击“查询”按钮,然后对其结果按照“价格从低到高”进行排序,效果如下图2。
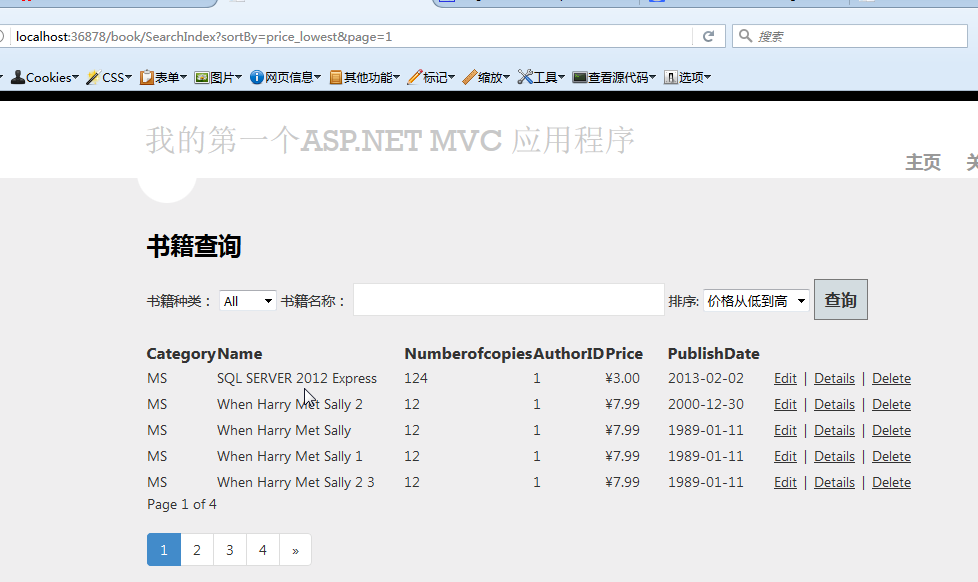
图2:有搜索条件、排序和按分类过滤的分页效果

