Spring MVC 学习总结(五)——校验与文件上传
Spring MVC不仅是在架构上改变了项目,使代码变得可复用、可维护与可扩展,其实在功能上也加强了不少。 验证与文件上传是许多项目中不可缺少的一部分。在项目中验证非常重要,首先是安全性考虑,如防止注入攻击,XSS等;其次还可以确保数据的完整性,如输入的格式,内容,长度,大小等。Spring MVC可以使用验证器Validator与JSR303完成后台验证功能。这里也会介绍方便的前端验证方法。
一、Spring MVC验证器Validator
Spring MVC验证器Validator是一个接口,通过实现该接口来定义对实体对象的验证,接口如下所示:
package org.springframework.validation;

/**
 * Spring MVC内置的验证器接口
 */
public interface Validator {

    /**
     * 是否可以验证该类型
     */
    boolean supports(Class<?> clazz);

    /**
     * 执行验证 target表示要验证的对象 error表示错误信息
     */
    void validate(Object target, Errors errors);
}
1.1、定义验证器
package com.zhangguo.springmvc51.entities;

import org.springframework.validation.Errors;
import org.springframework.validation.ValidationUtils;
import org.springframework.validation.Validator;

/**
 * 产品验证器
 *
 */
public class ProductValidator implements Validator {

    //当前验证器可以验证的类型
    @Override
    public boolean supports(Class<?> clazz) {
        return Product.class.isAssignableFrom(clazz);
    }

    //执行校验
    @Override
    public void validate(Object target, Errors errors) {
        //将要验证的对象转换成Product类型
        Product entity=(Product)target;
        //如果产品名称为空或为空格,使用工具类
        ValidationUtils.rejectIfEmptyOrWhitespace(errors, "name", "required", "产品名称必须填写");
        //价格,手动判断
        if(entity.getPrice()<0){
            errors.rejectValue("price", "product.price.gtZero", "产品价格必须大于等于0");
        }
        //产品类型必须选择
        if(entity.getProductType().getId()==0){
            errors.rejectValue("productType.id", "product.productType.id.required", "请选择产品类型");
        }
    }

}
ValidationUtils是一个工具类,中间有一些方可以用于判断内容是否有误。
1.2、执行校验
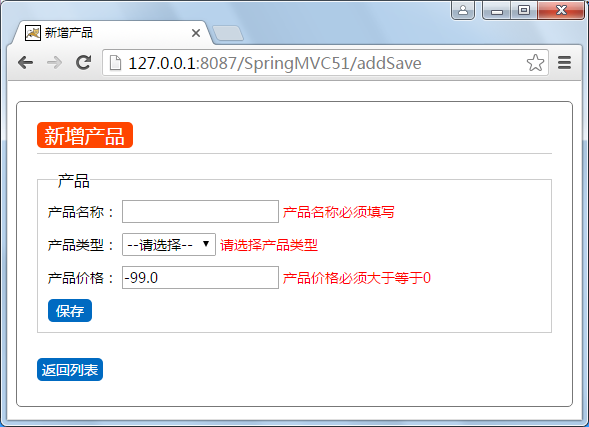
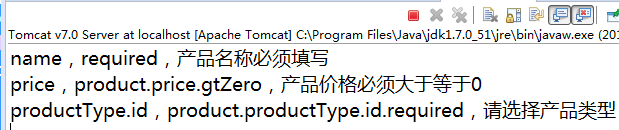
// 新增保存,如果新增成功转回列表页,如果失败回新增页,保持页面数据
    @RequestMapping("/addSave")
    public String addSave(Model model, Product product, BindingResult bindingResult) {

        // 创建一个产品验证器
        ProductValidator validator = new ProductValidator();
        // 执行验证,将验证的结果给bindingResult,该类型继承Errors
        validator.validate(product, bindingResult);

        // 获得所有的字段错误信息,非必要
        for (FieldError fielderror : bindingResult.getFieldErrors()) {
            System.out.println(fielderror.getField() + "," + fielderror.getCode() + "," + fielderror.getDefaultMessage());
        }

        // 是否存在错误,如果没有,执行添加
        if (!bindingResult.hasErrors()) {
            // 根据类型的编号获得类型对象
            product.setProductType(productTypeService.getProductTypeById(product.getProductType().getId()));
            productService.addProduct(product);
            return "redirect:/";
        } else {
            // 与form绑定的模型
            model.addAttribute("product", product);
            // 用于生成下拉列表
            model.addAttribute("productTypes", productTypeService.getAllProductTypes());
            return "product/add";
        }
    }
注意在参数中增加了一个BindingResult类型的对象,该类型继承自Errors,获得绑定结果,承载错误信息,该对象中有一些方法可以获得完整的错误信息,可以使用hasErrors方法判断是否产生了错误。
1.3、在UI中添加错误标签
<%@ page language="java" contentType="text/html; charset=UTF-8" pageEncoding="UTF-8"%>
<%@taglib prefix="c" uri="http://java.sun.com/jsp/jstl/core"%>
<%@taglib prefix="form" uri="http://www.springframework.org/tags/form" %>
<!DOCTYPE html>
<html>
<head>
<meta http-equiv="Content-Type" content="text/html;charset=UTF-8">
<link href="styles/main.css" type="text/css" rel="stylesheet" />
<title>新增产品</title>
</head>
<body>
    <div class="main">
        <h2 class="title"><span>新增产品</span></h2>
        <form:form action="addSave" modelAttribute="product">
        <fieldset>
            <legend>产品</legend>
            <p>
                <label for="name">产品名称:</label>
                <form:input path="name"/>
                <form:errors path="name" cssClass="error"></form:errors>
            </p>
            <p>
                <label for="title">产品类型:</label>
                <form:select path="productType.id">
                     <form:option value="0">--请选择--</form:option>
                     <form:options items="${productTypes}"  itemLabel="name" itemValue="id"/>
                </form:select>
                <form:errors path="productType.id" cssClass="error"></form:errors>
            </p>
            <p>
                <label for="price">产品价格:</label>
                <form:input path="price"/>
                <form:errors path="price" cssClass="error"></form:errors>
            </p>
            <p>
              <input type="submit" value="保存" class="btn out">
            </p>
        </fieldset>
        </form:form>
        <p style="color: red">${message}</p>
        <p>
            <a href="<c:url value="/" />"  class="abtn out">返回列表</a>
        </p>
    </div>
</body>
</html>
发生错误时解析的结果:
<!DOCTYPE html>
<html>
<head>
<meta http-equiv="Content-Type" content="text/html;charset=UTF-8">
<link href="styles/main.css" type="text/css" rel="stylesheet" />
<title>新增产品</title>
</head>
<body>
    <div class="main">
        <h2 class="title"><span>新增产品</span></h2>
        <form id="product" action="addSave" method="post">
        <fieldset>
            <legend>产品</legend>
            <p>
                <label for="name">产品名称:</label>
                <input id="name" name="name" type="text" value=""/>
                <span id="name.errors" class="error">产品名称必须填写</span>
            </p>
            <p>
                <label for="title">产品类型:</label>
                <select id="productType.id" name="productType.id">
                     <option value="0" selected="selected">--请选择--</option>
                     <option value="11">数码电子</option><option value="21">鞋帽服饰</option><option value="31">图书音像</option><option value="41">五金家电</option><option value="51">生鲜水果</option>
                </select>
                <span id="productType.id.errors" class="error">请选择产品类型</span>
            </p>
            <p>
                <label for="price">产品价格:</label>
                <input id="price" name="price" type="text" value="-10.0"/>
                <span id="price.errors" class="error">产品价格必须大于等于0</span>
            </p>
            <p>
              <input type="submit" value="保存" class="btn out">
            </p>
        </fieldset>
        </form>
        <p style="color: red"></p>
        <p>
            <a href="/SpringMVC51/"  class="abtn out">返回列表</a>
        </p>
    </div>
</body>
</html>
1.4、测试运行
控制台输出:
二、JSR303验证器
JSR是Java Specification Requests的缩写,意思是Java 规范提案。是指向JCP(Java Community Process)提出新增一个标准化技术规范的正式请求。任何人都可以提交JSR,以向Java平台增添新的API和服务。JSR已成为Java界的一个重要标准。https://jcp.org/en/home/index
JSR 303 – Bean Validation 是一个数据验证的规范。JSR303只是一个标准,是一验证规范,对这个标准的实现有:
hibernate-validator,Apache BVal等。这里我们使用hibernate-validator实现校验。
2.1、添加hibernate-validator依赖
修改配置pom.xml配置文件,添加依赖。
        <!--JSR303 Bean校验-->
        <dependency>
            <groupId>org.hibernate</groupId>
            <artifactId>hibernate-validator</artifactId>
            <version>5.2.2.Final</version>
        </dependency>

2.2、注解Bean
在bean中设置验证规则,示例代码如下:
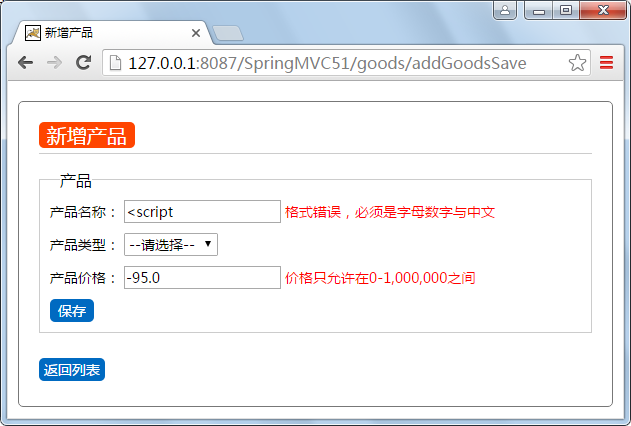
package com.zhangguo.springmvc51.entities;

import java.io.Serializable;

import javax.validation.constraints.NotNull;
import javax.validation.constraints.Pattern;
import javax.validation.constraints.Size;

import org.hibernate.validator.constraints.Range;

/**
 * 产品
 */
public class Product implements Serializable {
    private static final long serialVersionUID = 1L;
    /*
     * 编号
     */
    private int id;
    /*
     * 名称
     */
    @Size(min=1,max=50,message="名称长度必须介于{2}-{1}之间")
    @Pattern(regexp="^[\\w\\u4e00-\\u9fa5]{0,10}$",message="格式错误,必须是字母数字与中文")
    private String name;
    /*
     * 价格
     */
    @Range(min=0,max=1000000,message="价格只允许在{2}-{1}之间")
    private double price;
    /*
     * 产品类型
     */
    private ProductType productType;

    public Product() {
        productType=new ProductType();
    }

    public Product(String name, double price) {
        super();
        this.name = name;
        this.price = price;
    }

    public Product(int id, String name, double price, ProductType type) {
        super();
        this.id = id;
        this.name = name;
        this.price = price;
        this.productType = type;
    }

    @Override
    public String toString() {
        return "编号(id):" + this.getId() + ",名称(name):" + this.getName() + ",价格(price):" + this.getPrice()
                + ",类型(productType.Name):" + this.getProductType().getName();
    }

    public int getId() {
        return id;
    }

    public void setId(int id) {
        this.id = id;
    }

    public String getName() {
        return name;
    }

    public void setName(String name) {
        this.name = name;
    }

    public double getPrice() {
        return price;
    }

    public void setPrice(double price) {
        this.price = price;
    }

    public ProductType getProductType() {
        return productType;
    }

    public void setProductType(ProductType productType) {
        this.productType = productType;
    }
}
更多的验证注解如下所示:
2.2.1、空值检查
@Null 验证对象是否为null
@NotNull 验证对象是否不为null, 无法查检长度为0的字符串
@NotBlank 检查约束字符串是不是Null还有被Trim的长度是否大于0,只对字符串,且会去掉前后空格.
@NotEmpty 检查约束元素是否为NULL或者是EMPTY.
2.2.2、Booelan检查
@AssertTrue 验证 Boolean 对象是否为 true
@AssertFalse 验证 Boolean 对象是否为 false
2.2.3、长度检查
@Size(min=, max=) 验证对象(Array,Collection,Map,String)长度是否在给定的范围之内
@Length(min=, max=) Validates that the annotated string is between min and max included.
2.2.4、日期检查
@Past 验证 Date 和 Calendar 对象是否在当前时间之前
@Future 验证 Date 和 Calendar 对象是否在当前时间之后
2.2.5、正则
@Pattern 验证 String 对象是否符合正则表达式的规则
2.2.6、数值检查
建议使用在Stirng,Integer类型,不建议使用在int类型上,因为表单值为“”时无法转换为int,但可以转换为String为"",Integer为null
@Min 验证 Number 和 String 对象是否大等于指定的值
@Max 验证 Number 和 String 对象是否小等于指定的值
@DecimalMax 被标注的值必须不大于约束中指定的最大值. 这个约束的参数是一个通过BigDecimal定义的最大值的字符串表示.小数存在精度
@DecimalMin 被标注的值必须不小于约束中指定的最小值. 这个约束的参数是一个通过BigDecimal定义的最小值的字符串表示.小数存在精度
@Digits 验证 Number 和 String 的构成是否合法
@Digits(integer=,fraction=) 验证字符串是否是符合指定格式的数字,interger指定整数精度,fraction指定小数精度。
2.2.7、范围
@Range(min=, max=) 检查被注解对象的值是否处于min与max之间,闭区间,包含min与max值
@Range(min=10000,max=50000,message="必须介于{2}-{1}之间")
2.2.8、其它注解
@Valid 递归的对关联对象进行校验, 如果关联对象是个集合或者数组,那么对其中的元素进行递归校验,如果是一个map,则对其中的值部分进行校验.(是否进行递归验证),该注解使用在Action的参数上。
@CreditCardNumber信用卡验证
@Email 验证是否是邮件地址,如果为null,不进行验证,算通过验证。
@ScriptAssert(lang= ,script=, alias=)
@URL(protocol=,host=, port=,regexp=, flags=)
2.3、注解控制器参数
在需要使用Bean验证的参数对象上注解@Valid,触发验证,示例代码如下:
package com.zhangguo.springmvc51.controllers;

import java.util.List;
import javax.validation.Valid;
import org.springframework.beans.factory.annotation.Autowired;
import org.springframework.stereotype.Controller;
import org.springframework.ui.Model;
import org.springframework.validation.BindingResult;
import org.springframework.web.bind.annotation.RequestMapping;
import org.springframework.web.bind.annotation.ResponseBody;
import com.zhangguo.springmvc51.entities.Product;
import com.zhangguo.springmvc51.services.ProductService;
import com.zhangguo.springmvc51.services.ProductTypeService;

@Controller
@RequestMapping("/goods")
public class GoodsController {
    @Autowired
    ProductService productService;
    @Autowired
    ProductTypeService productTypeService;

    // 新增,渲染出新增界面
    @RequestMapping("/add")
    public String add(Model model) {
        // 与form绑定的模型
        model.addAttribute("product", new Product());
        // 用于生成下拉列表
        model.addAttribute("productTypes", productTypeService.getAllProductTypes());
        return "product/addGoods";
    }

    // 新增保存,如果新增成功转回列表页,如果失败回新增页,保持页面数据
    @RequestMapping("/addGoodsSave")
    public String addSave(Model model, @Valid Product product, BindingResult bindingResult) {

        // 是否存在错误,如果没有,执行添加
        if (!bindingResult.hasErrors()) {
            // 根据类型的编号获得类型对象
            product.setProductType(productTypeService.getProductTypeById(product.getProductType().getId()));
            productService.addProduct(product);
            return "redirect:/";
        } else {
            // 与form绑定的模型
            model.addAttribute("product", product);
            // 用于生成下拉列表
            model.addAttribute("productTypes", productTypeService.getAllProductTypes());
            return "product/addGoods";
        }
    }

    @RequestMapping("/products")
    @ResponseBody
    public List<Product> getProduct(){
        return productService.getAllProducts();
    }
}
2.4、在UI中添加错误标签
这里与Spring MVC Validator基本一致,在product目录下新增一个名为addGoods.jsp的页面,脚本如下所示:


<%@ page language="java" contentType="text/html; charset=UTF-8" pageEncoding="UTF-8"%>
<%@taglib prefix="c" uri="http://java.sun.com/jsp/jstl/core"%>
<%@taglib prefix="form" uri="http://www.springframework.org/tags/form" %>
<!DOCTYPE html>
<html>
<head>
<meta http-equiv="Content-Type" content="text/html;charset=UTF-8">
<link href="<c:url value="/styles/main.css" />" type="text/css" rel="stylesheet" />
<title>新增产品</title>
</head>
<body>
    <div class="main">
        <h2 class="title"><span>新增产品</span></h2>
        <form:form action="addGoodsSave" modelAttribute="product">
        <fieldset>
            <legend>产品</legend>
            <p>
                <label for="name">产品名称:</label>
                <form:input path="name"/>
                <form:errors path="name" cssClass="error"></form:errors>
            </p>
            <p>
                <label for="title">产品类型:</label>
                <form:select path="productType.id">
                     <form:option value="0">--请选择--</form:option>
                     <form:options items="${productTypes}"  itemLabel="name" itemValue="id"/>
                </form:select>
                <form:errors path="productType.id" cssClass="error"></form:errors>
            </p>
            <p>
                <label for="price">产品价格:</label>
                <form:input path="price"/>
                <form:errors path="price" cssClass="error"></form:errors>
            </p>
            <p>
              <input type="submit" value="保存" class="btn out">
            </p>
        </fieldset>
        </form:form>
        <p style="color: red">${message}</p>
        <p>
            <a href="<c:url value="/" />"  class="abtn out">返回列表</a>
        </p>
    </div>
</body>
</html>
2.5、测试运行
小结:从上面的示例可以看出这种验证更加方便直观,一次定义反复使用,以编辑更新时验证同样可以使用;另外验证的具体信息可以存放在配置文件中,如message.properties,这样便于国际化与修改。
三、使用jQuery扩展插件Validate实现前端校验
jquery.validate是基于jQuery的一个B/S客户端验证插件,借助jQuery的优势,我们可以迅速验证一些常见的输入,大大提高了开发效率,下面是很多年前本人做的学习笔记:
3.1、jQuery扩展插件validate—1基本使用方法
3.2、jQuery扩展插件validate—2通过参数设置验证规则
3.3、jQuery扩展插件validate—3通过参数设置错误信息
3.4、jQuery扩展插件validate—4设置错误提示的样式
3.5、jQuery扩展插件validate—5添加自定义验证方法
3.6、jQuery扩展插件validate—6radio、checkbox、select的验证
注意:validate只是使验证变得方便,简单,本质还是使用js,不论多么强大的js验证,当用户把js禁用或使用机器直接发起请求时都不能确保数据的完整性,所有不要把希望寄托在客户端验证,个人认为每一个客户端验证都要服务器进行再次验证。
四、文件上传
在Spring MVC中有两种实现上传文件的办法,第一种是Servlet3.0以下的版本通过commons-fileupload与commons-io完成的通用上传,第二种是Servlet3.0以上的版本的Spring内置标准上传,不需借助第3方组件。通用上传也兼容Servlet3.0以上的版本。
4.1、Servlet3.0以下的通过commons-fileupload上传
4.1.1、添加上传依赖包
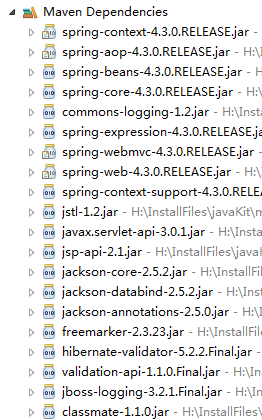
因为需要借助第三方上传组件commons-fileupload与commons-io,所以要修改pom.xml文件添加依赖,依赖的内容如下:
        <!--文件上传 -->
        <dependency>
            <groupId>commons-io</groupId>
            <artifactId>commons-io</artifactId>
            <version>2.4</version>
        </dependency>
        <dependency>
            <groupId>commons-fileupload</groupId>
            <artifactId>commons-fileupload</artifactId>
            <version>1.3.1</version>
        </dependency>
依赖成功后的结果:

4.1.2、新增上传页面
<%@ page language="java" contentType="text/html; charset=UTF-8" pageEncoding="UTF-8"%>
<%@ taglib prefix="c" uri="http://java.sun.com/jsp/jstl/core" %>
<!DOCTYPE html>
<html>
<head>
<meta http-equiv="Content-Type" content="text/html; charset=UTF-8">
<title>上传文件</title>
</head>
<body>
<h2>上传文件</h2>
<form action="fileSave" method="post"  enctype="multipart/form-data">
  <p>
     <label for="files">文件:</label>
     <input type="file" name="files" id="files" multiple="multiple" />
   </p>
   <p>
   <button>提交</button>
   </p>
   <p>
     ${message}
   </p>
</form>
</body>
</html>
如果有成功上传,页面中有几个关键点要注意:method的值必为Post;enctype必须为multipart/form-data,该类型的编码格式专门用于二进制数据类型;上传表单元素必须拥有name属性;
4.1.3、修改配置文件,增加上传配置
默认情总下Spring MVC对文件上传的视图内容是不能解析的,要配置一个特别的解析器解析上传的内容,修改springmvc-servlet.xml配置文件,增加如下配置内容:
    <bean id="multipartResolver"
        class="org.springframework.web.multipart.commons.CommonsMultipartResolver">
        <property name="defaultEncoding" value="utf-8" />
        <property name="maxUploadSize" value="10485760000" />
        <property name="maxInMemorySize" value="40960" />
    </bean>
增加了一个类型为CommonsMultipartResolver类型的解析器,各属性的意义:
defaultEncoding:默认编码格式
maxUploadSize:上传文件最大限制(字节byte)
maxInMemorySize:缓冲区大小
当Spring的前置中心控制器检查到客户端发送了一个多分部请求,定义在上下文中的解析器将被激活并接手处理。解析器将当前的HttpServletRequest包装成一个支持多部分文件上传的MultipartHttpServletRequest对象。在控制器中可以获得上传的文件信息。

CommonsMultipartResolver用于通用的文件上传,支持各种版本的Servlet。
StandardServletMultipartResolver用于Servlet3.0以上的版本上传文件。
4.1.4、增加控制器与Action
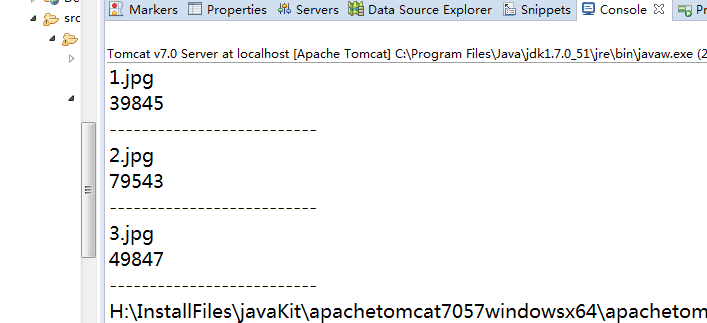
package com.zhangguo.springmvc51.controllers;

import java.io.File;
import javax.servlet.http.HttpServletRequest;
import org.springframework.stereotype.Controller;
import org.springframework.ui.Model;
import org.springframework.web.bind.annotation.RequestMapping;
import org.springframework.web.bind.annotation.RequestMethod;
import org.springframework.web.multipart.MultipartFile;

@Controller
@RequestMapping("/up")
public class UpFileController {

    @RequestMapping("/file")
    public String file(Model model){
        return "up/upfile";
    }

    @RequestMapping(value="/fileSave",method=RequestMethod.POST)
    public String fileSave(Model model,MultipartFile[] files,HttpServletRequest request) throws Exception{

        //文件存放的位置
        String path=request.getServletContext().getRealPath("/files");
        for (MultipartFile file : files) {
            System.out.println(file.getOriginalFilename());
            System.out.println(file.getSize());
            System.out.println("--------------------------");
            File tempFile=new File(path, file.getOriginalFilename());
            file.transferTo(tempFile);
        }

        System.out.println(path);
        return "up/upfile";
    }

}
注意这里定义的是一个数组,可以接受多个文件上传,如果单文件上传可以修改为MultipartFile类型;另外上传文件的细节在这里并没有花时间处理,比如文件重名的问题,路径问题,关于重名最简单的办法是重新命名为GUID文件名。
4.1.5、测试运行


4.2、Servlet3.0以上文件上传
Servlet3.0以上的版本不再需要第三方组件Commons.io和commons-fileupload,上传的方式与4.1提到基本一样,但配置稍有区别,可以使用@MultipartConfig注解在Servlet上进行配置上传,也可以在web.xml上进行配置。
4.2.1、修改web.xml配置上传参数
<?xml version="1.0" encoding="UTF-8"?>
<web-app xmlns:xsi="http://www.w3.org/2001/XMLSchema-instance"
    xmlns="http://java.sun.com/xml/ns/javaee"
    xsi:schemaLocation="http://java.sun.com/xml/ns/javaee http://java.sun.com/xml/ns/javaee/web-app_3_0.xsd"
    id="WebApp_ID" version="3.0">
    <servlet>
        <servlet-name>springmvc</servlet-name>
        <servlet-class>org.springframework.web.servlet.DispatcherServlet</servlet-class>
        <init-param>
            <param-name>contextConfigLocation</param-name>
            <param-value>classpath*:springmvc-servlet.xml</param-value>
        </init-param>
        <load-on-startup>1</load-on-startup>
        <!--Servlet3.0以上文件上传配置 -->
        <multipart-config>
            <max-file-size>5242880</max-file-size><!--上传单个文件的最大限制5MB -->
            <max-request-size>20971520</max-request-size><!--请求的最大限制20MB,一次上传多个文件时一共的大小 -->
            <file-size-threshold>0</file-size-threshold><!--当文件的大小超过临界值时将写入磁盘 -->
        </multipart-config>
    </servlet>

    <servlet-mapping>
        <servlet-name>springmvc</servlet-name>
        <url-pattern>/</url-pattern>
    </servlet-mapping>

    <filter>
        <filter-name>characterEncodingFilter</filter-name>
        <filter-class>org.springframework.web.filter.CharacterEncodingFilter</filter-class>
        <init-param>
            <param-name>encoding</param-name>
            <param-value>UTF-8</param-value>
        </init-param>
        <init-param>
            <param-name>forceEncoding</param-name>
            <param-value>true</param-value>
        </init-param>
    </filter>
    <filter-mapping>
        <filter-name>characterEncodingFilter</filter-name>
        <url-pattern>/*</url-pattern>
    </filter-mapping>
</web-app>
-
file-size-threshold:数字类型,当文件大小超过指定的大小后将写入到硬盘上。默认是0,表示所有大小的文件上传后都会作为一个临时文件写入到硬盘上。
-
location:指定上传文件存放的目录。当我们指定了location后,我们在调用Part的write(String fileName)方法把文件写入到硬盘的时候可以,文件名称可以不用带路径,但是如果fileName带了绝对路径,那将以fileName所带路径为准把文件写入磁盘,不建议指定。
-
max-file-size:数值类型,表示单个文件的最大大小。默认为-1,表示不限制。当有单个文件的大小超过了max-file-size指定的值时将抛出IllegalStateException异常。
-
max-request-size:数值类型,表示一次上传文件的最大大小。默认为-1,表示不限制。当上传时所有文件的大小超过了max-request-size时也将抛出IllegalStateException异常。
4.2.2、修改pom.xml依赖信息
把pom.xml中对文件上传第三方的依赖删除,删除依赖保存后的结果:
4.2.3、修改springmvc-servlet.xml配置信息
将原有的文件上传通用解析器更换为标准解析器,修改后的配置如下所示:
    <!--文件上传解析器 -->
    <bean id="multipartResolver"
        class="org.springframework.web.multipart.support.StandardServletMultipartResolver">
    </bean>
定义了一个标准的文件上传解析器,更多属性可以查看这个类的源码。这步非常关键,否则上传会失败。另外id不要换成别的名称,更换后可能会上传失败。
4.2.4、定义视图
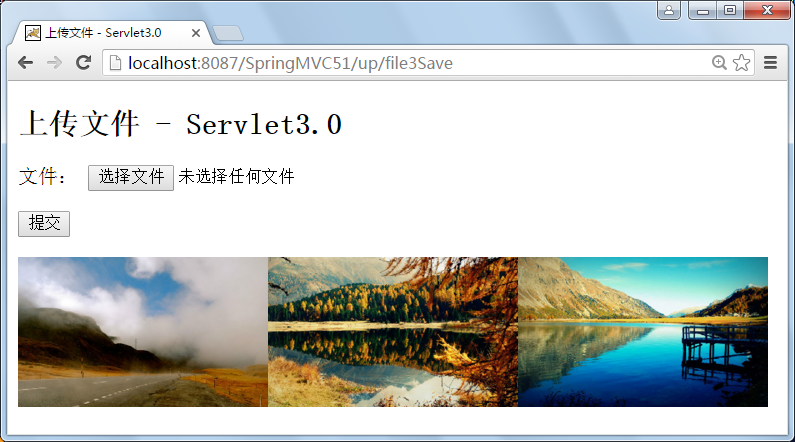
在views/up/下定义名称为file3.jsp文件,内容如下:
<%@ page language="java" contentType="text/html; charset=UTF-8" pageEncoding="UTF-8"%>
<%@ taglib prefix="c" uri="http://java.sun.com/jsp/jstl/core" %>
<!DOCTYPE html>
<html>
<head>
<meta http-equiv="Content-Type" content="text/html; charset=UTF-8">
<title>上传文件 - Servlet3.0</title>
</head>
<body>
<h2>上传文件 - Servlet3.0</h2>
<form action="file3Save" method="post"  enctype="multipart/form-data">
  <p>
     <label for="files">文件:</label>
     <input type="file" name="files" id="files" multiple="multiple" />
   </p>
   <p>
   <button>提交</button>
   </p>
   <p>
     ${message}
   </p>
</form>
</body>
</html>
multiple="multiple"这个属性是HTML5新增加的属性,一些旧版的浏览器可能不支持,使用JavaScript可以处理一下。
4.2.5、定义Action
在UpFileController中定义两个action,一个叫file3用于展示上传页面,一个叫file3Save用于处理上传文,代码如下:
package com.zhangguo.springmvc51.controllers;

import java.io.File;
import javax.servlet.http.HttpServletRequest;
import org.springframework.stereotype.Controller;
import org.springframework.ui.Model;
import org.springframework.web.bind.annotation.RequestMapping;
import org.springframework.web.bind.annotation.RequestMethod;
import org.springframework.web.multipart.MultipartFile;

@Controller
@RequestMapping("/up")
public class UpFileController {

    @RequestMapping("/file")
    public String file(Model model){
        return "up/upfile";
    }

    @RequestMapping(value="/fileSave",method=RequestMethod.POST)
    public String fileSave(Model model,MultipartFile[] files,HttpServletRequest request) throws Exception{

        //文件存放的位置
        String path=request.getServletContext().getRealPath("/files");
        for (MultipartFile file : files) {
            System.out.println(file.getOriginalFilename());
            System.out.println(file.getSize());
            System.out.println("--------------------------");
            File tempFile=new File(path, file.getOriginalFilename());
            file.transferTo(tempFile);
        }

        System.out.println(path);
        return "up/upfile";
    }


    @RequestMapping("/file3")
    public String file3(Model model){
        return "up/upfile3";
    }

    @RequestMapping(value="/file3Save",method=RequestMethod.POST)
    public String file3Save(Model model,MultipartFile[] files,HttpServletRequest request) throws Exception{

        //文件存放的位置
        String path=request.getSession().getServletContext().getRealPath("/files");
        System.out.println(path);
        String msg="";
        for (MultipartFile file : files) {
            //保存文件
            File tempFile=new File(path, file.getOriginalFilename());
            file.transferTo(tempFile);
            msg+="<img src='../files/"+file.getOriginalFilename()+"' width='200' />";
        }
        model.addAttribute("message", msg);
        return "up/upfile3";
    }

}
4.2.6、测试运行