
oracle单实例12.2.0.1安装
说明:本文描述oracle linux 6.8 安装 oracle 12.2.0.1
0. 查看操作系统版本
[root@12c01 ~]# cat /etc/os-release
NAME="Oracle Linux Server"
VERSION="6.8"
1. 修改用户的SHELL的限制,vi /etc/security/limits.conf 文件,文件末尾添加修改如下
oracle soft nproc 2047
oracle hard nproc 16384
oracle soft nofile 1024
oracle hard nofile 65536
oracle soft stack 10240
2. 修改linux内核,修改 /etc/sysctl.conf 文件
vi /etc/sysctl.conf 文件并添加如下内容:
fs.aio-max-nr = 1048576
fs.file-max = 6815744
kernel.shmall = 2097152
kernel.shmmax = 4294967295
kernel.shmmni = 4096
kernel.sem = 250 32000 100 128
net.ipv4.ip_local_port_range = 9000 65500
net.core.rmem_default = 262144
net.core.rmem_max = 4194304
net.core.wmem_default = 262144
net.core.wmem_max = 1048576
或者kernel.shmall和kernel.shmmax的默认值已经超过上述值,使用默认值即可。
修改生效
[root@12c01 ~]# /sbin/sysctl -p
3. 创建用户
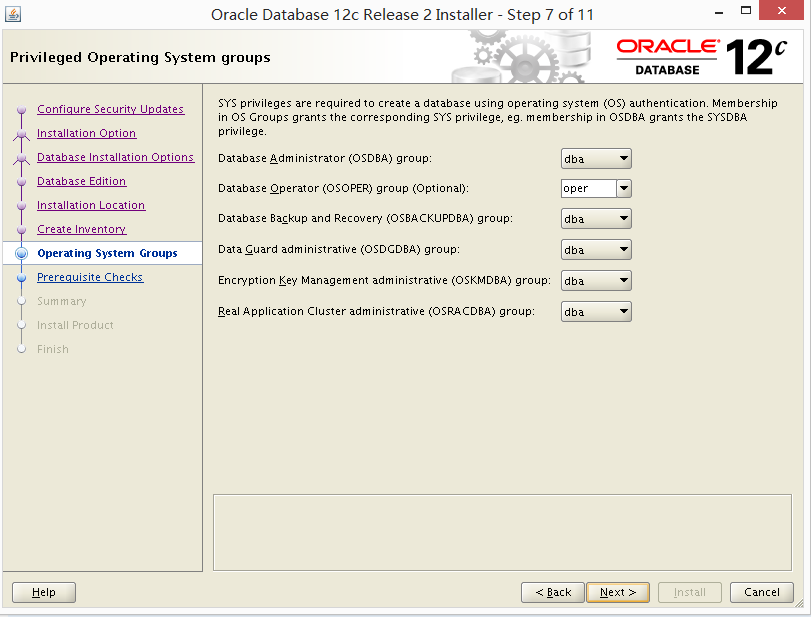
/usr/sbin/groupadd -g 54321 oinstall
/usr/sbin/groupadd -g 54322 dba
/usr/sbin/groupadd -g 54323 oper
/usr/sbin/groupadd -g 54324 backupdba
/usr/sbin/groupadd -g 54325 dgdba
/usr/sbin/groupadd -g 54326 kmdba
/usr/sbin/groupadd -g 54327 asmdba
/usr/sbin/groupadd -g 54328 asmoper
/usr/sbin/groupadd -g 54329 asmadmin
/usr/sbin/groupadd -g 54330 racdba
/usr/sbin/useradd -u 54321 -g oinstall -G dba,asmdba,oper oracle
/usr/sbin/useradd -u 54322 -g oinstall -G asmdba,asmadmin grid
4. 确认用户:
[root@12c01 ~]# id oracle
uid=54321(oracle) gid=54321(oinstall) groups=54321(oinstall),54322(dba),54323(oper),54327(asmdba)
[root@12c01 ~]# id grid
uid=54322(grid) gid=54321(oinstall) groups=54321(oinstall),54327(asmdba),54329(asmadmin)
5. 修改密码:让你输入密码,密码任意输入2次,但必须保持一致,回车确认
[root@12c01 ~]# passwd oracle
Changing password for user oracle.
New password:
BAD PASSWORD: it is based on a dictionary word
BAD PASSWORD: is too simple
Retype new password:
passwd: all authentication tokens updated successfully.
[root@12c01 ~]# passwd grid
Changing password for user grid.
New password:
BAD PASSWORD: it is too short
BAD PASSWORD: is too simple
Retype new password:
passwd: all authentication tokens updated successfully.
6. 创建目录结构:
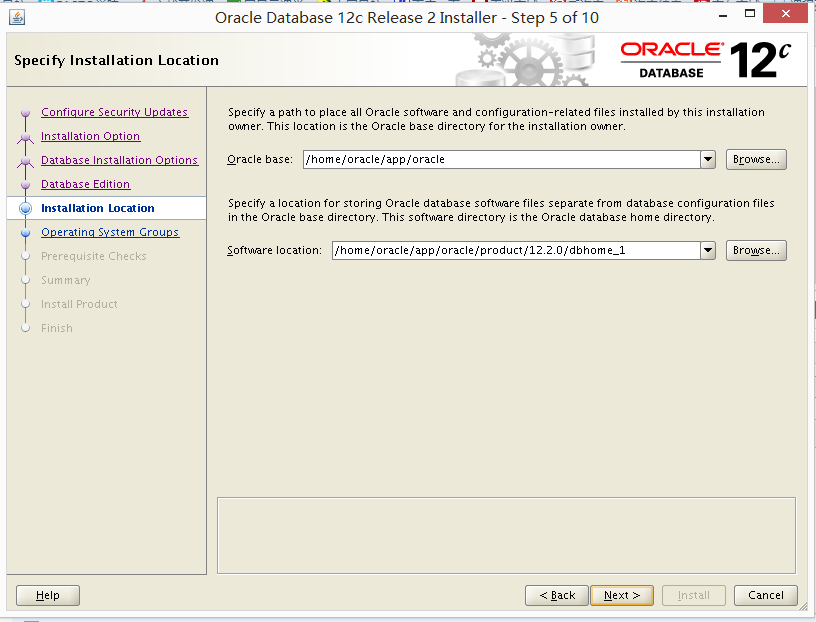
mkdir -p /home/oracle/app/oracle/product/12.2.0/dbhome_1
mkdir -p /home/oracle/app/oradata
chown -R oracle:oinstall /home/oracle/
7. 设置oracle用户的环境变量:
#vi .bash_profile
--将如下代码添加到.bash_profile文件中:
# Oracle Settings
umask 022
export TMP=/tmp;
export TMPDIR=$TMP;
export ORACLE_BASE=/home/oracle/app/oracle;
export ORACLE_HOME=$ORACLE_BASE/product/12.2.0/dbhome_1;
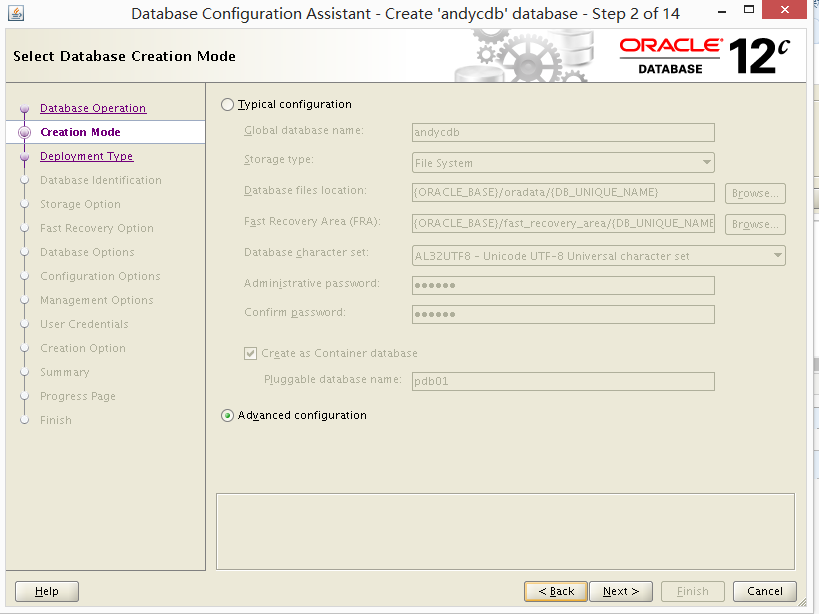
export ORACLE_SID=andycdb;
export ORACLE_TERM=xterm;
export PATH=/usr/sbin:$PATH;
export PATH=$ORACLE_HOME/bin:$PATH;
export LD_LIBRARY_PATH=$ORACLE_HOME/lib:/lib:/usr/lib;
export CLASSPATH=$ORACLE_HOME/jre:$ORACLE_HOME/jlib:$ORACLE_HOME/rdbms/jlib;
8.检查 /etc/hosts 文件确认是否添加主机名和域名全称
[root@12c01 ~]# cat /etc/hosts
127.0.0.1 localhost localhost.localdomain localhost4 localhost4.localdomain4
::1 localhost localhost.localdomain localhost6 localhost6.localdomain6
10.100.25.16 12c01
9. 将Oracle安装包(以64位为例)复制到linux的home目录下,打开终端命令行界面,运行unzip命令解压oracle安装文件。
输入命令:
[oracle@12c01 ~]$ ll
total 3372760
drwxr-xr-x. 4 oracle oinstall 4096 May 6 03:31 app
-rw-r--r--. 1 oracle oinstall 3453696911 May 6 03:38 linuxx64_12201_database.zip
[oracle@12c01 ~]$ du -h linuxx64_12201_database.zip
3.3G linuxx64_12201_database.zip
[oracle@12c01 ~]$ unzip linuxx64_12201_database.zip
PRVF-0002 : could not retrieve local node name
解压完成后 cd 进入其解压后的目录database
输入命令:
cd database
执行安装
输入命令:
./runInstaller


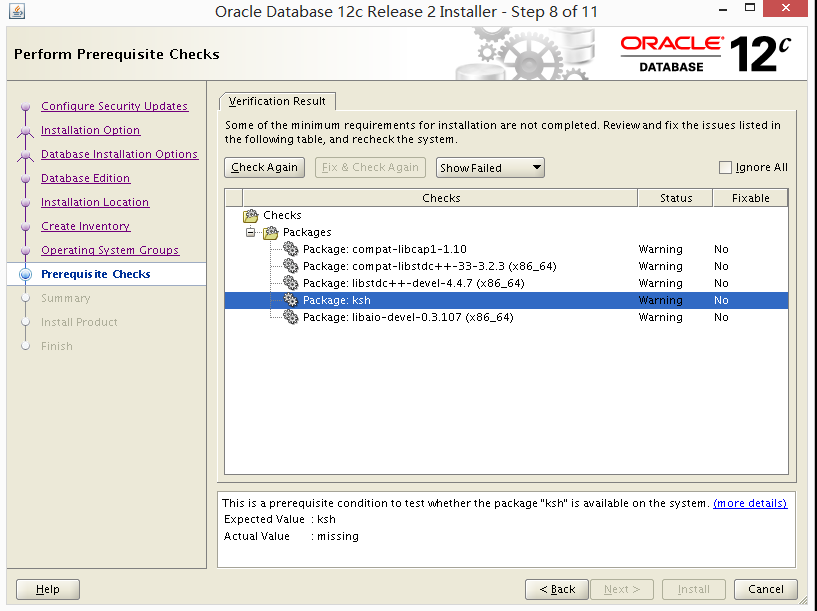
缺包,自行补包。

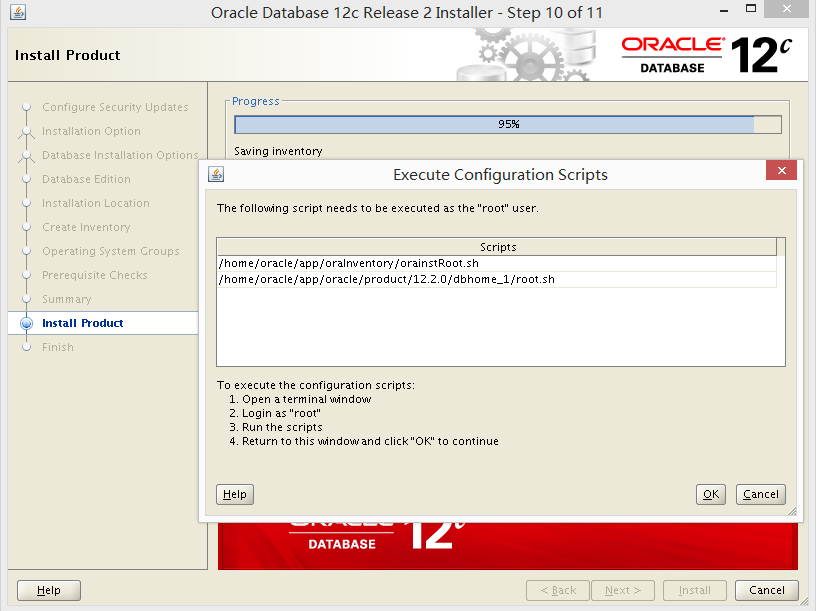
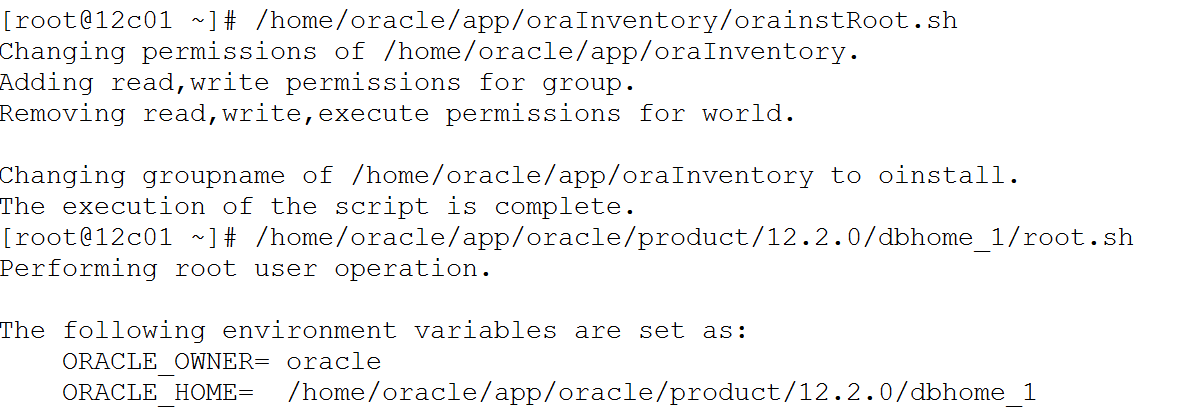
root执行完点击ok,12c软件安装结束。
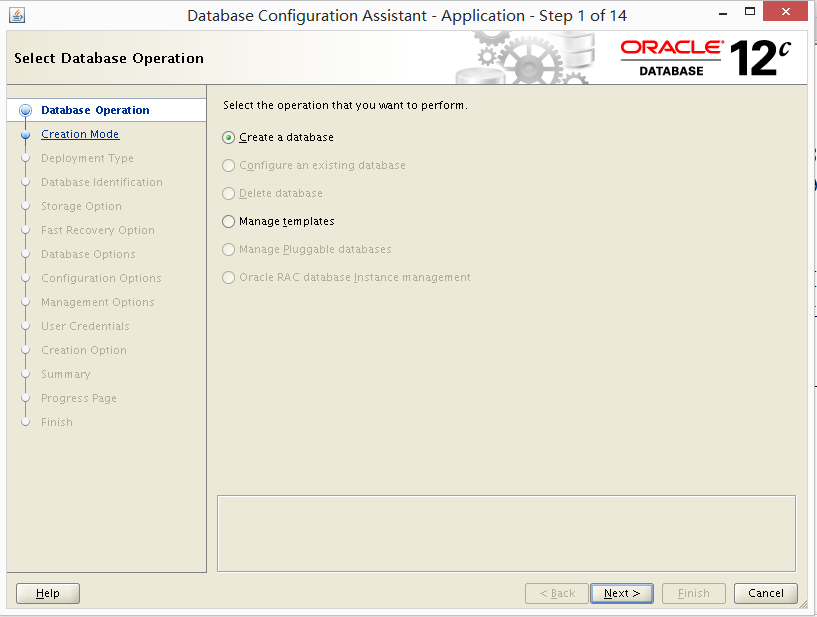
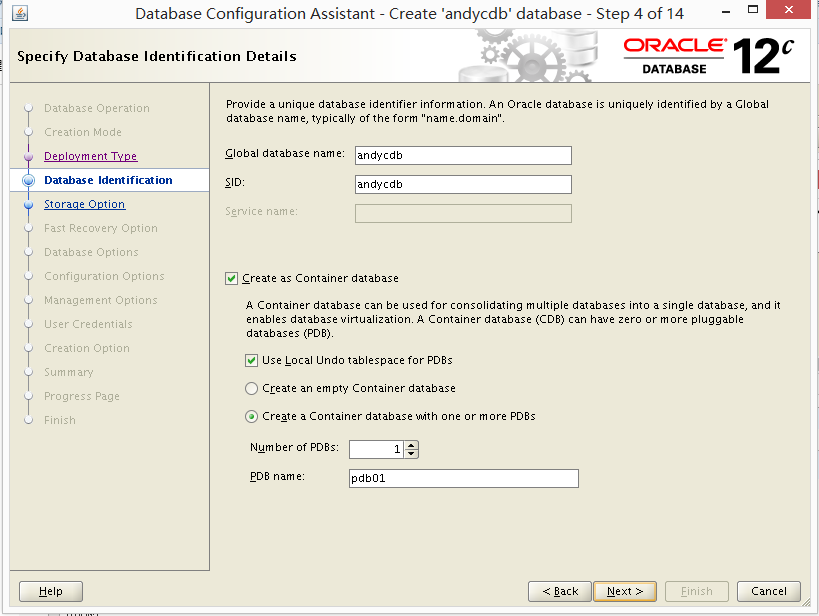
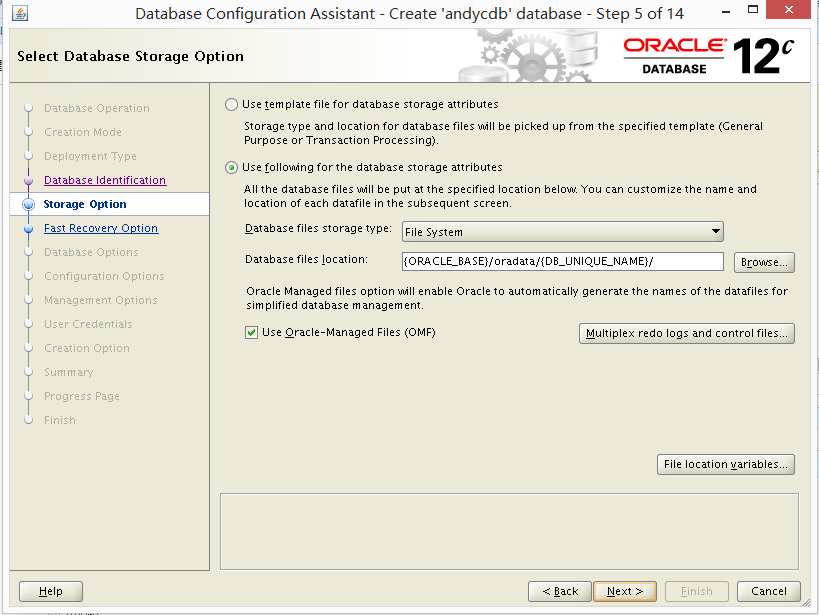
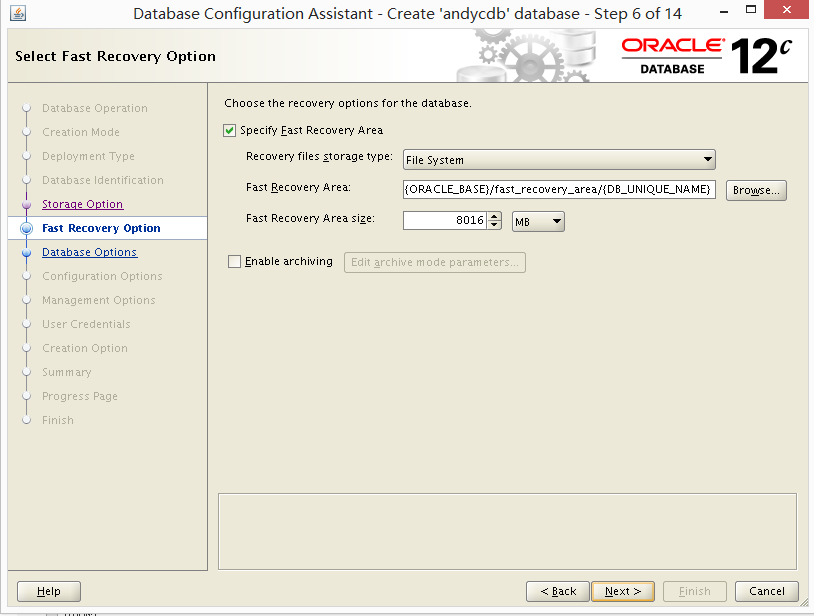
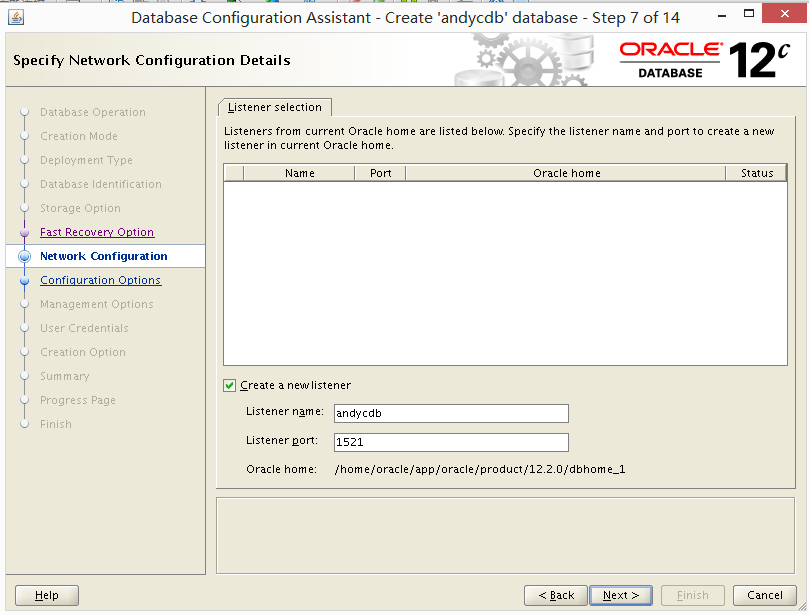
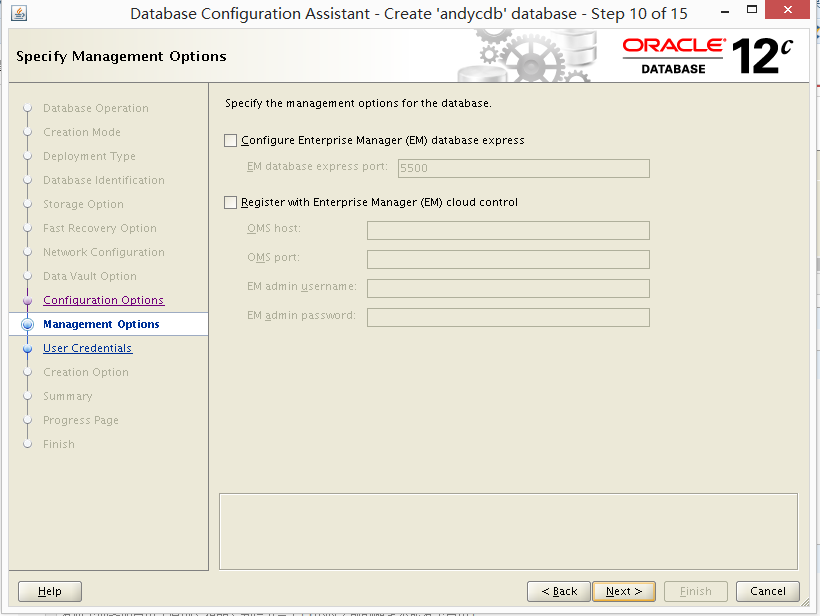
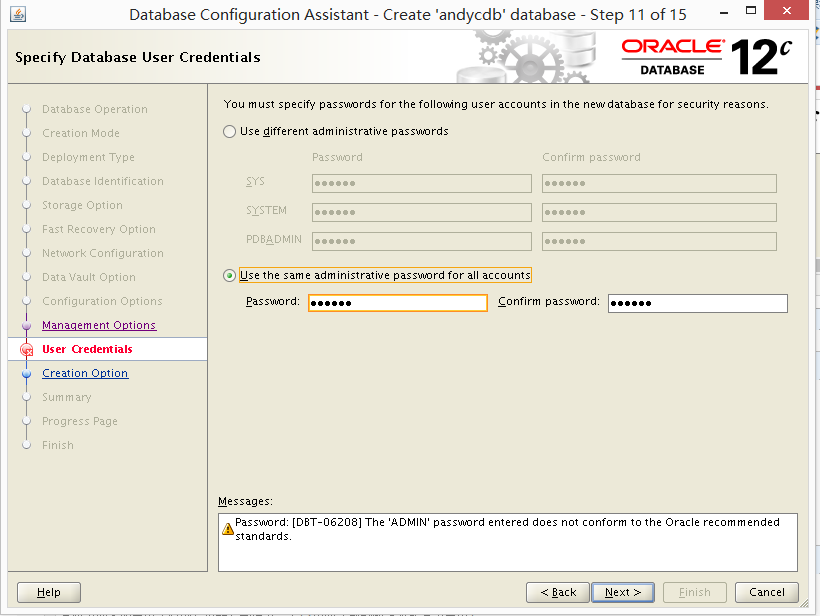
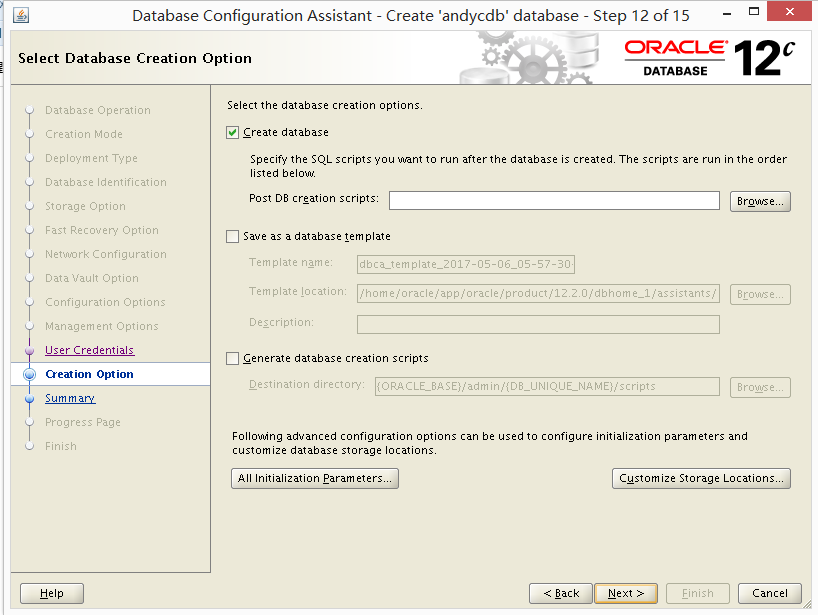
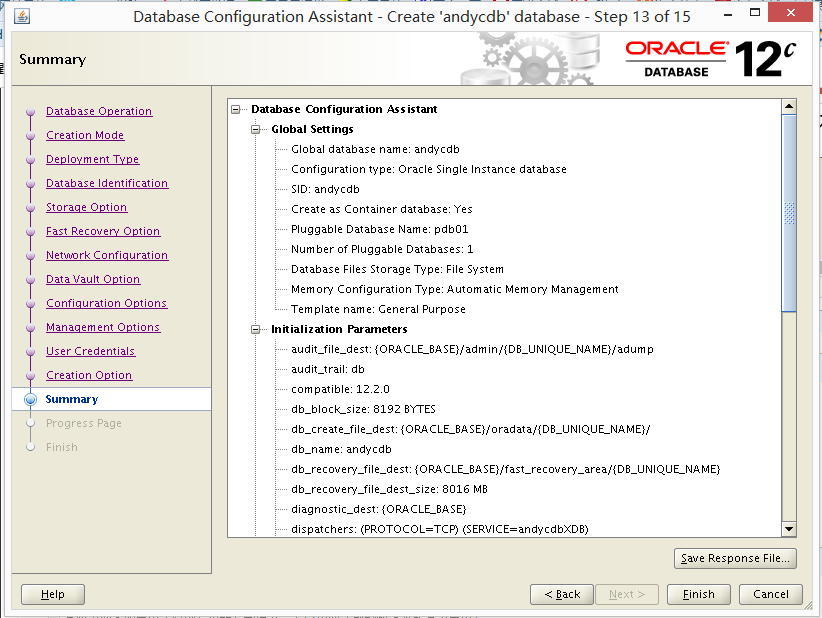
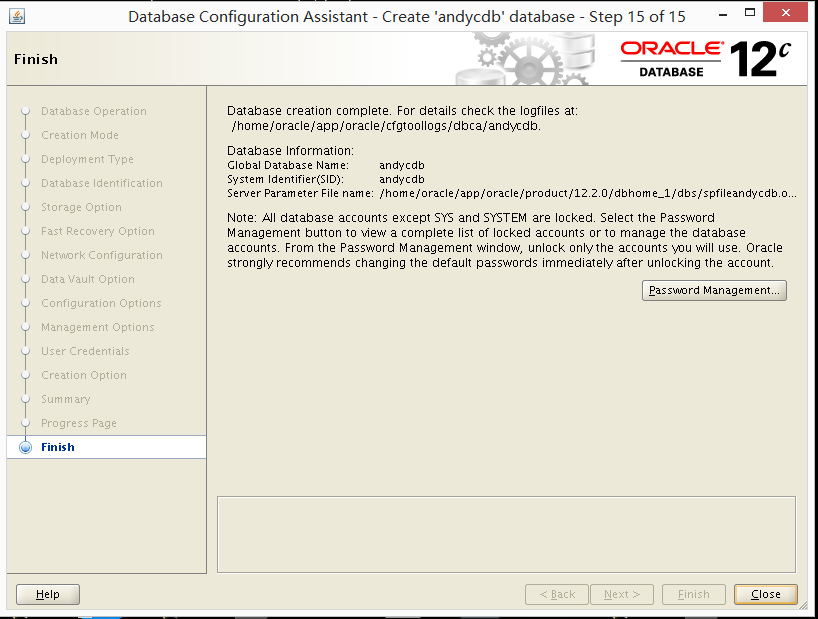
dbca 建库。
[oracle@12c01 database]$ dbca


[oracle@12c01 ~]$ sqlplus / as sysdba
SQL*Plus: Release 12.2.0.1.0 Production on Sat May 6 06:48:50 2017
Copyright (c) 1982, 2016, Oracle. All rights reserved.
Connected to:
Oracle Database 12c Enterprise Edition Release 12.2.0.1.0 - 64bit Production
SQL> select name,cdb from v$database;
NAME CDB
--------- ---
ANDYCDB YES
SQL> show pdbs
CON_ID CON_NAME OPEN MODE RESTRICTED
---------- ------------------------------ ---------- ----------
2 PDB$SEED READ ONLY NO
3 PDB01 READ WRITE NO


