
K8S脉络整理(025)-Harbor 企业级 Docker Registry
https://www.cnblogs.com/jsonhc/p/7892107.html
https://www.ilanni.com/?p=13492
20180419
curl -L https://github.com/docker/compose/releases/download/1.21.0/docker-compose-`uname -s`-`uname -m` -o /usr/local/bin/docker-compose
chmod +x /usr/local/bin/docker-compose
root@DOCKER-HARBOR:~# docker-compose -v
docker-compose version 1.21.0, build 5920eb0
apt-add-repository ppa:ansible/ansible
apt-get install python python-netaddr
root@DOCKER-HARBOR:~# wget https://storage.googleapis.com/harbor-releases/release-1.5.0/harbor-offline-installer-v1.5.0-rc1.tgz
root@DOCKER-HARBOR:~# tar xvf harbor-offline-installer-v1.5.0-rc1.tgz
root@DOCKER-HARBOR:~# cd harbor/
修改配置文件:/root/harbor/harbor.cfg
- hostname: The target host's hostname, which is used to access the UI and the registry service. It should be the IP address or the fully qualified domain name (FQDN) of your target machine, e.g.,
192.168.1.10orreg.yourdomain.com. Do NOT uselocalhostor127.0.0.1for the hostname - the registry service needs to be accessible by external clients! - db_password: The root password for the MySQL database used for db_auth. Change this password for any production use!
- harbor_admin_password: The administrator's initial password. This password only takes effect for the first time Harbor launches. After that, this setting is ignored and the administrator's password should be set in the UI. Note that the default username/password are admin/Harbor12345 .
- 其他ldap相关
hostname = 。。。。
db_password = 。。。
harbor_admin_password = 。。。


root@DOCKER-HARBOR:~/harbor# ./install.sh

[Step 0]: checking installation environment ...

Note: docker version: 17.09.0

Note: docker-compose version: 1.21.0

[Step 1]: loading Harbor images ...
Loaded image: vmware/notary-signer-photon:v0.5.1-v1.5.0-rc1
Loaded image: vmware/photon:1.0
Loaded image: vmware/harbor-ui:v1.5.0-rc1
Loaded image: vmware/harbor-jobservice:v1.5.0-rc1
Loaded image: vmware/nginx-photon:v1.5.0-rc1
Loaded image: vmware/registry-photon:v2.6.2-v1.5.0-rc1
Loaded image: vmware/notary-server-photon:v0.5.1-v1.5.0-rc1
Loaded image: vmware/postgresql-photon:v1.5.0-rc1
Loaded image: vmware/harbor-adminserver:v1.5.0-rc1
Loaded image: vmware/redis-photon:v1.5.0-rc1
Loaded image: vmware/clair-photon:v2.0.1-v1.5.0-rc1
Loaded image: vmware/harbor-migrator:v1.5.0
Loaded image: vmware/harbor-log:v1.5.0-rc1
Loaded image: vmware/mariadb-photon:v1.5.0-rc1
Loaded image: vmware/harbor-db:v1.5.0-rc1


[Step 2]: preparing environment ...
Generated and saved secret to file: /data/secretkey
Generated configuration file: ./common/config/nginx/nginx.conf
Generated configuration file: ./common/config/adminserver/env
Generated configuration file: ./common/config/ui/env
Generated configuration file: ./common/config/registry/config.yml
Generated configuration file: ./common/config/db/env
Generated configuration file: ./common/config/jobservice/env
Generated configuration file: ./common/config/log/logrotate.conf
Generated configuration file: ./common/config/jobservice/config.yml
Generated configuration file: ./common/config/ui/app.conf
Generated certificate, key file: ./common/config/ui/private_key.pem, cert file: ./common/config/registry/root.crt
The configuration files are ready, please use docker-compose to start the service.


[Step 3]: checking existing instance of Harbor ...


[Step 4]: starting Harbor ...
Creating network "harbor_harbor" with the default driver
Creating harbor-log ... done
Creating redis      ... done
Creating harbor-db          ... done
Creating registry           ... done
Creating harbor-adminserver ... done
Creating harbor-ui          ... done
Creating nginx              ... done
Creating harbor-jobservice  ... done

✔ ----Harbor has been installed and started successfully.----

Now you should be able to visit the admin portal at http://172.28.2.1.
For more details, please visit https://github.com/vmware/harbor .
root@DOCKER-HARBOR:~/harbor# docker images
REPOSITORY                    TAG                 IMAGE ID            CREATED             SIZE
vmware/redis-photon           v1.5.0-rc1          1039803c9659        2 days ago          208MB
vmware/clair-photon           v2.0.1-v1.5.0-rc1   8282dd793caf        2 days ago          302MB
vmware/notary-server-photon   v0.5.1-v1.5.0-rc1   144763539395        2 days ago          213MB
vmware/notary-signer-photon   v0.5.1-v1.5.0-rc1   51041ec4c87a        2 days ago          210MB
vmware/registry-photon        v2.6.2-v1.5.0-rc1   205849cb6d82        2 days ago          200MB
vmware/nginx-photon           v1.5.0-rc1          a259f790eddd        2 days ago          136MB
vmware/harbor-log             v1.5.0-rc1          cc6c4a14854a        2 days ago          201MB
vmware/harbor-jobservice      v1.5.0-rc1          dffc96b31d8b        2 days ago          196MB
vmware/harbor-ui              v1.5.0-rc1          449e6989cdfc        2 days ago          213MB
vmware/harbor-adminserver     v1.5.0-rc1          f8c19167a754        2 days ago          185MB
vmware/harbor-db              v1.5.0-rc1          d9f7c9e69728        2 days ago          523MB
vmware/mariadb-photon         v1.5.0-rc1          620338232bb1        2 days ago          523MB
vmware/postgresql-photon      v1.5.0-rc1          ee91b01d2b5e        2 days ago          223MB
vmware/photon                 1.0                 f3e8e81382cb        9 days ago          130MB
vmware/harbor-migrator        v1.5.0              0f5516527b3e        2 weeks ago         1.15GB
配置加速器
curl -sSL https://get.daocloud.io/daotools/set_mirror.sh | sh -s http://11a4cef9.m.daocloud.io
systemctl restart docker
harbor_admin_password = Harbor12345
同时对多个非SSL源进行显式标注,则加入多个insecure-registry标签即可,例如:
INSECURE_REGISTRY='--insecure-registry 172.28.XXX.XXX:5000 --insecure-registry 10.XX.XX.XX:5000'
(为便于变更和管理仓库ip等信息,建议在/etc/hosts中对ip进行映射,实际使用映射后的字符串作为仓库地址)
/etc/hosts
# registry
xx.xx.xx.xx hjz-reg1
xx.xx.xx.xx hjz-reg2

/etc/default/docker
INSECURE_REGISTRY='--insecure-registry hjz-reg1:5000 --insecure-registry hjz-reg2'
root@DOCKER-HARBOR:~/harbor# cat /etc/default/docker

DOCKER_OPTS="-H unix:///var/run/docker.sock -H 0.0.0.0:2375 --insecure-registry 172.28.2.2:4000 --insecure-registry 172.28.2.1 --storage-driver=aufs"
# systemctl restart docker
root@DOCKER-HARBOR:~/harbor# docker info
Containers: 9
 Running: 5
 Paused: 0
 Stopped: 4
Images: 16
Server Version: 17.09.0-ce
Storage Driver: aufs
 Root Dir: /var/lib/docker/aufs
 Backing Filesystem: extfs
 Dirs: 84
 Dirperm1 Supported: true
Logging Driver: json-file
Cgroup Driver: cgroupfs
Plugins:
 Volume: local
 Network: bridge host macvlan null overlay
 Log: awslogs fluentd gcplogs gelf journald json-file logentries splunk syslog
Swarm: inactive
Runtimes: runc
Default Runtime: runc
Init Binary: docker-init
containerd version: 06b9cb35161009dcb7123345749fef02f7cea8e0
runc version: 3f2f8b84a77f73d38244dd690525642a72156c64
init version: 949e6fa
Security Options:
 apparmor
 seccomp
  Profile: default
Kernel Version: 4.4.0-101-generic
Operating System: Ubuntu 16.04.3 LTS
OSType: linux
Architecture: x86_64
CPUs: 4
Total Memory: 15.67GiB
Name: DOCKER-HARBOR
ID: BWFV:H74O:PCGX:46SU:3FFZ:5UKQ:WD32:VRWE:ZORE:4QV3:XPMV:RFOX
Docker Root Dir: /var/lib/docker
Debug Mode (client): false
Debug Mode (server): false
Registry: https://index.docker.io/v1/
Experimental: false
Insecure Registries:
 172.28.2.2:4000
 172.28.2.1
 127.0.0.0/8
Registry Mirrors:
 http://11a4cef9.m.daocloud.io/
[root@master harbor]# docker login 172.28.2.1
Username: admin
Password:                  默认密码是Harbor12345(就是登录的admin账号)
Login Succeeded
现在使用另一个host主机来搭建docker环境,然后将镜像推送到HarBor上:
root@DOCKER-HARBOR:~/harbor# cat /etc/default/docker

DOCKER_OPTS="-H unix:///var/run/docker.sock -H 0.0.0.0:2375 --insecure-registry 172.28.2.2:4000 --insecure-registry 172.28.2.1 --storage-driver=aufs"

root@DOCKER-HARBOR:/images/scripts/ctp# docker tag hello-world:latest 172.28.2.1/linshi/hello:latest
root@DOCKER-HARBOR:/images/scripts/ctp# docker push 172.28.2.1/linshi/hello
The push refers to a repository [172.28.2.1/linshi/hello]
f999ae22f308: Preparing
denied: requested access to the resource is denied
#使用admin账号登录HarBor:
root@DOCKER-HARBOR:/images/scripts/ctp# docker login 172.28.2.1
Username: admin
Password:
Login Succeeded
root@DOCKER-HARBOR:/images/scripts/ctp# docker push 172.28.2.1/linshi/hello
The push refers to a repository [172.28.2.1/linshi/hello]
f999ae22f308: Pushed
latest: digest: sha256:8072a54ebb3bc136150e2f2860f00a7bf45f13eeb917cca2430fcd0054c8e51b size: 524
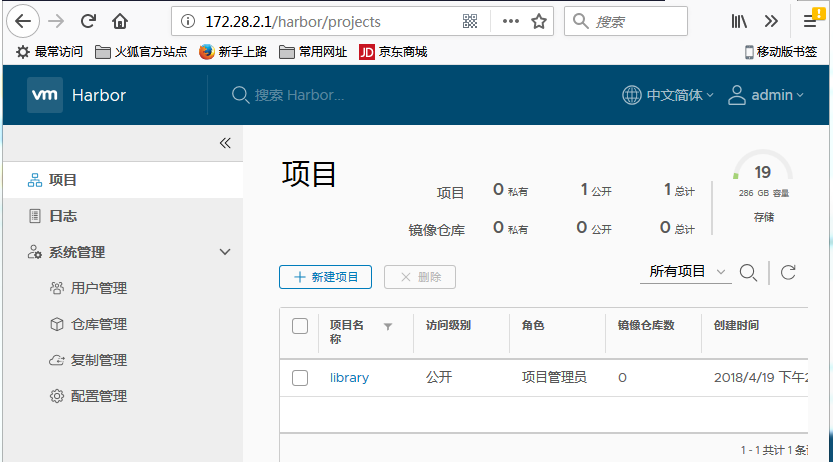
然后从HarBor的web界面查看linshi项目下的镜像:

harbor操作镜像:
docker tag SOURCE_IMAGE[:TAG] 172.28.2.1/library(或新建其他项目)/IMAGE[:TAG]
docker push 172.28.2.1/library/IMAGE[:TAG]
web可进行其他操作,如创建用户(用户添加后,若想推送镜像至指定项目,需将用户添加至项目组),查看下载次数,各类管理功能等。

 浙公网安备 33010602011771号